Catch You Letter: Tutorial 1
While watching the Disney Singalong, I was inspired to create this piece. In this blog post, I’ll go through my process and the tools I used to create this project. The resources I’ve used for this piece (and so many others) are available on Design Cuts. You can get a major discount on these tools by clicking here!
In the Procreate App:
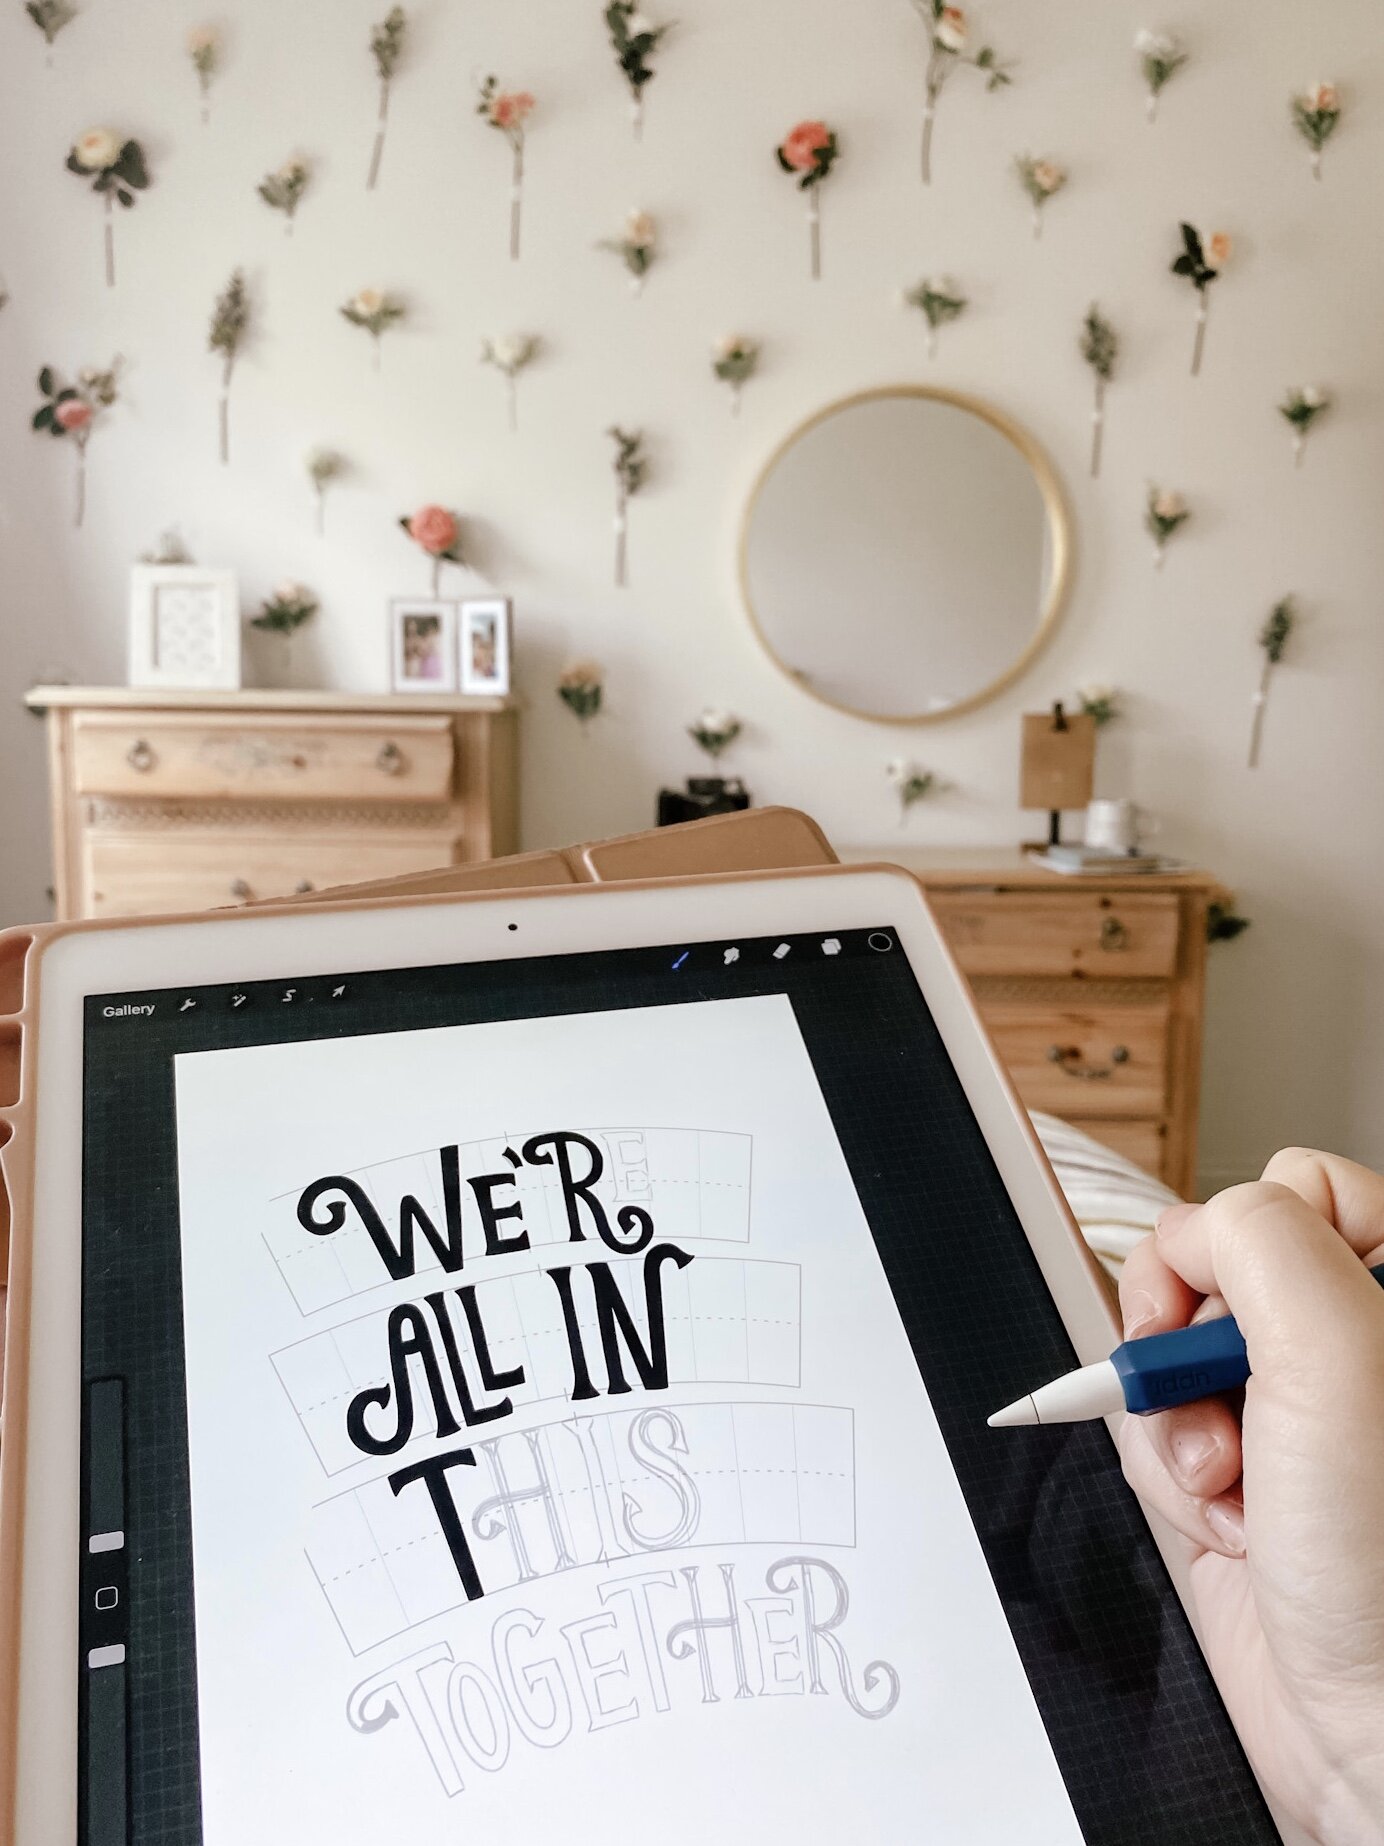
To begin, I started with arched grids from the Grid Builder by Ian Barnard on Design Cuts. Using these as a template is so helpful, especially when I’m not sure of the composition going into a piece. There are times when I start a project and have a pretty good idea of the final outcome. However, there are times when I have a phrase or an idea but need to work out the concept and these grid builders are a good place to start.
My next step was to create a new layer and draw the letter forms using the one of the pencil brushes from the Procreate Lettering Toolkit by Quiver Supply Co. Drawing with the pencil brushes helps me to sketch out my idea. Additionally, the pressure sensitivity of the Apple Pencil allows me to sketch lightly and then create harsher lines when I begin to finalize the design. I then lower the opacity of the pencil/sketch layer so that I can use the sketch as a basis to trace the final.
The next step in my process is to create a new layer and outline the letters using the FP Clean Rounded Mono Brush that is also from the Lettering Toolkit. I use the color black so that I have an easier time vectorizing the work in Adobe Illustrator. I trace over top of the sketch layer and make sure the letters are filled in. The last step in the Procreate App is to “hide” or “turn off” all layers besides the final letterforms. This means that both the grid builder layer and the sketch layer will not be visible.
For the final steps, I prefer to move into Adobe Illustrator and vectorize my work. However, you can continue to finalize the piece in the Procreate App by changing the colors, adding texture, altering the background, etc.
In Adobe Illustrator:
After exporting the artwork from the Procreate App as a JPEG, I open the file in Adobe Illustrator and vectorize my work. For a full breakdown of the methods, I use to vectorize my work, purchase my Digital Guide to the Procreate App & iPad Lettering! Click here to view the digital download in my shop. After vectorizing, I change the colors, add extra elements, and finish formatting!
I hope this helped you understand my process- if you ever have any questions, feel free to message me on Instagram! Lastly, let me know if more step by step blog posts are what you’d like to see!
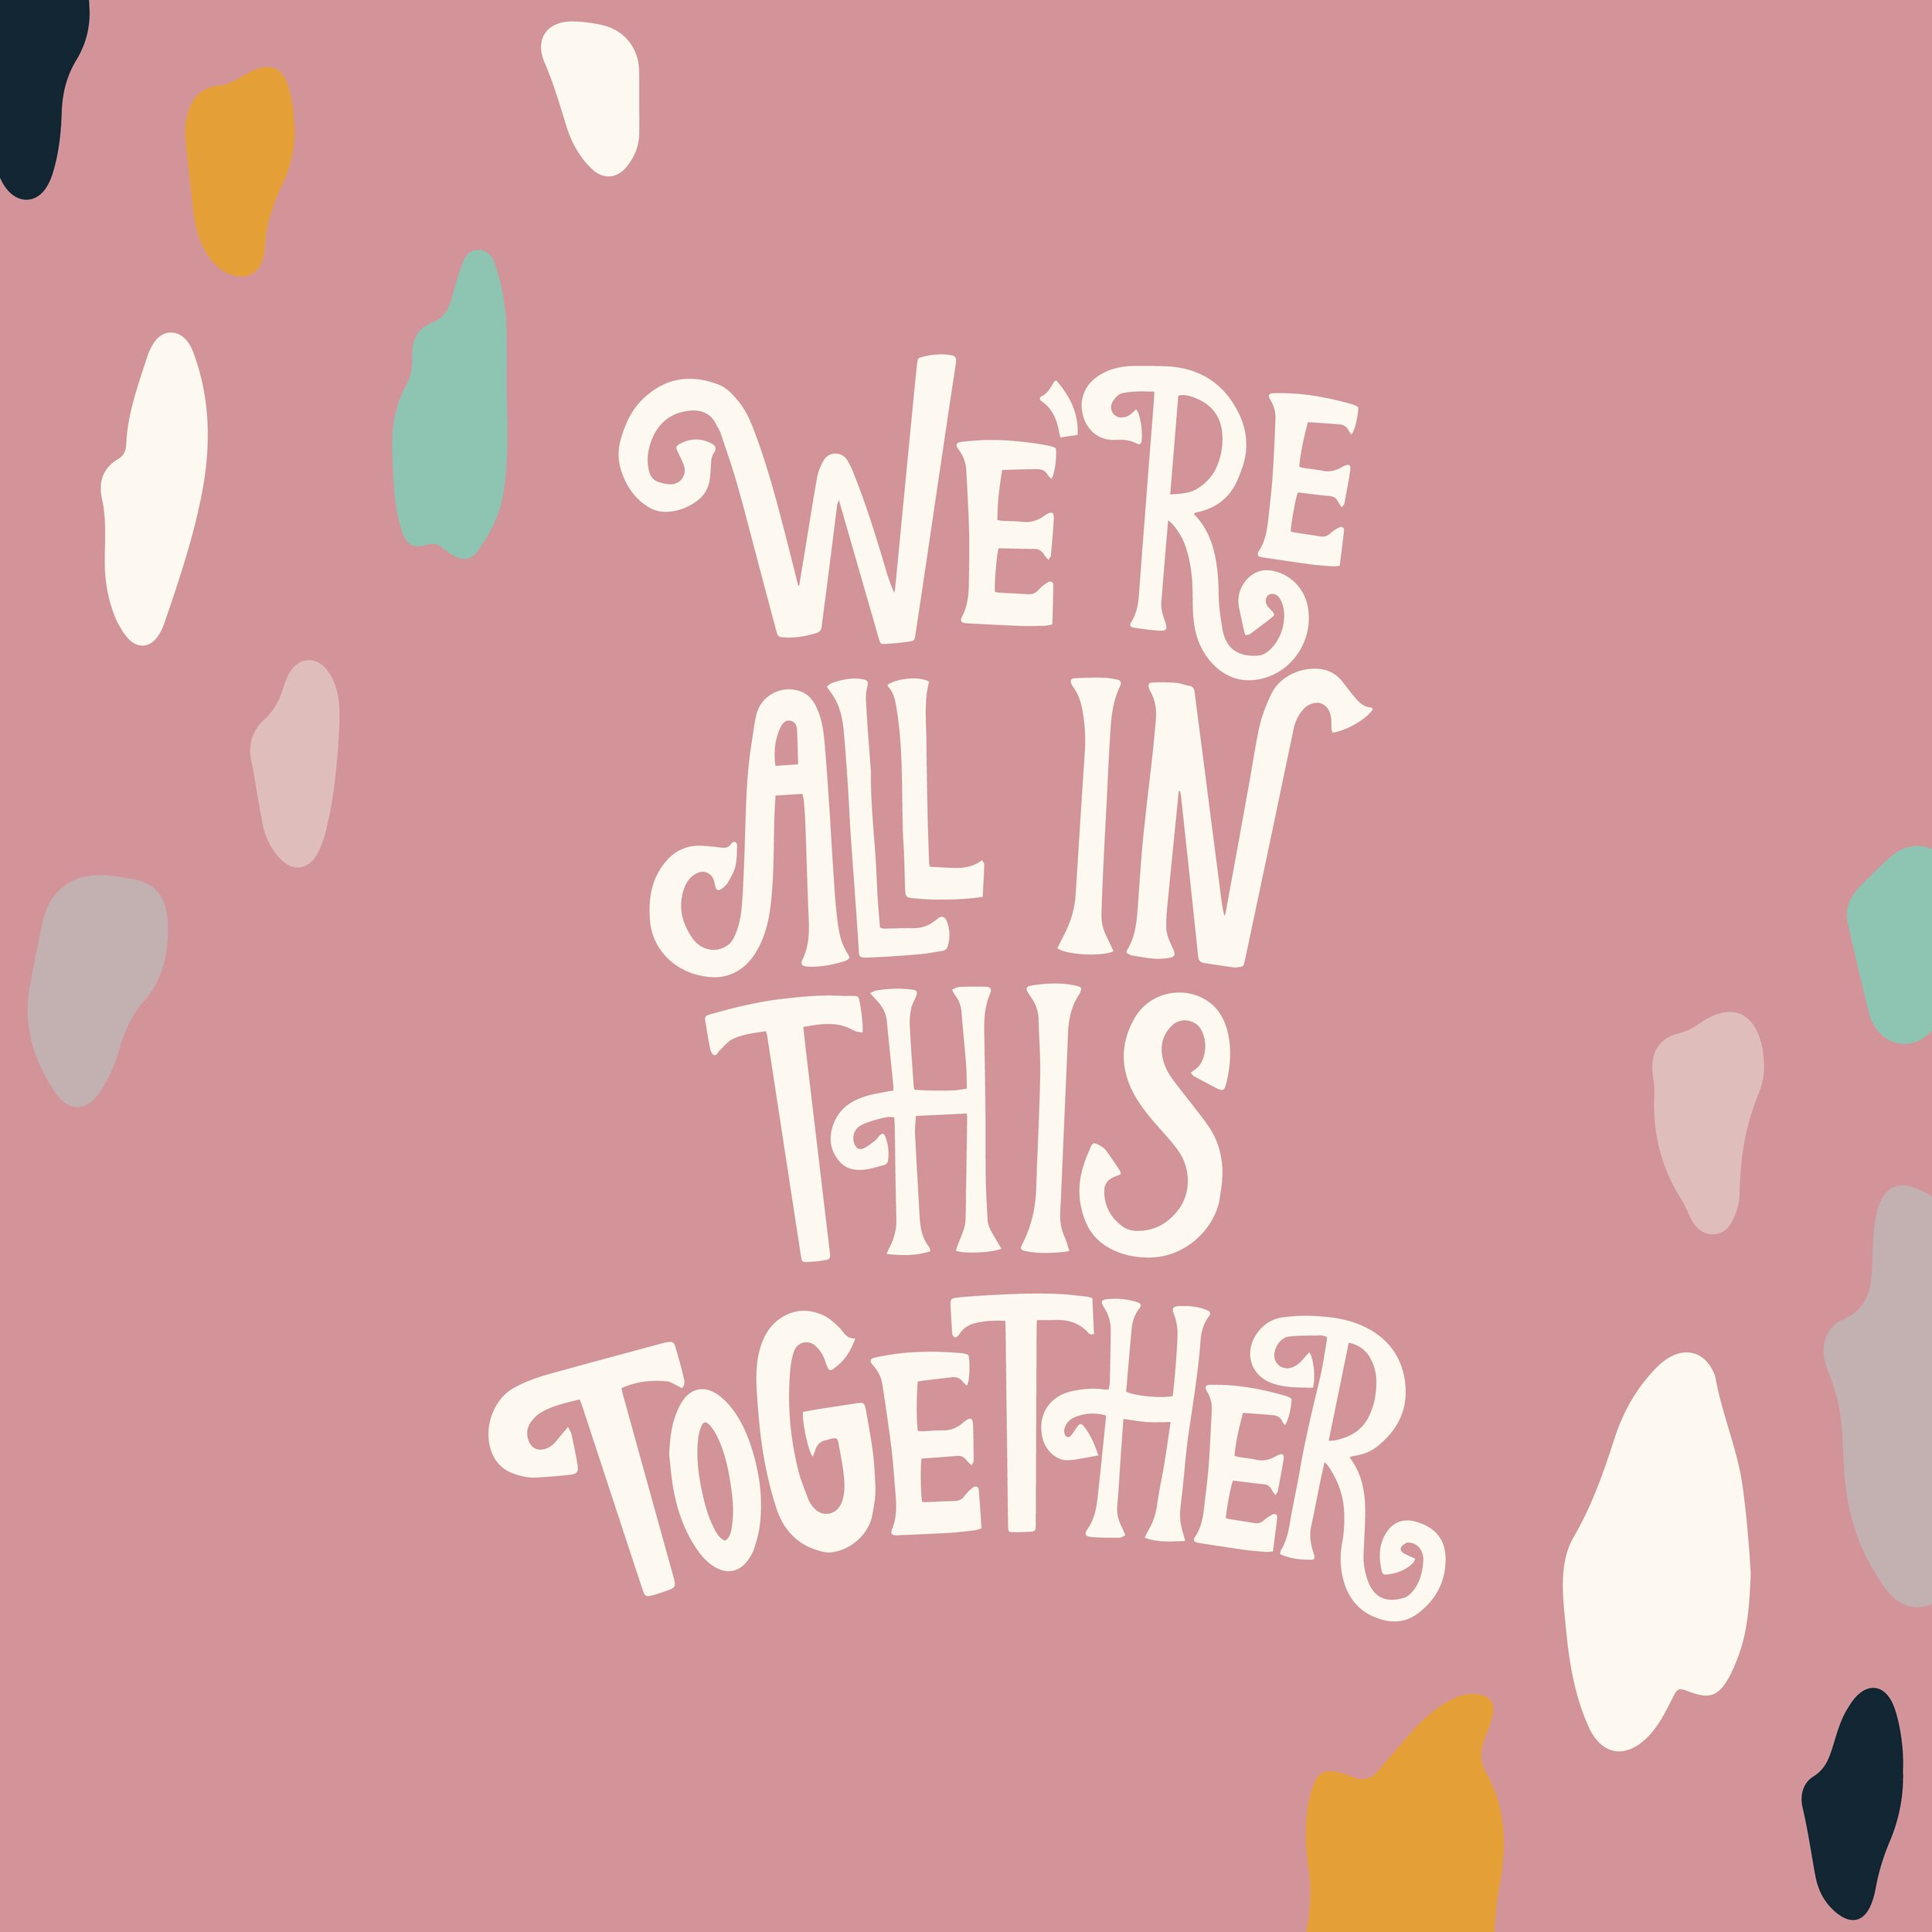
The final piece that has been vectorized finalized in Illustrator. See it on my Instagram, @kelseyhaverdesigns