Pop Up Shop + Craft Market Tips
Back in 2019, I participated in my first live shopping event as a vendor. Since then, I’ve participated in 125+ of events (I had 51 event/market days in 2023 and 44 in 2024), both indoor and outdoor, with booth sizes ranging from a 4ft table to a 10x20 ft space! In this blog post, I’ve listed out my tips and tricks along with my favorite products, display ideas and go-to essentials for market days.
Please note that this blog post does include some sponsored content and affiliate links, but these are all products that I use and love!
market essentials
I’ve put together a storefront with lots of my market essentials in one place! You can find that linked here.
You can also find more market display ideas and tutorials on my Tiktok which you can find here.

the basics
Payment Methods
It’s best to accept as many payment options as you can! I use a Square Reader to accept cards and Apple Pay, cash, and Venmo. You’ll want to have plenty of cash and coins to make change - have more 1’s and 5’s than 10’s and 20’s. As far as Square Readers go, I keep two in my market bag as you never know how Wifi/Service will be at events. One of them plugs into your iPad/Phone and one connects via Bluetooth, I recommend having both of these because the Bluetooth can be spotty when at events. I use my iPad to accept payments and keep my phone as a backup!

canopy tent+weights
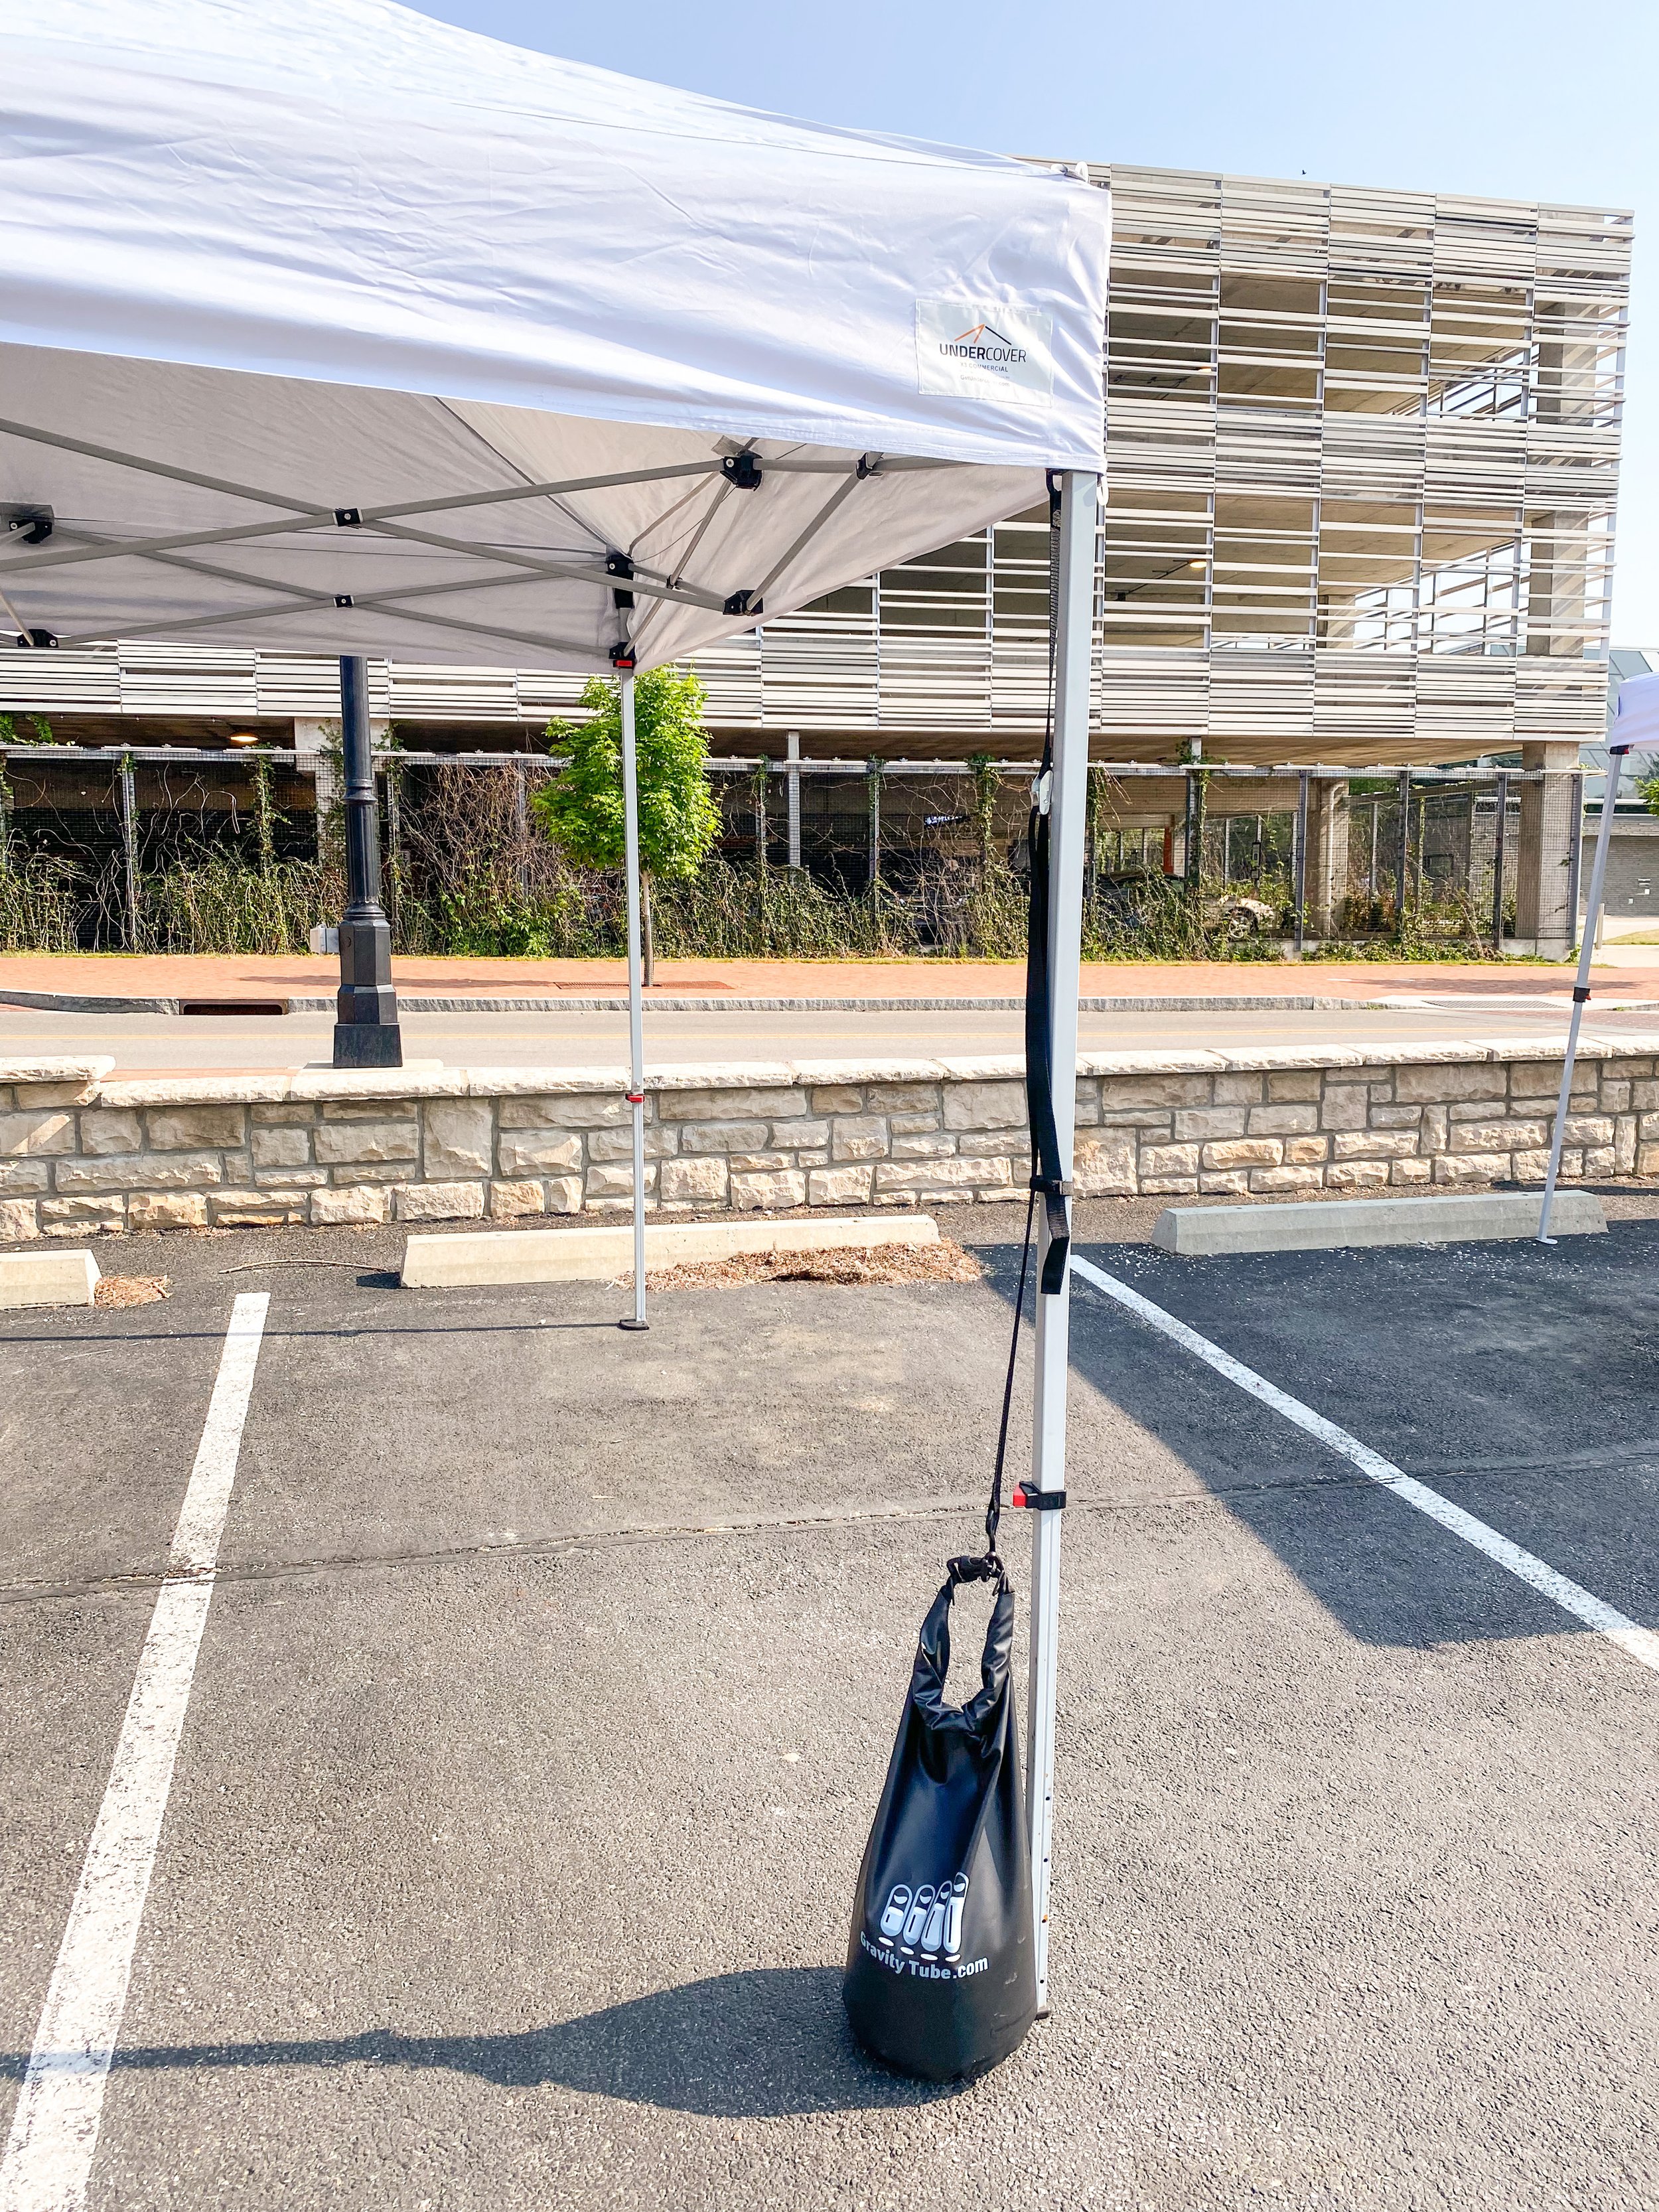
UNDERCOVER X3 10x10 Commercial Canopy Tent, Gravity Tube Canopy Anchor Weights
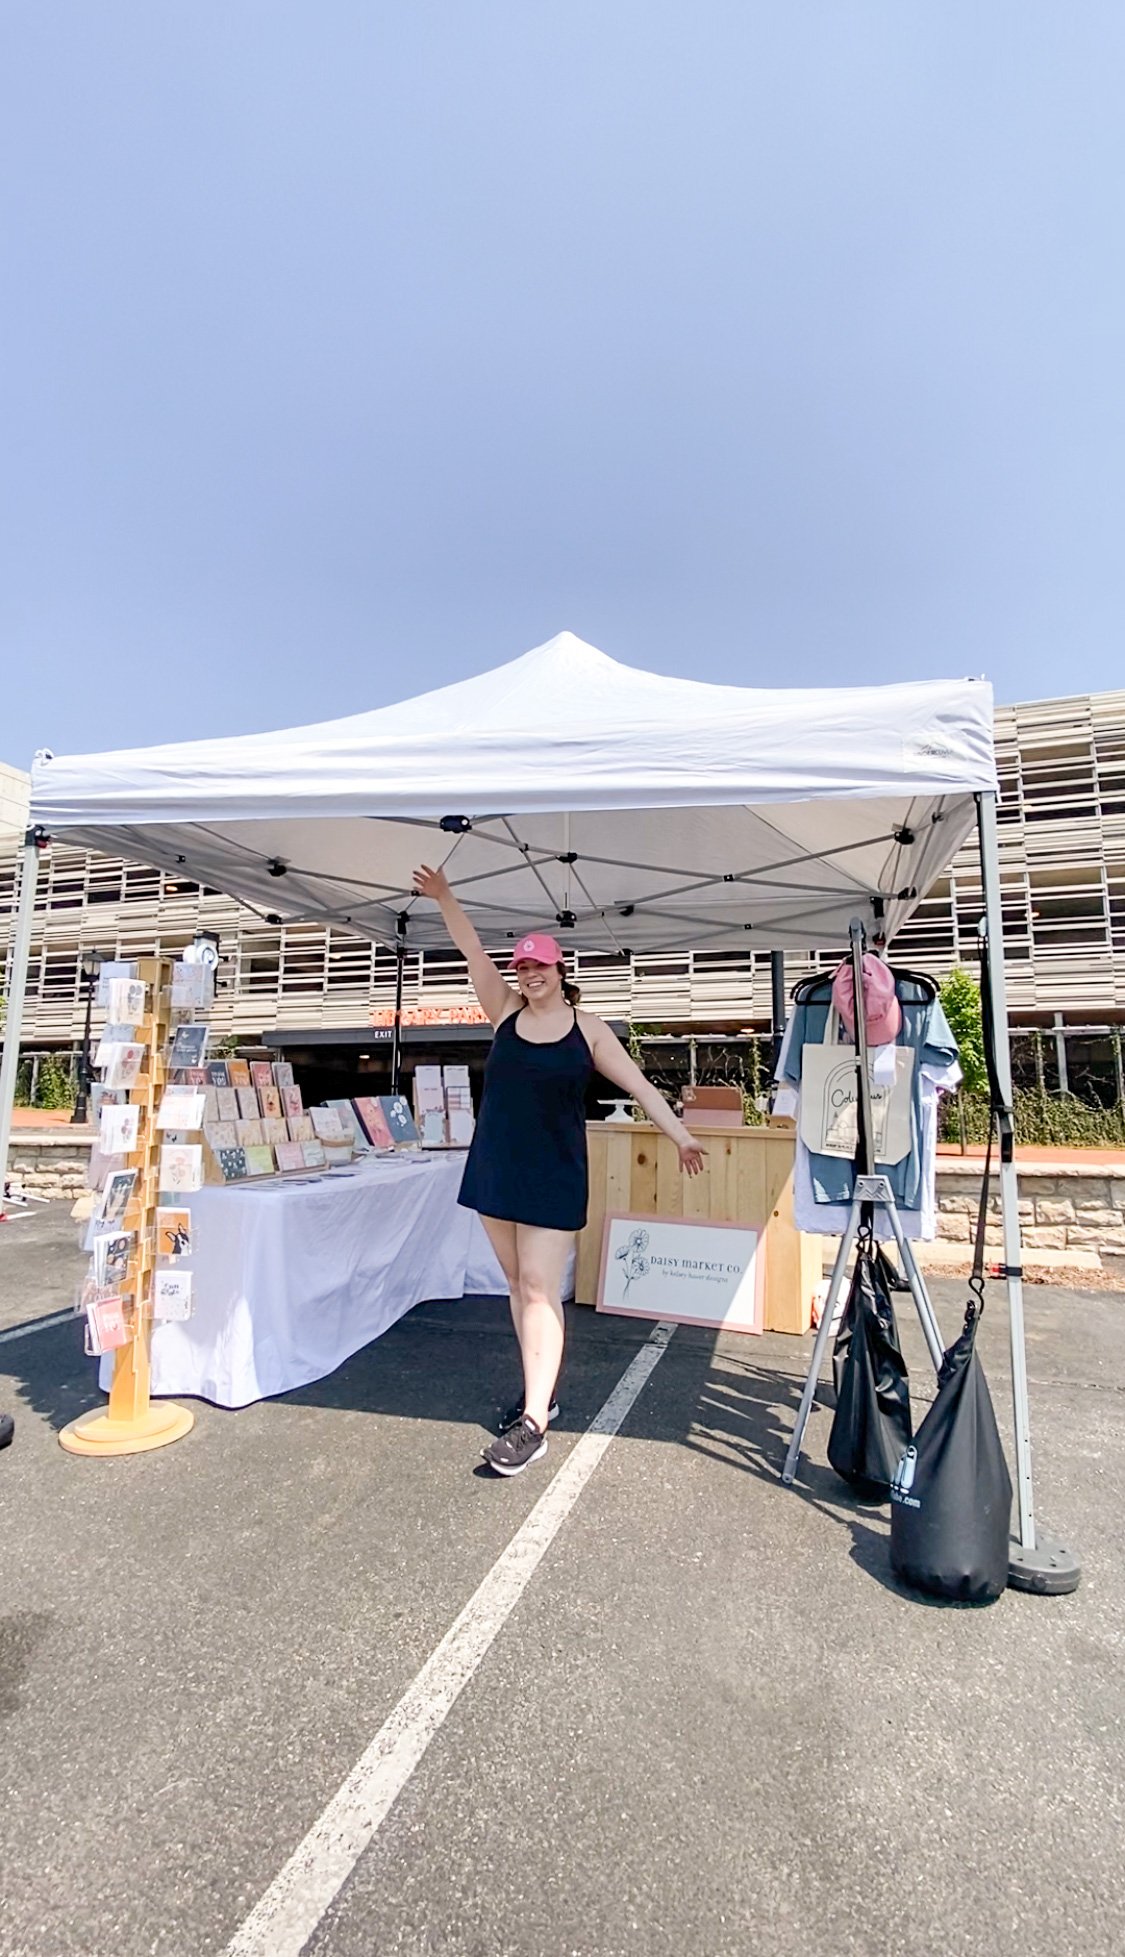
One of my biggest pieces of advice for aspiring small business owners who are wanting to do pop up markets or those more established looking to elevate their shopping experience is to invest in a quality tent and weights that will last. I purchased the UNDERCOVER X3 10x10 Commercial Canopy Tent in white back in 2022 and highly recommend it. It’s easy to take up and down, comes with a carrying case that has both wheels and handles and is so durable. Not to mention that it looks professional and high quality to draw people into your booth.
Weather at pop up markets can be rainy, windy and unpredictable so you want to invest in a tent that is reliable! I’ve watched tents collapse due to rain and break due to wind and you don’t want that to happen during a busy market day. The Undercover tent comes with stakes as well as velcro tent walls that can zip up to enclose your booth for any type of weather. Everything fits in the case so I’m always prepared for whatever the day brings.
Another tip is to make sure you have tent weights as it’s a safety hazard to not secure your tent, and most events require them. I have a few styles of weights and bring several with me, usually using 8 total. The Gravity Tube Canopy Anchor Weights are super easy and convenient as I fill mine with water (you can use rocks or sand as well) and then I empty them out at the end of the event. I use these on my tent as well as my wardrobe rack to secure everything!
Click here to shop my 10x10 Undercover Tent
Click here to order Gravity Tubes
To watch my video on the Undercover Tent, click here!
To watch another video showing my booth setup with the Undercover Tent, click here!
my setup
Every event and setup is different ranging from a tablespace to a large booth! I own three 4ft tables and two 6ft tables which allow for flexibility and accommodations for most setups. For links to tables and the tablecloths, displays, bins and more, click here!
Display + Setup Tips:
While there are standard booth sizes, each venue and event will be a little different. You may have a little extra space or you might end up with an unfortunately located pole that can cause you to change your setup a bit. Be flexible and pack some extra things to have on hand in case you need to change it up onsite!
Invest in a wagon - this is a MUST! I couldn’t do my setup without my wagon. I always have it in the car and will usually ask organizers if the event is upstairs/if there’s an elevator/how big it is, etc. to make sure I’m prepared. Here’s the link to the collapsible wagon that I have and love!
Pay attention to Vendor Emails, Agreements and Instructions as I’ve been at all sorts of events that require different setup needs. Often times this includes floor-length tablecloths, a specific color tablecloth (white or black), “walls” and more.
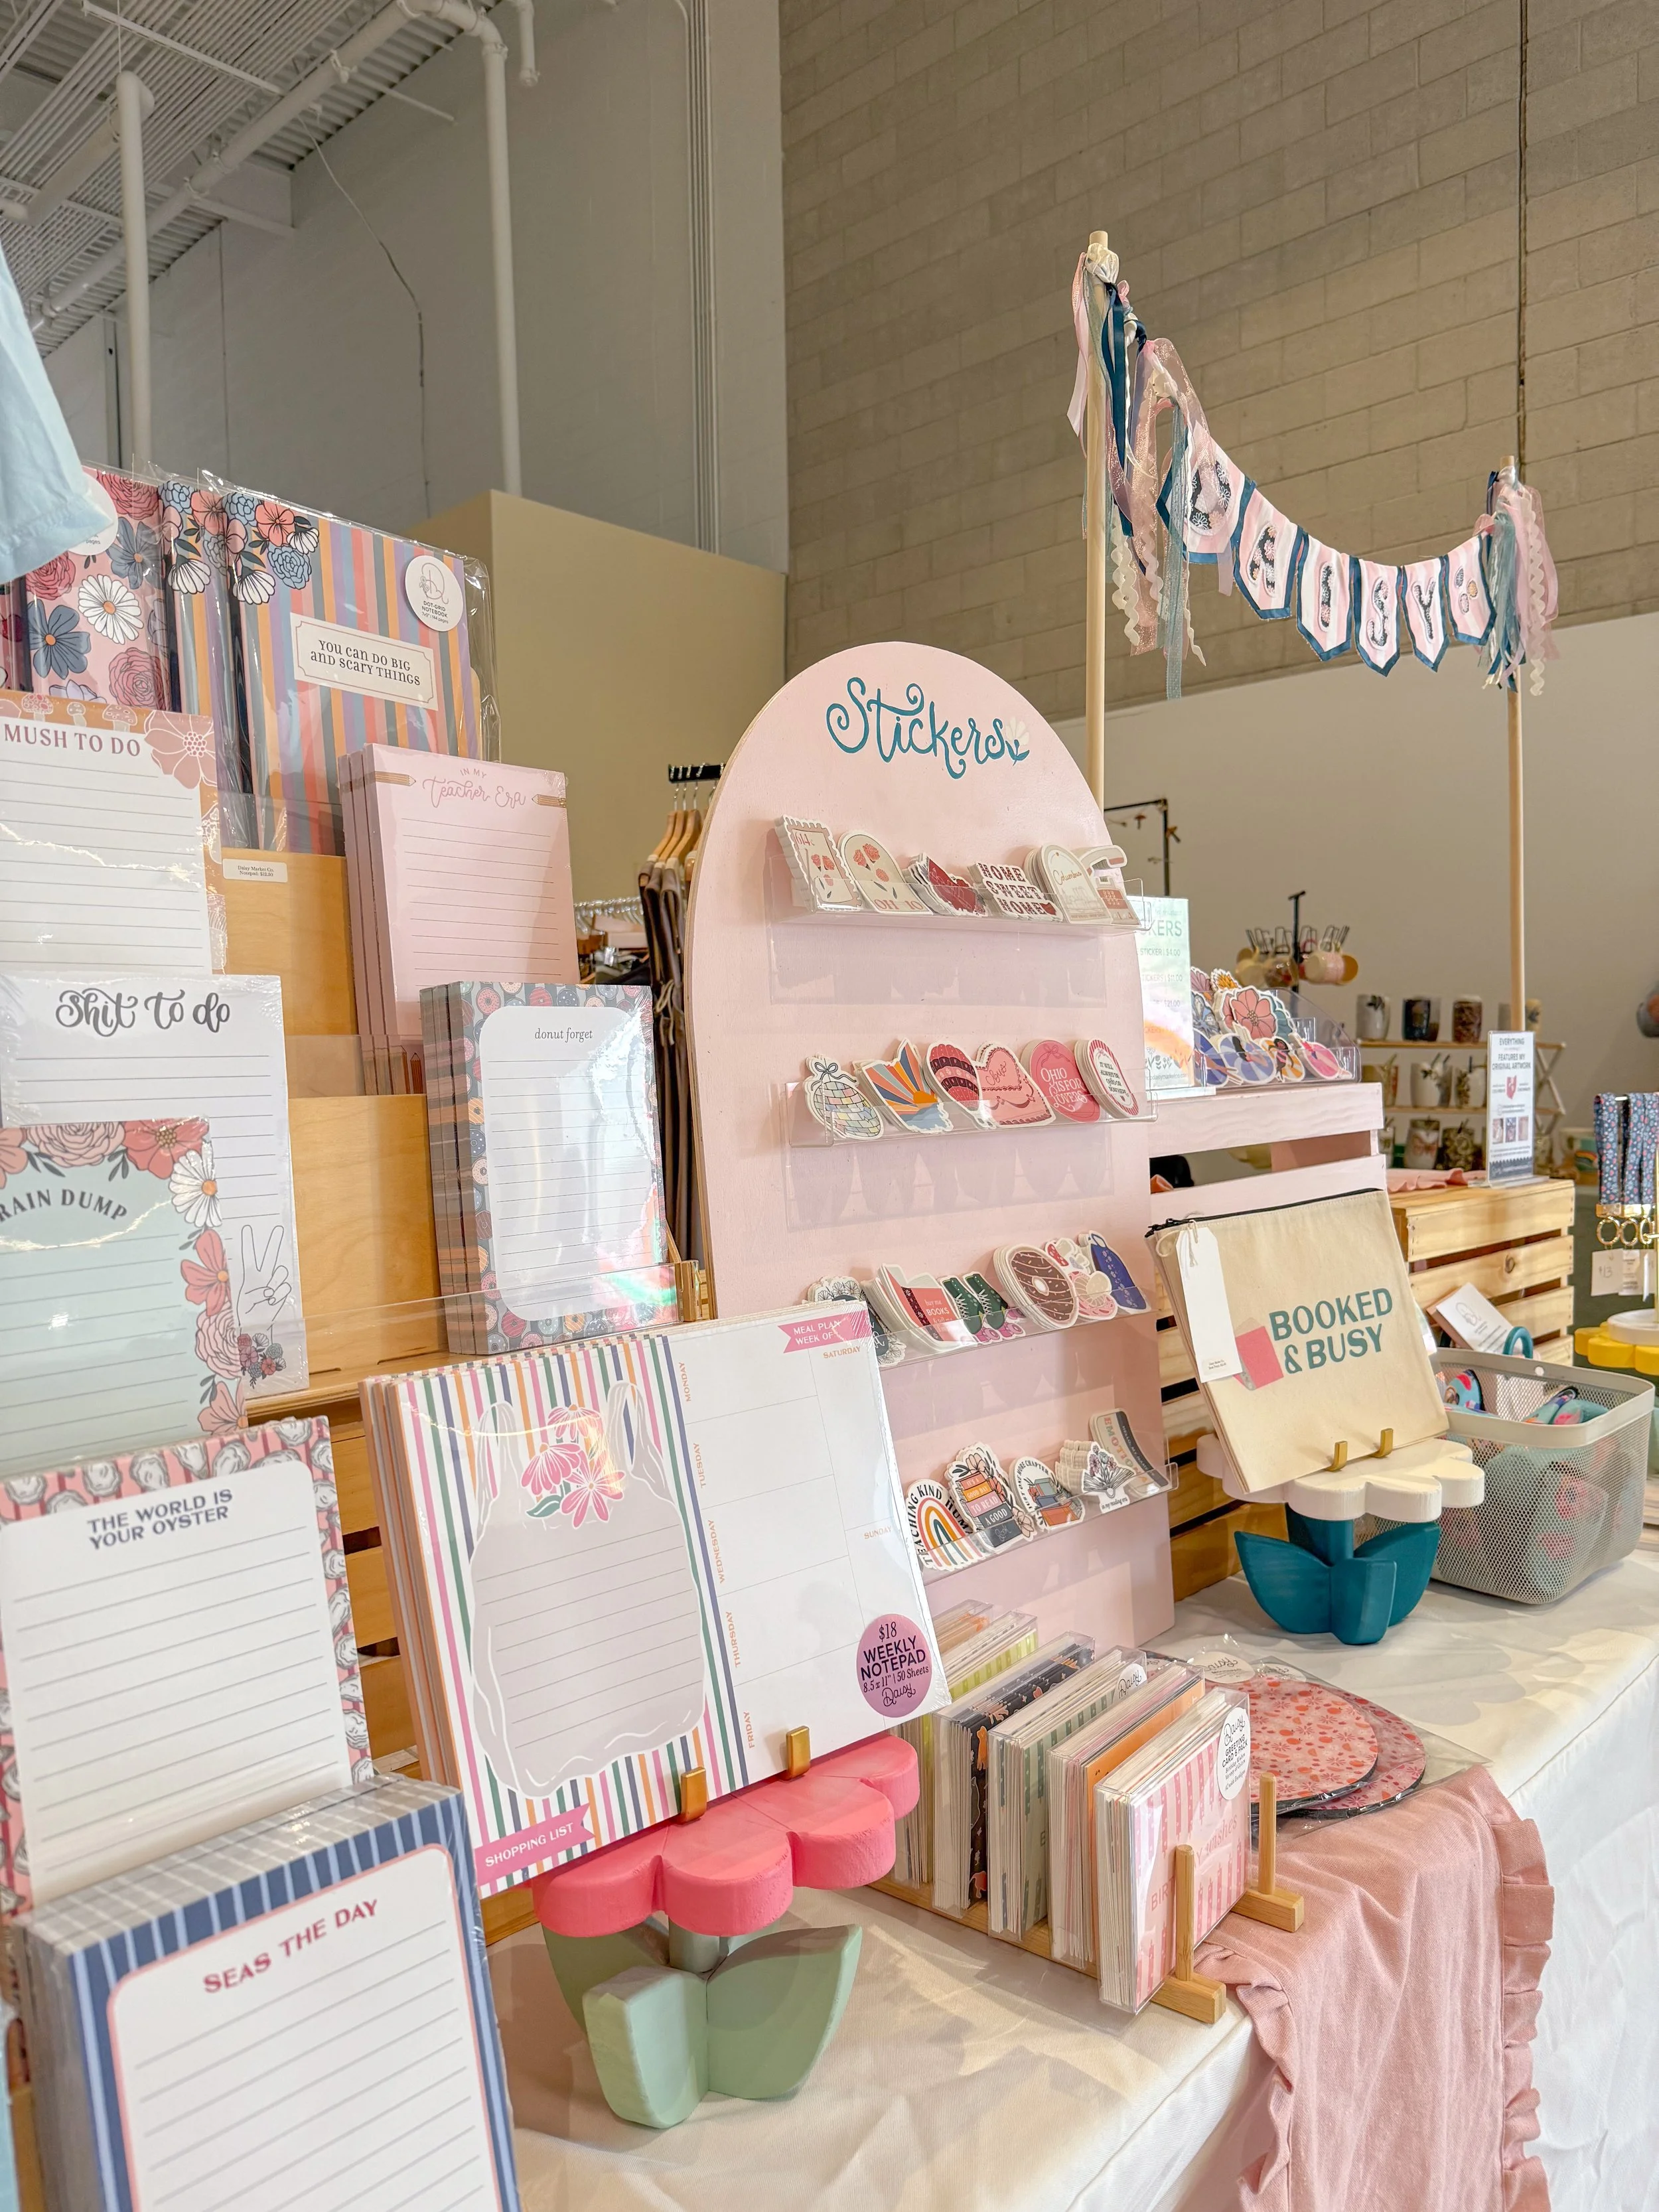
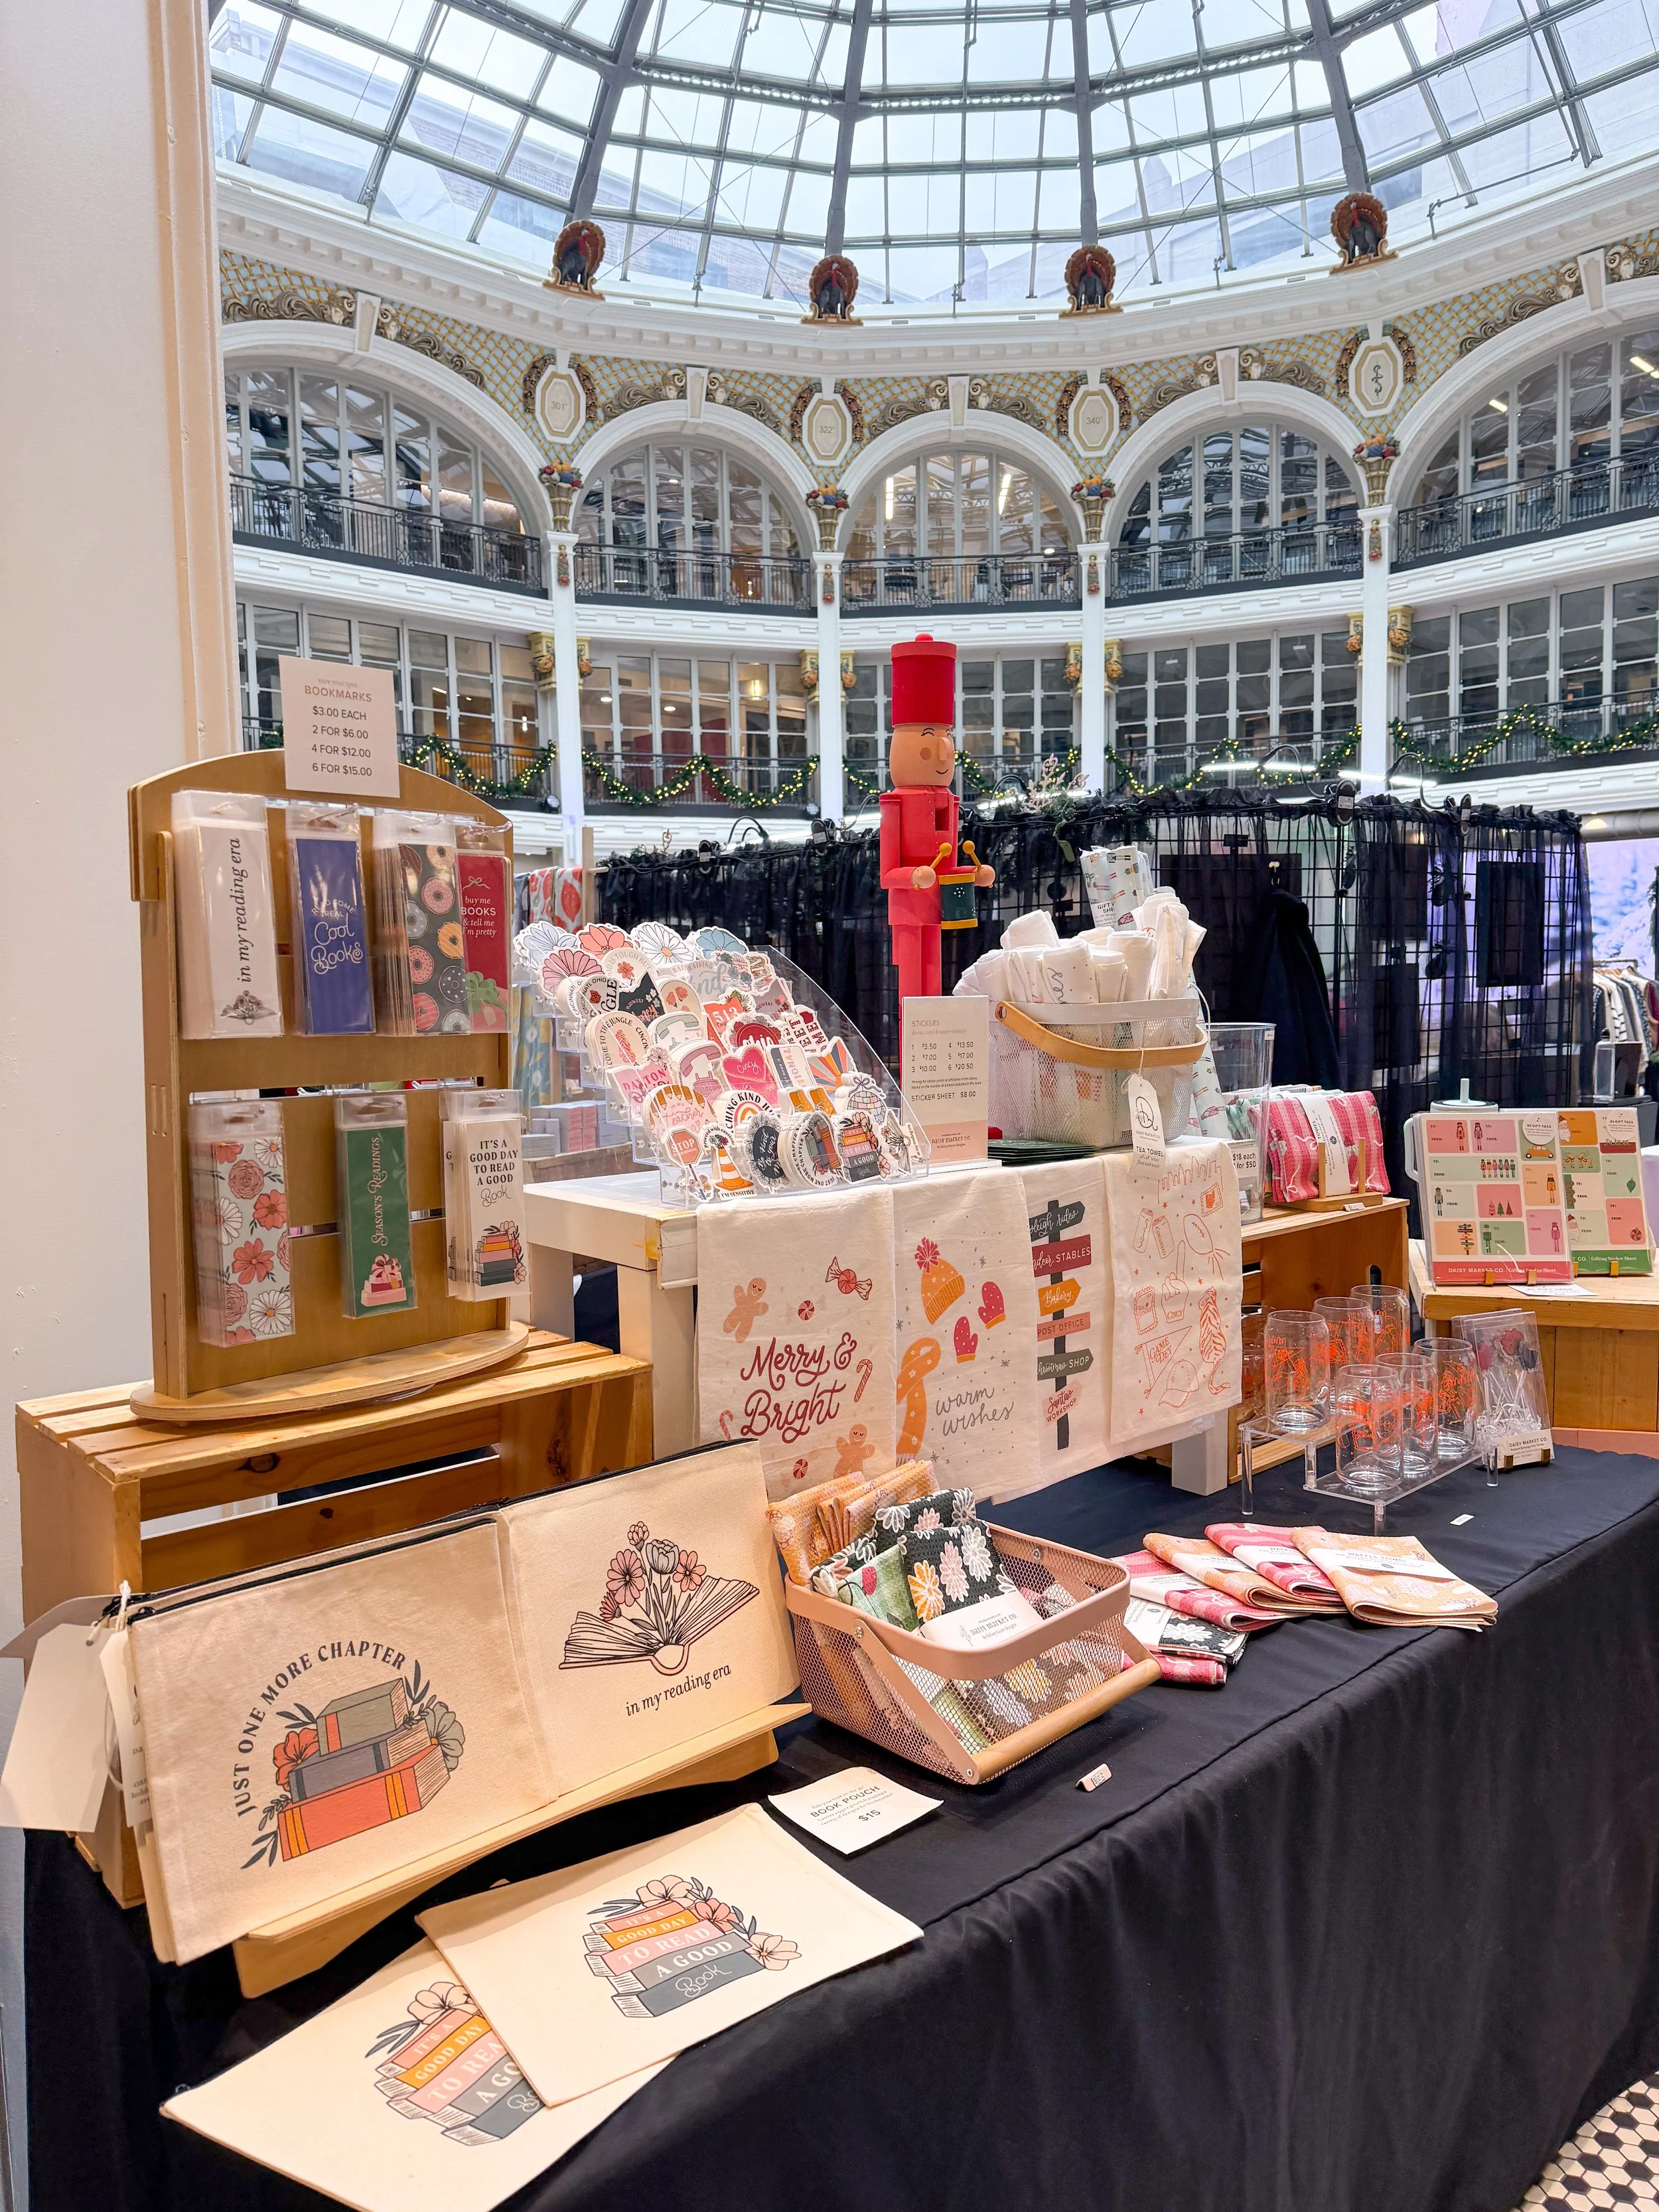
Utilize your space the best you can by creating vertical displays! I have tons of wood crates that I use to give my booth some extra height. I’ve linked the crates that I have here.
Little details matter! Think about how you can bring your brand into your booth through signage, decor, displays, etc.
Michael’s Craft Store has so many different wood items that you can easily paint in your brand colors and use as displays!
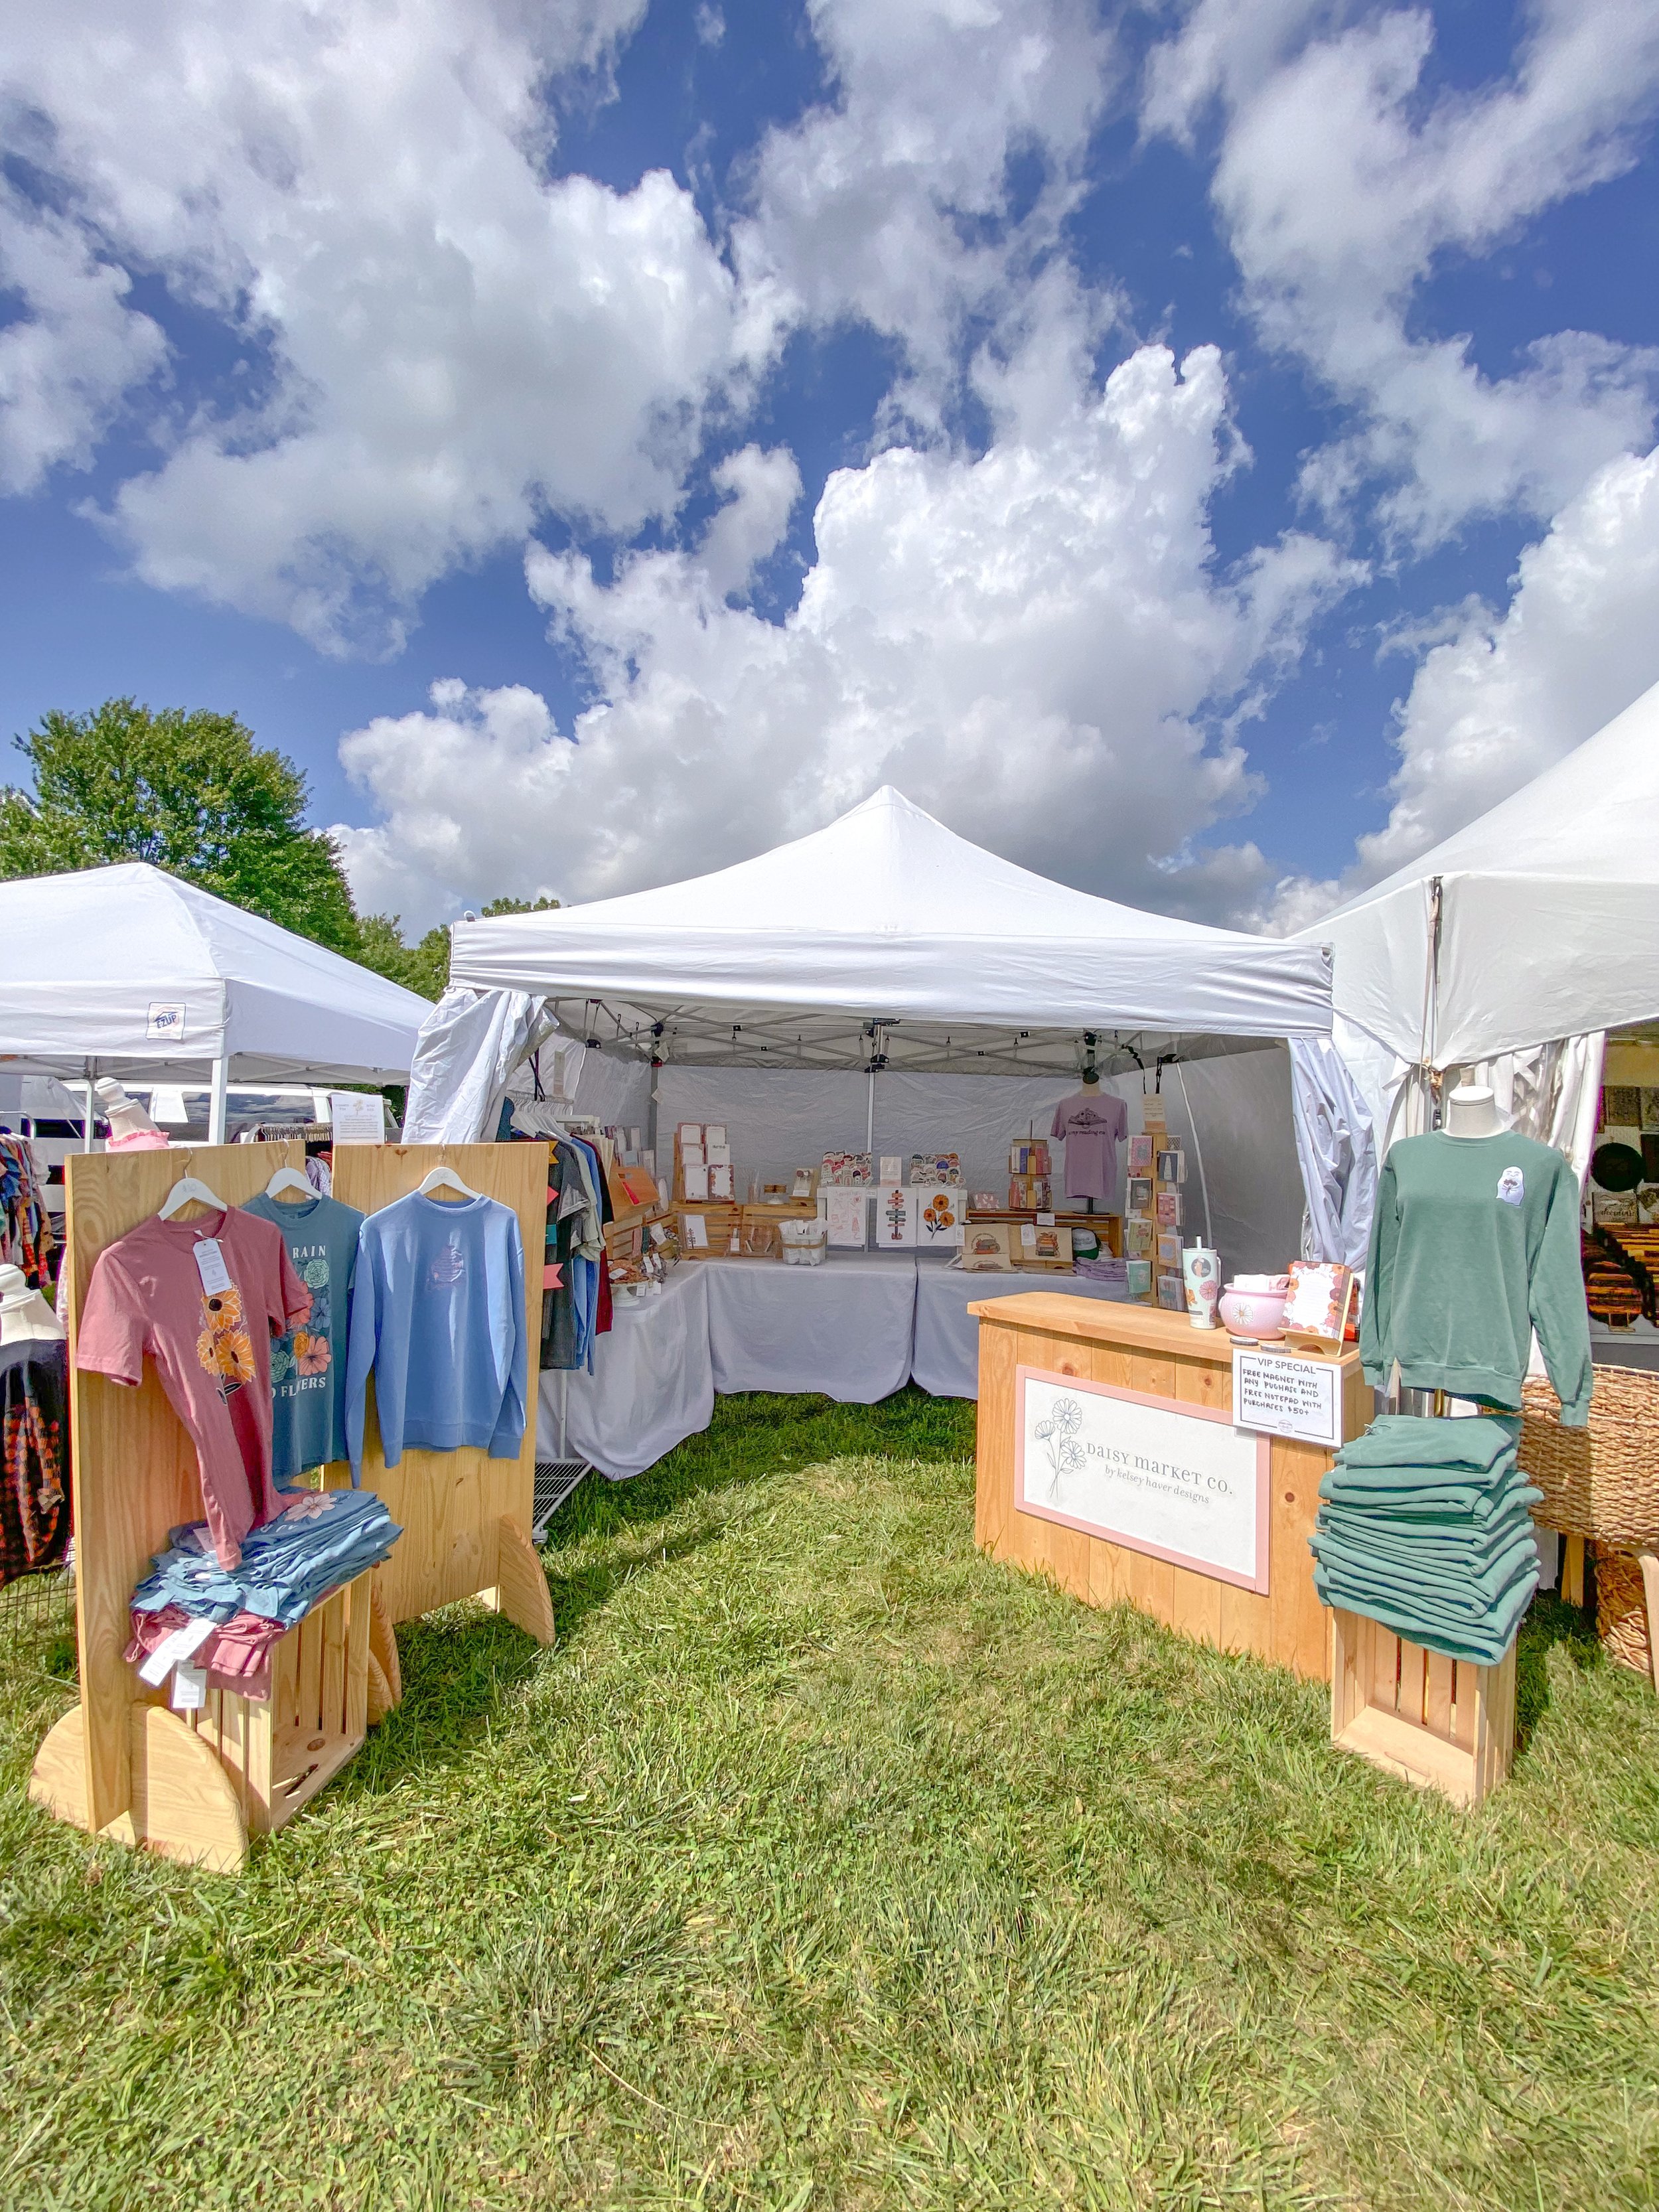


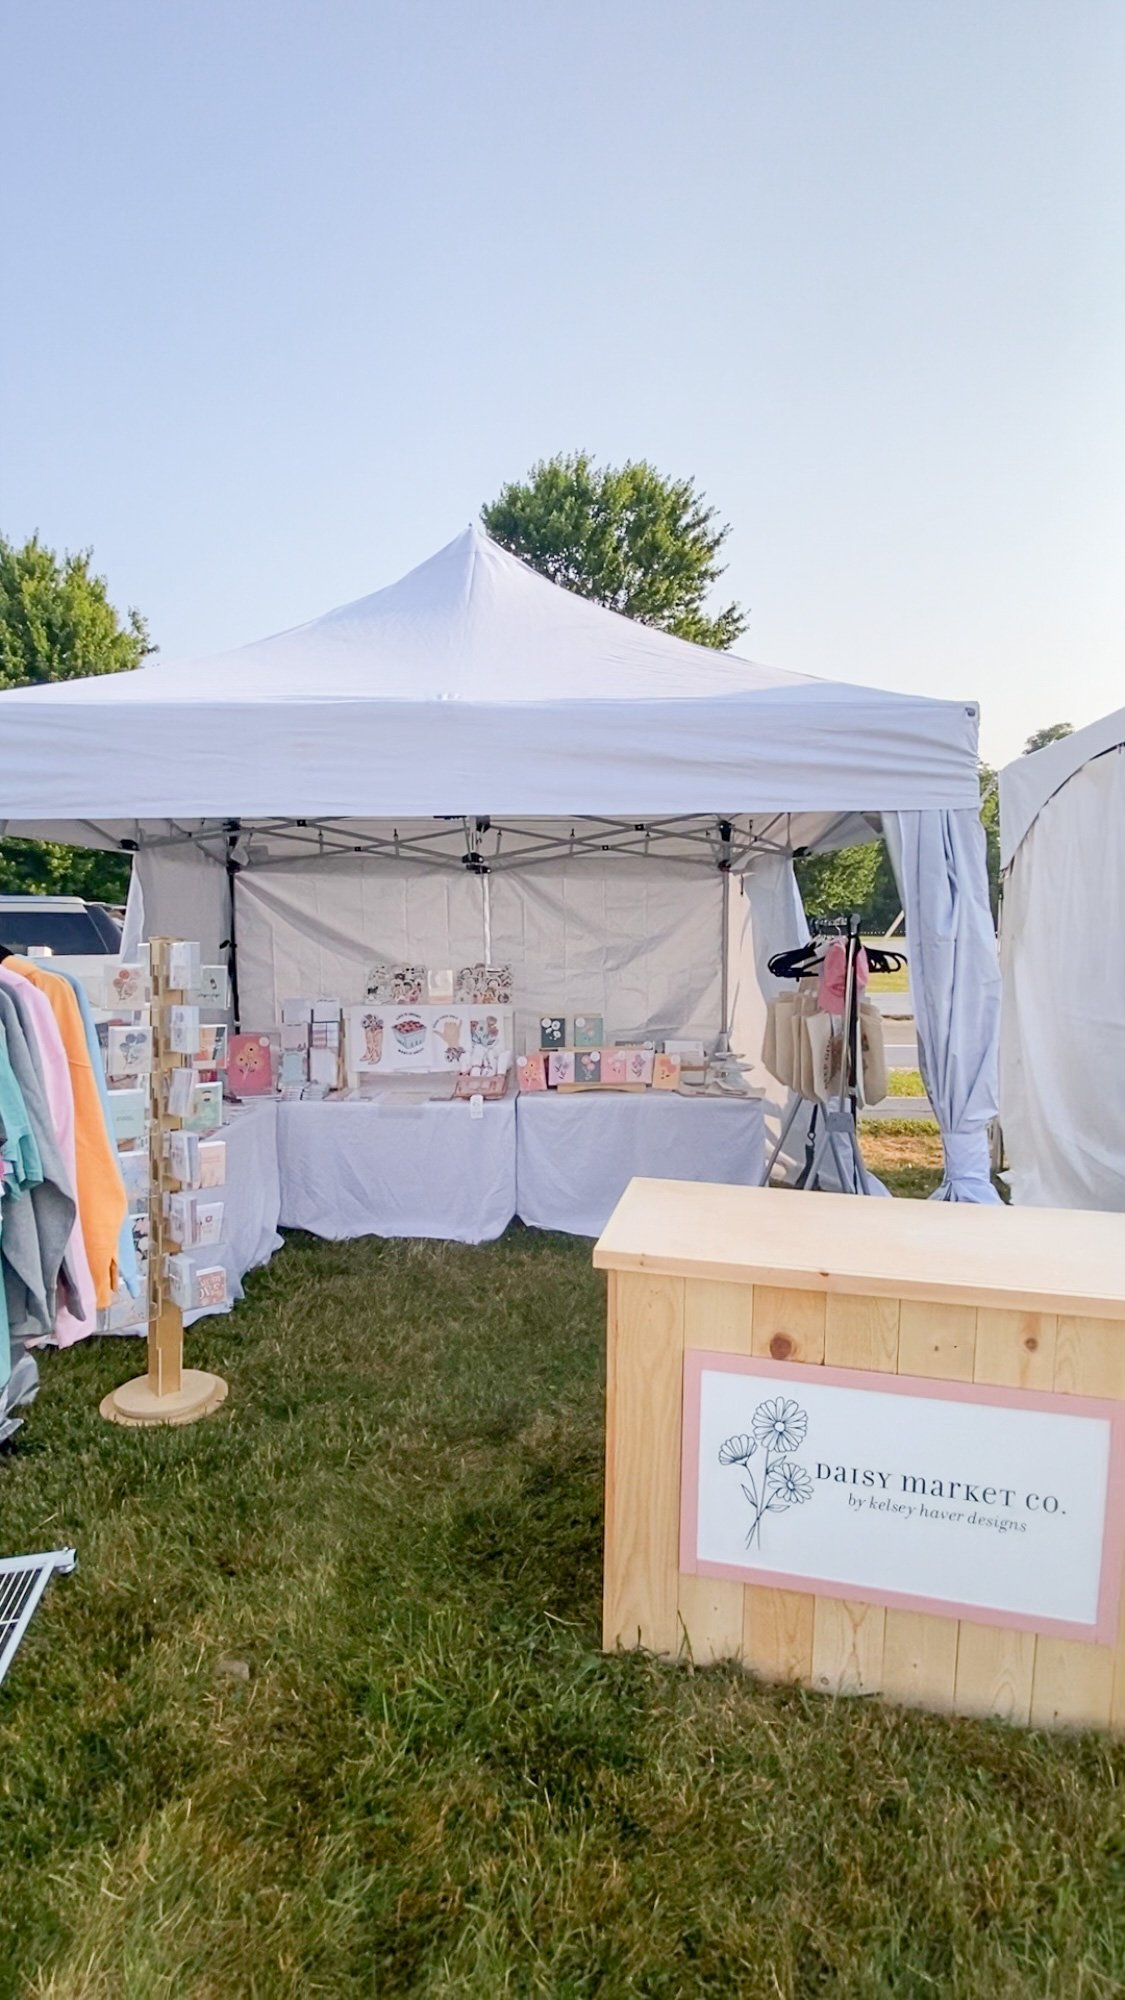
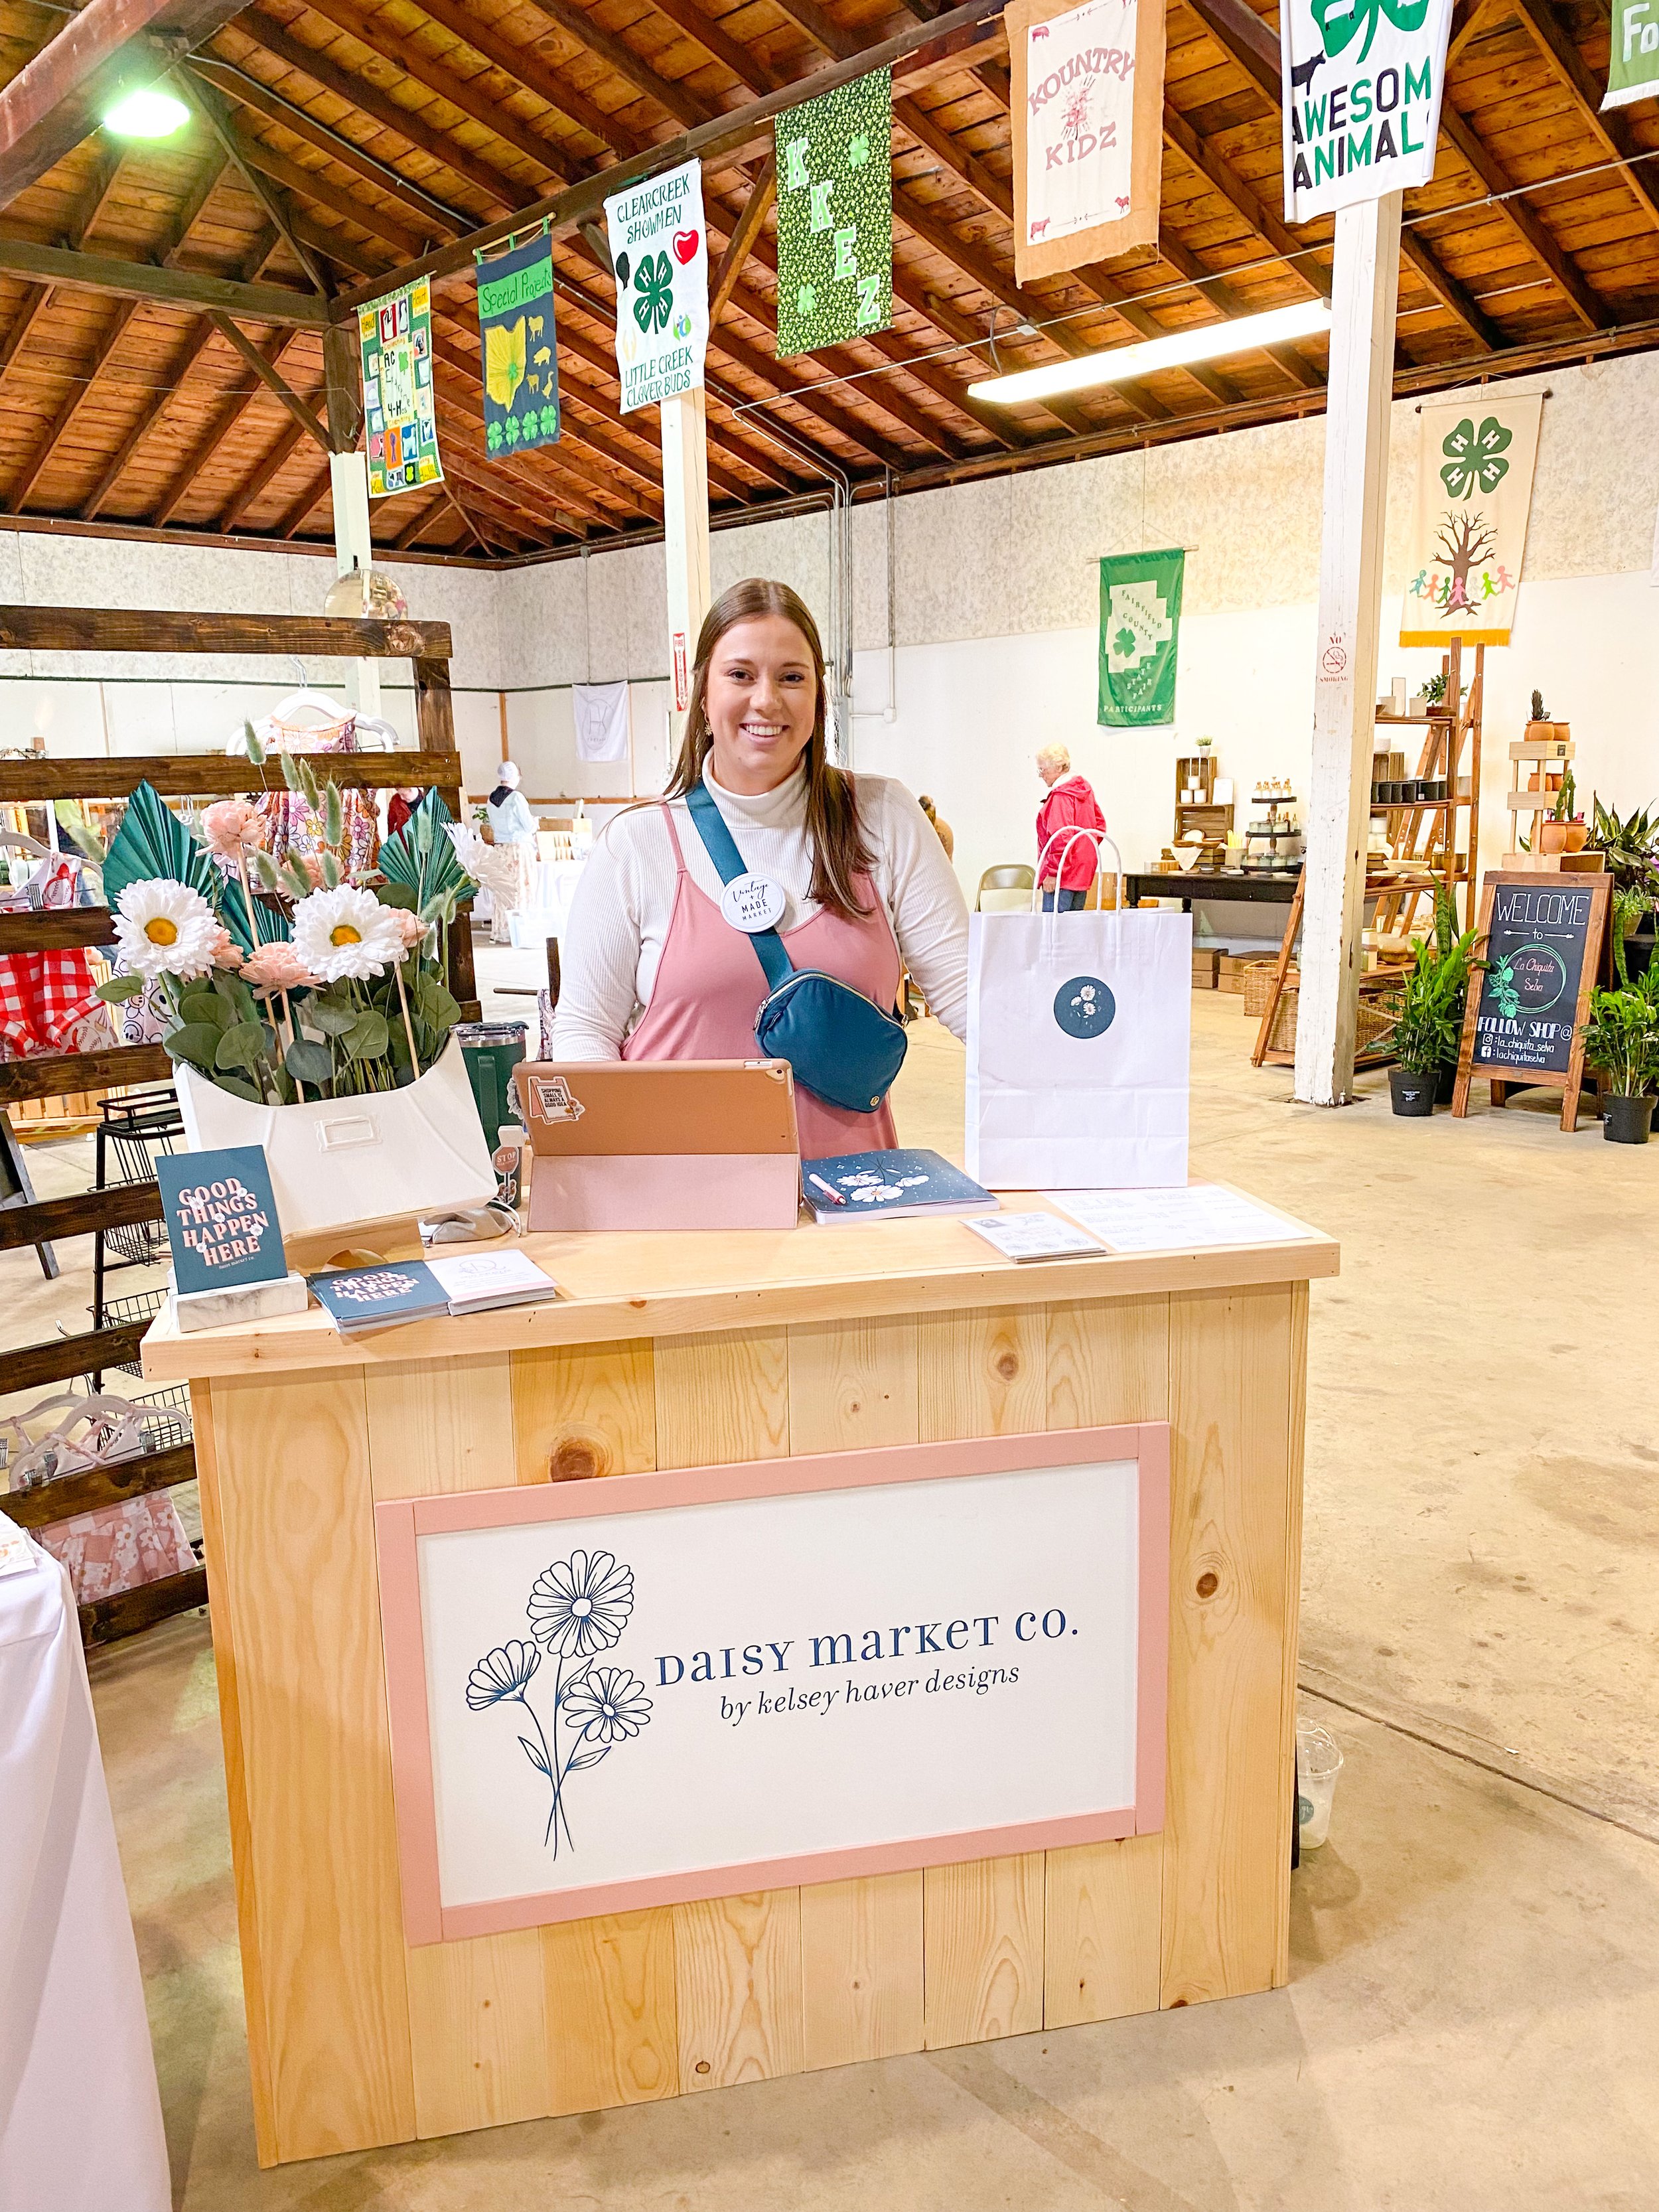
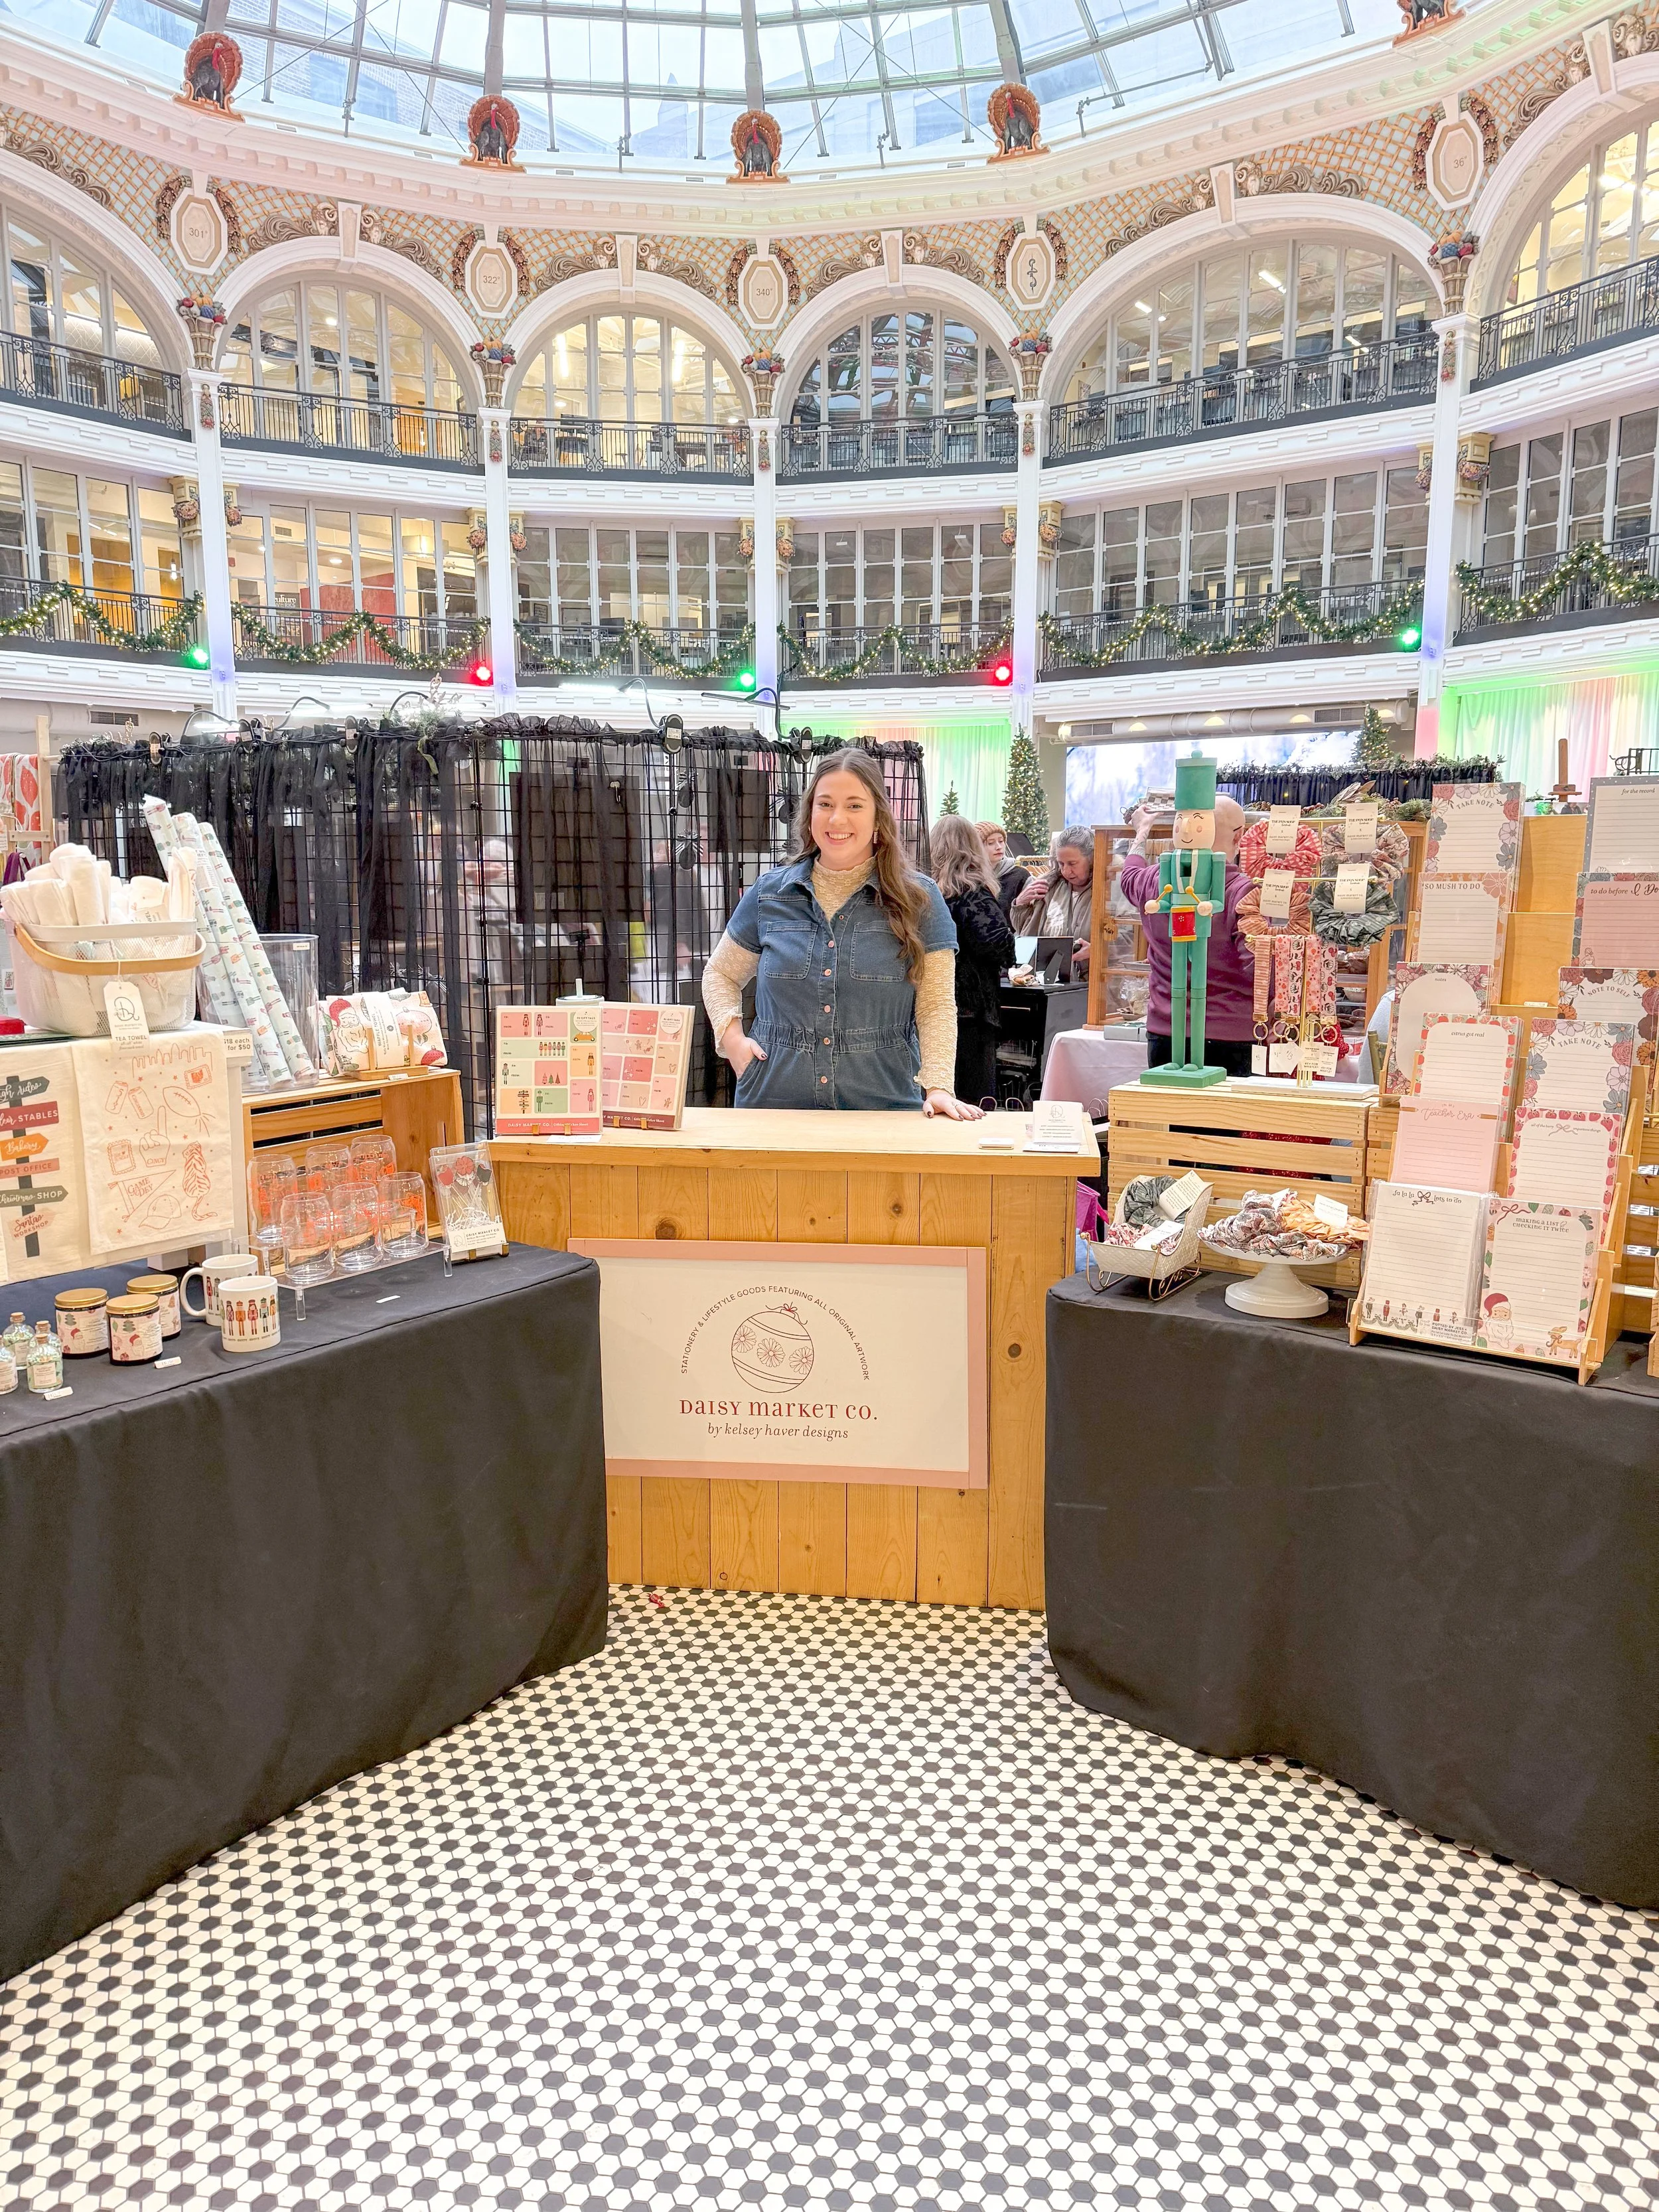
checkout counter
Strategically placing yourself in your booth is very important when considering your setup! I used to stand behind the table (and still do at smaller markets) but I’ve found that I really enjoy having this checkout counter. It helps me give shoppers some breathing room and doesn’t feel like I’m in the way of their shopping. Additionally, there’s storage on the backside which is helpful for keeping extra product, bags, personal items, food and more. My amazing and talented mom created this counter for me but it was based off of a Pinterest Pin that I’ll link here. Make sure you use locking hinges if you do this DIY! The sign on the front is attached with command strips so I can change it out for the holiday season to make it more festive and fun!
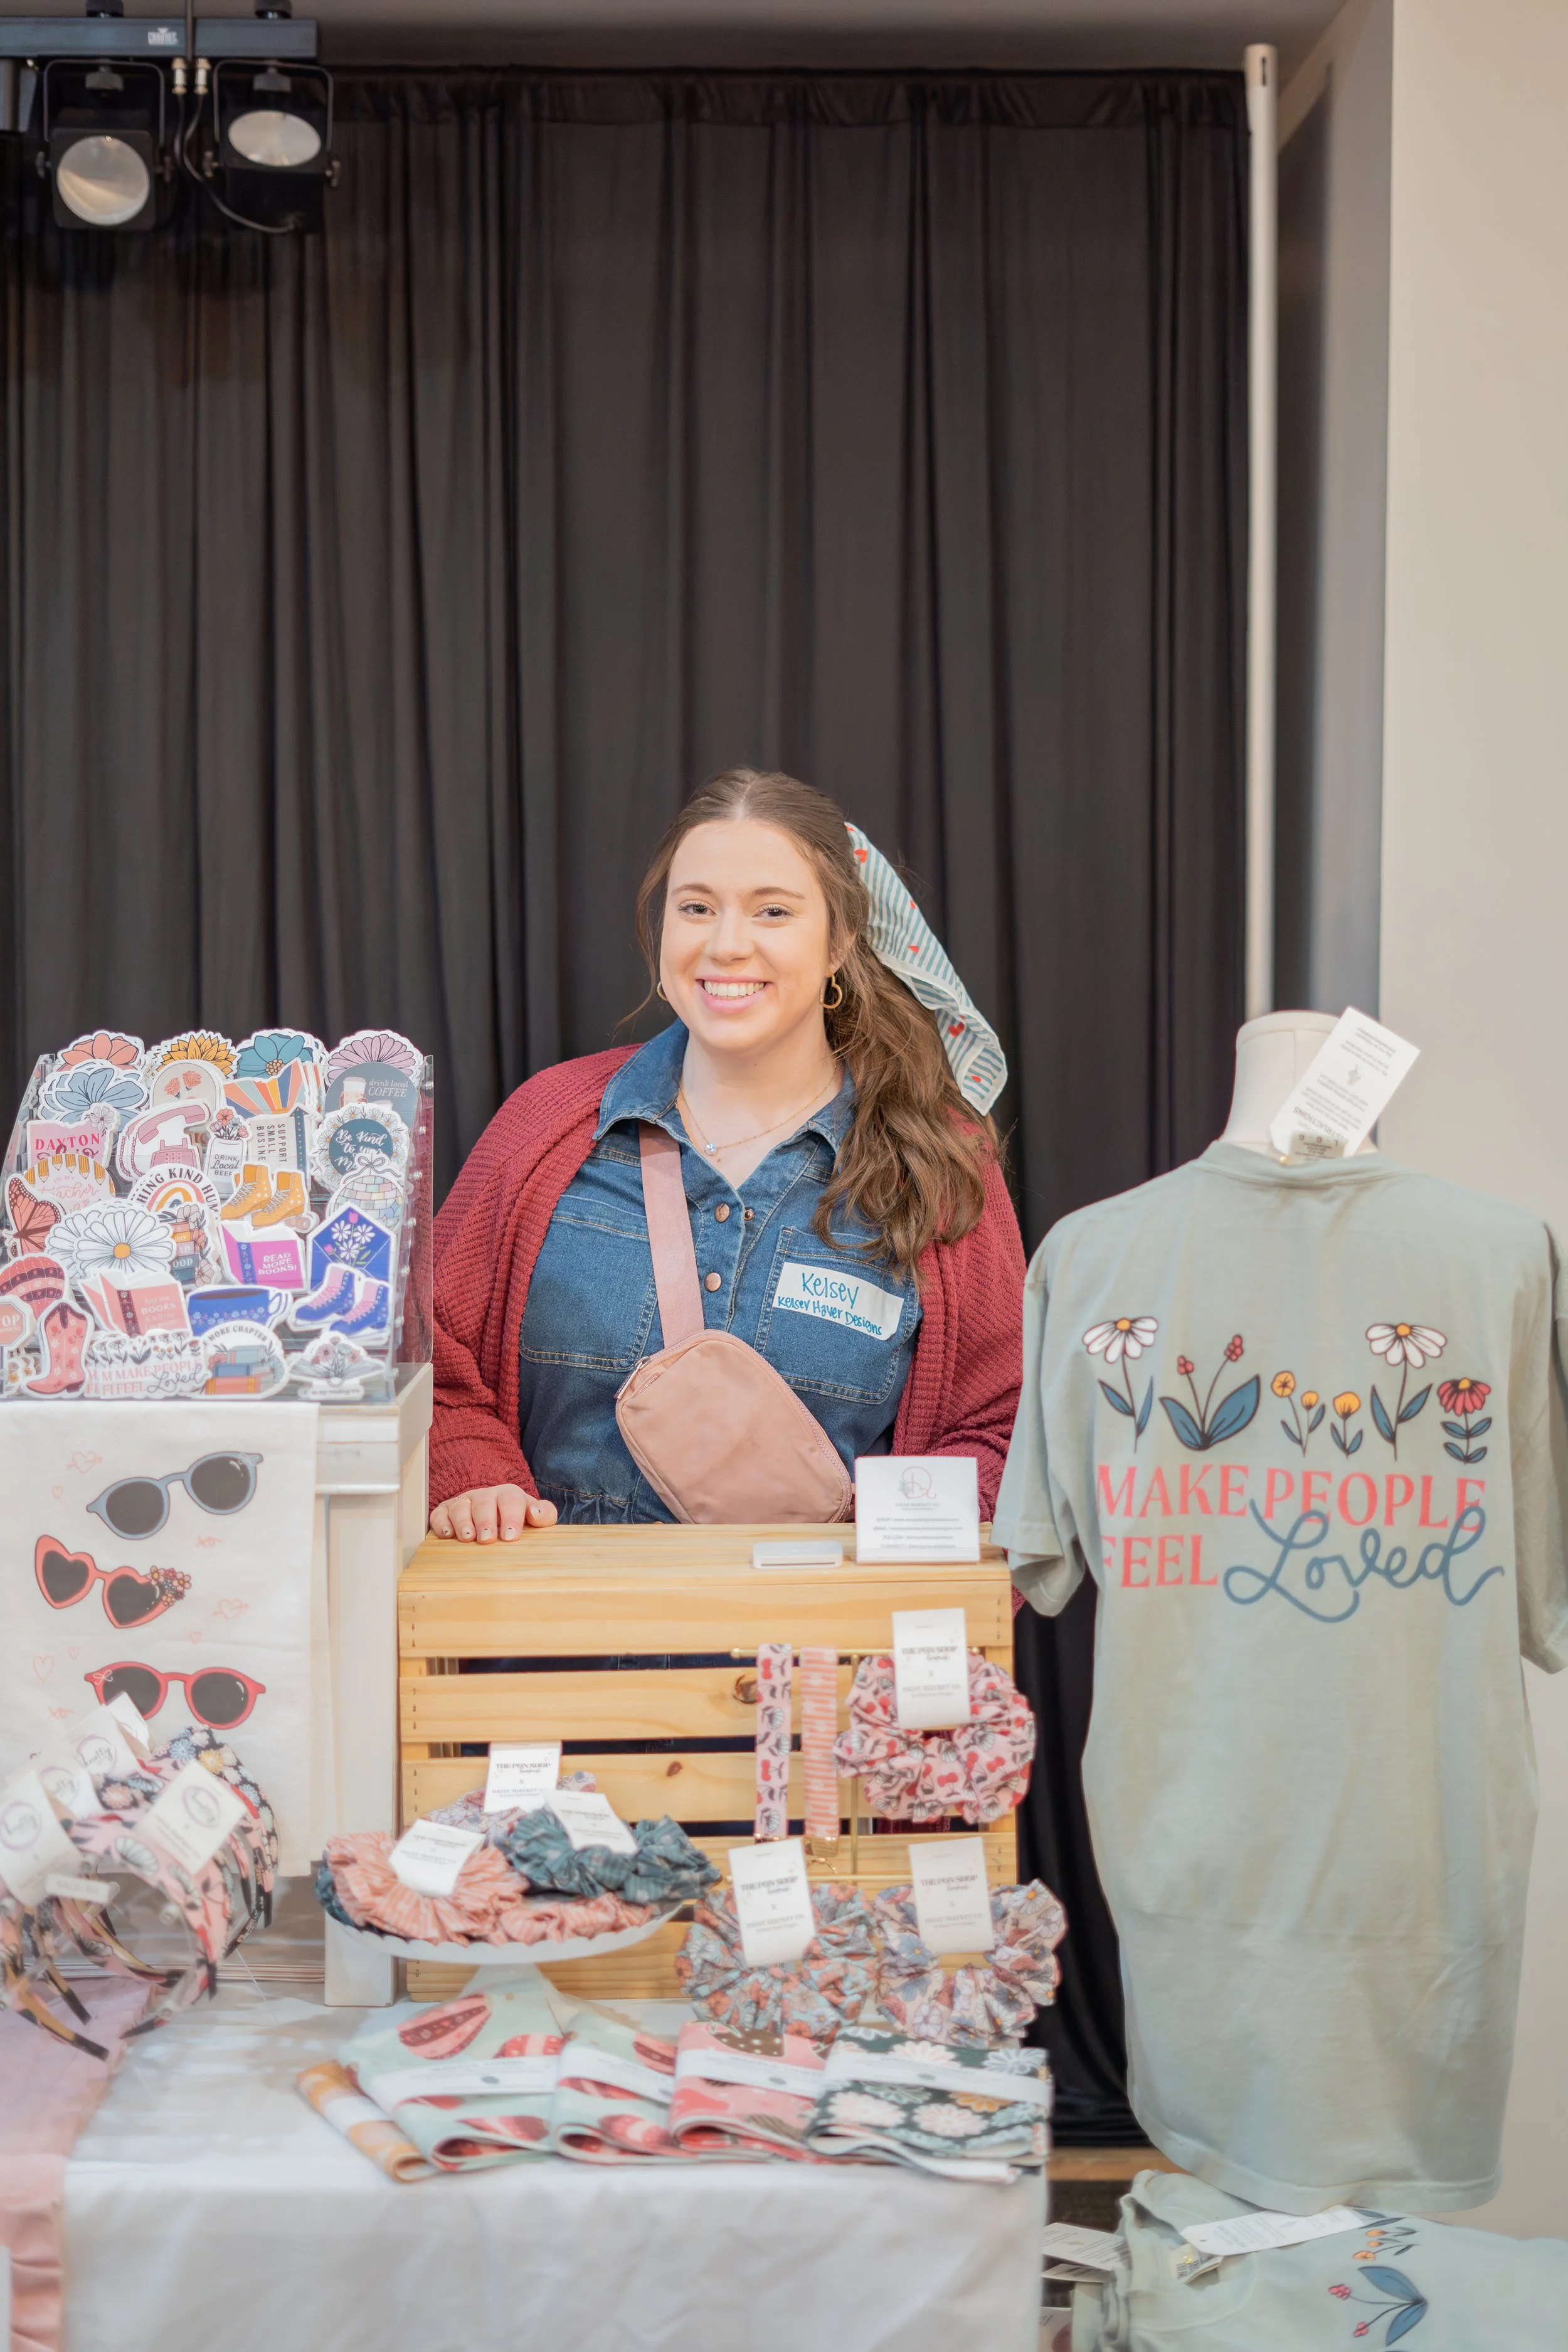
signage
Having signage that makes you stand out at busy markets is crucial! I partnered with UPrinting to create this A-Frame sign that is durable, high quality and sure to make a statement. This large sign features two sides that you can switch out depending on the event, the season or special promotions that you have going on! To learn more about this sign and to see it in action, click here!
I designed one side to work for markets when I’m setup with my product shop, Daisy, and the other side is perfect for when I’m on-site at a mural. Two uses and one sign with endless possibilities to swap them out.
To order one of your own, visit www.uprinting.com !


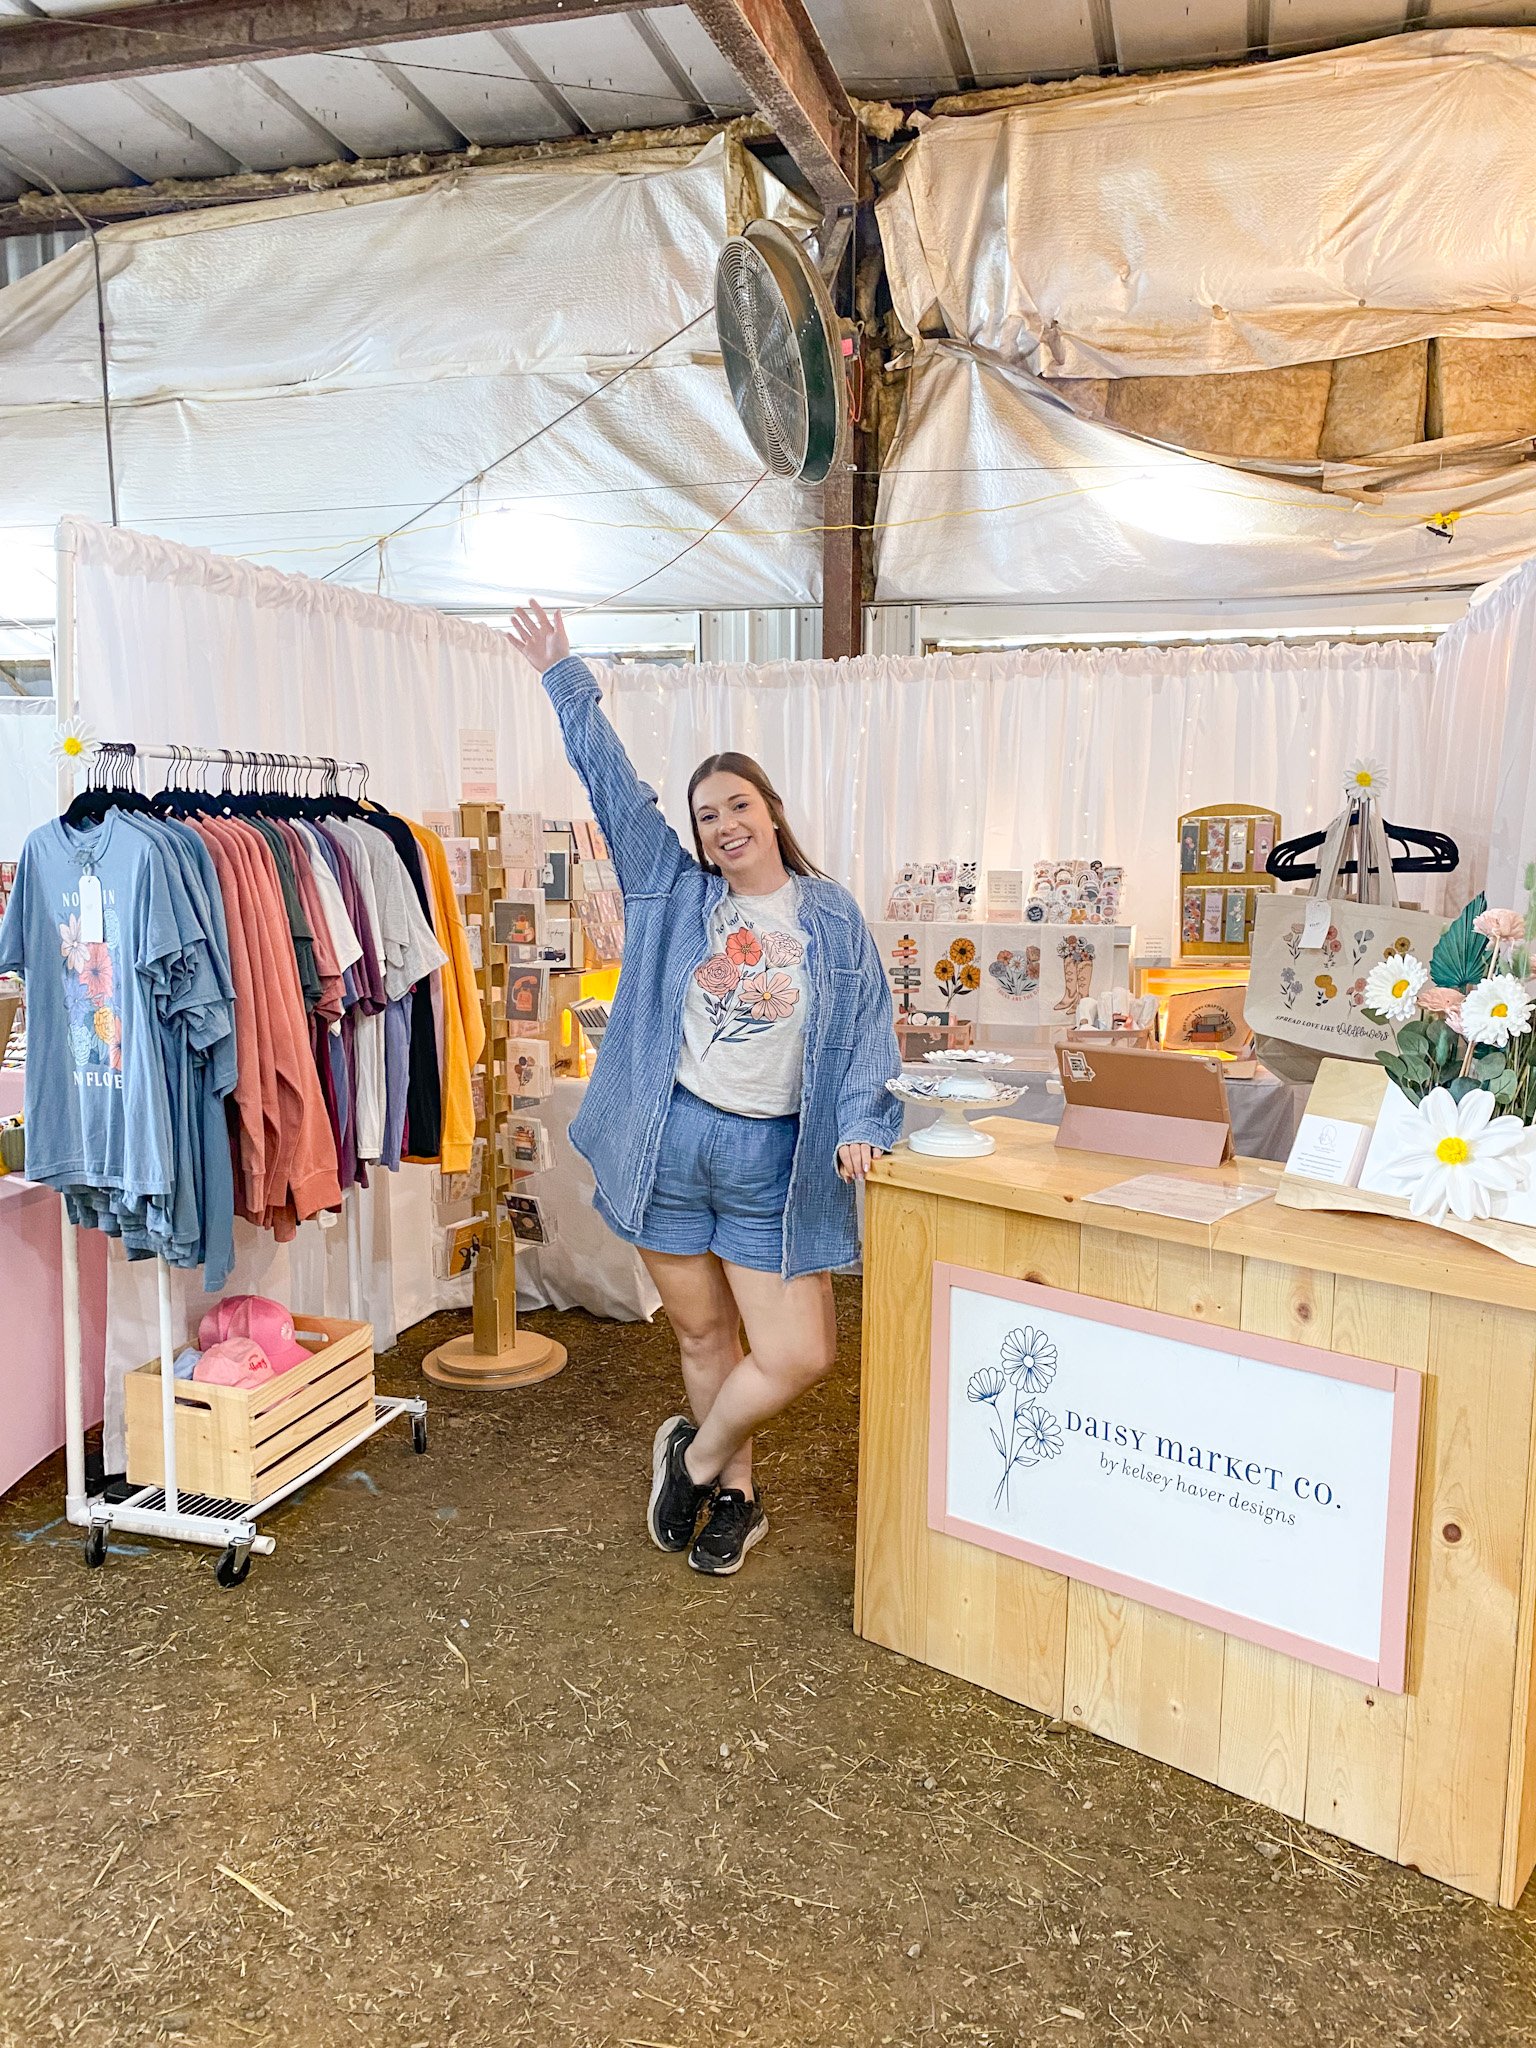
curtain walls
I’ve participated in markets where it is required to have “walls” that separate you from the other vendors so this was my solution. Again, my mom and I created these based off of a Pinterest tutorial. That tutorial is linked here. If you do this, I’d recommend that you bring a step stool and a mallet to help assist you with setup. Additionally, I’d bring a few weights (I used my tent weights) to make it feel a little extra secure. This setup is NOT my everyday setup and I’d recommend having a person (or two) to help you as I would not be able to do this if I was solo at a market. Lastly, I’d recommend you purchase bungee cords and/or velcro straps to help keep the PVC pipes together during transport.
tent edge
For outdoor markets, you want to find a way to make your tent stand out when potential customers are looking down the rows and rows of booths. One of my favorite ways to do this is with the Tent Edge and vinyl vertical banners! The Tent Edge is a system that allows your banners to be attached to your tent and placed conveniently under your tent weights so you can have vertical banners as an entry moment for customers. There’s a few different sets that you can choose from but each Tent Edge allows for two banners to be used so you can put two on one side or one banner on each side! I like to mix it up depending on the event and where the majority of people are coming from. If you place a Tent Edge on all four sides, you could display up to 8 banners on your tent. You can use code KELSEY20 for a discount on the Tent Edge system!
To shop the Tent Edge system, click here!
To watch my video on how the Tent Edge works, click here.
My banners were printed through Vistaprint!


I’ve found other displays like my greeting card spinner and wooden displays through the A-Z Directory! The directory is also where I find my vendors to print a lot of products as well as my printed materials for my business. You can read more about this amazing resource for small business owners and product makers here on this blog post.

the details
I’m a big believer in little details to make a full experience. Below are some ways that I bring my branding and experiences into my booth at markets. PS - in addition to my shop, I work with small businesses as a freelance designer and artist! So if you’re looking for a logo / branding suite or help with packaging, signage, all the things, submit a form on my contact tab and let’s chat.
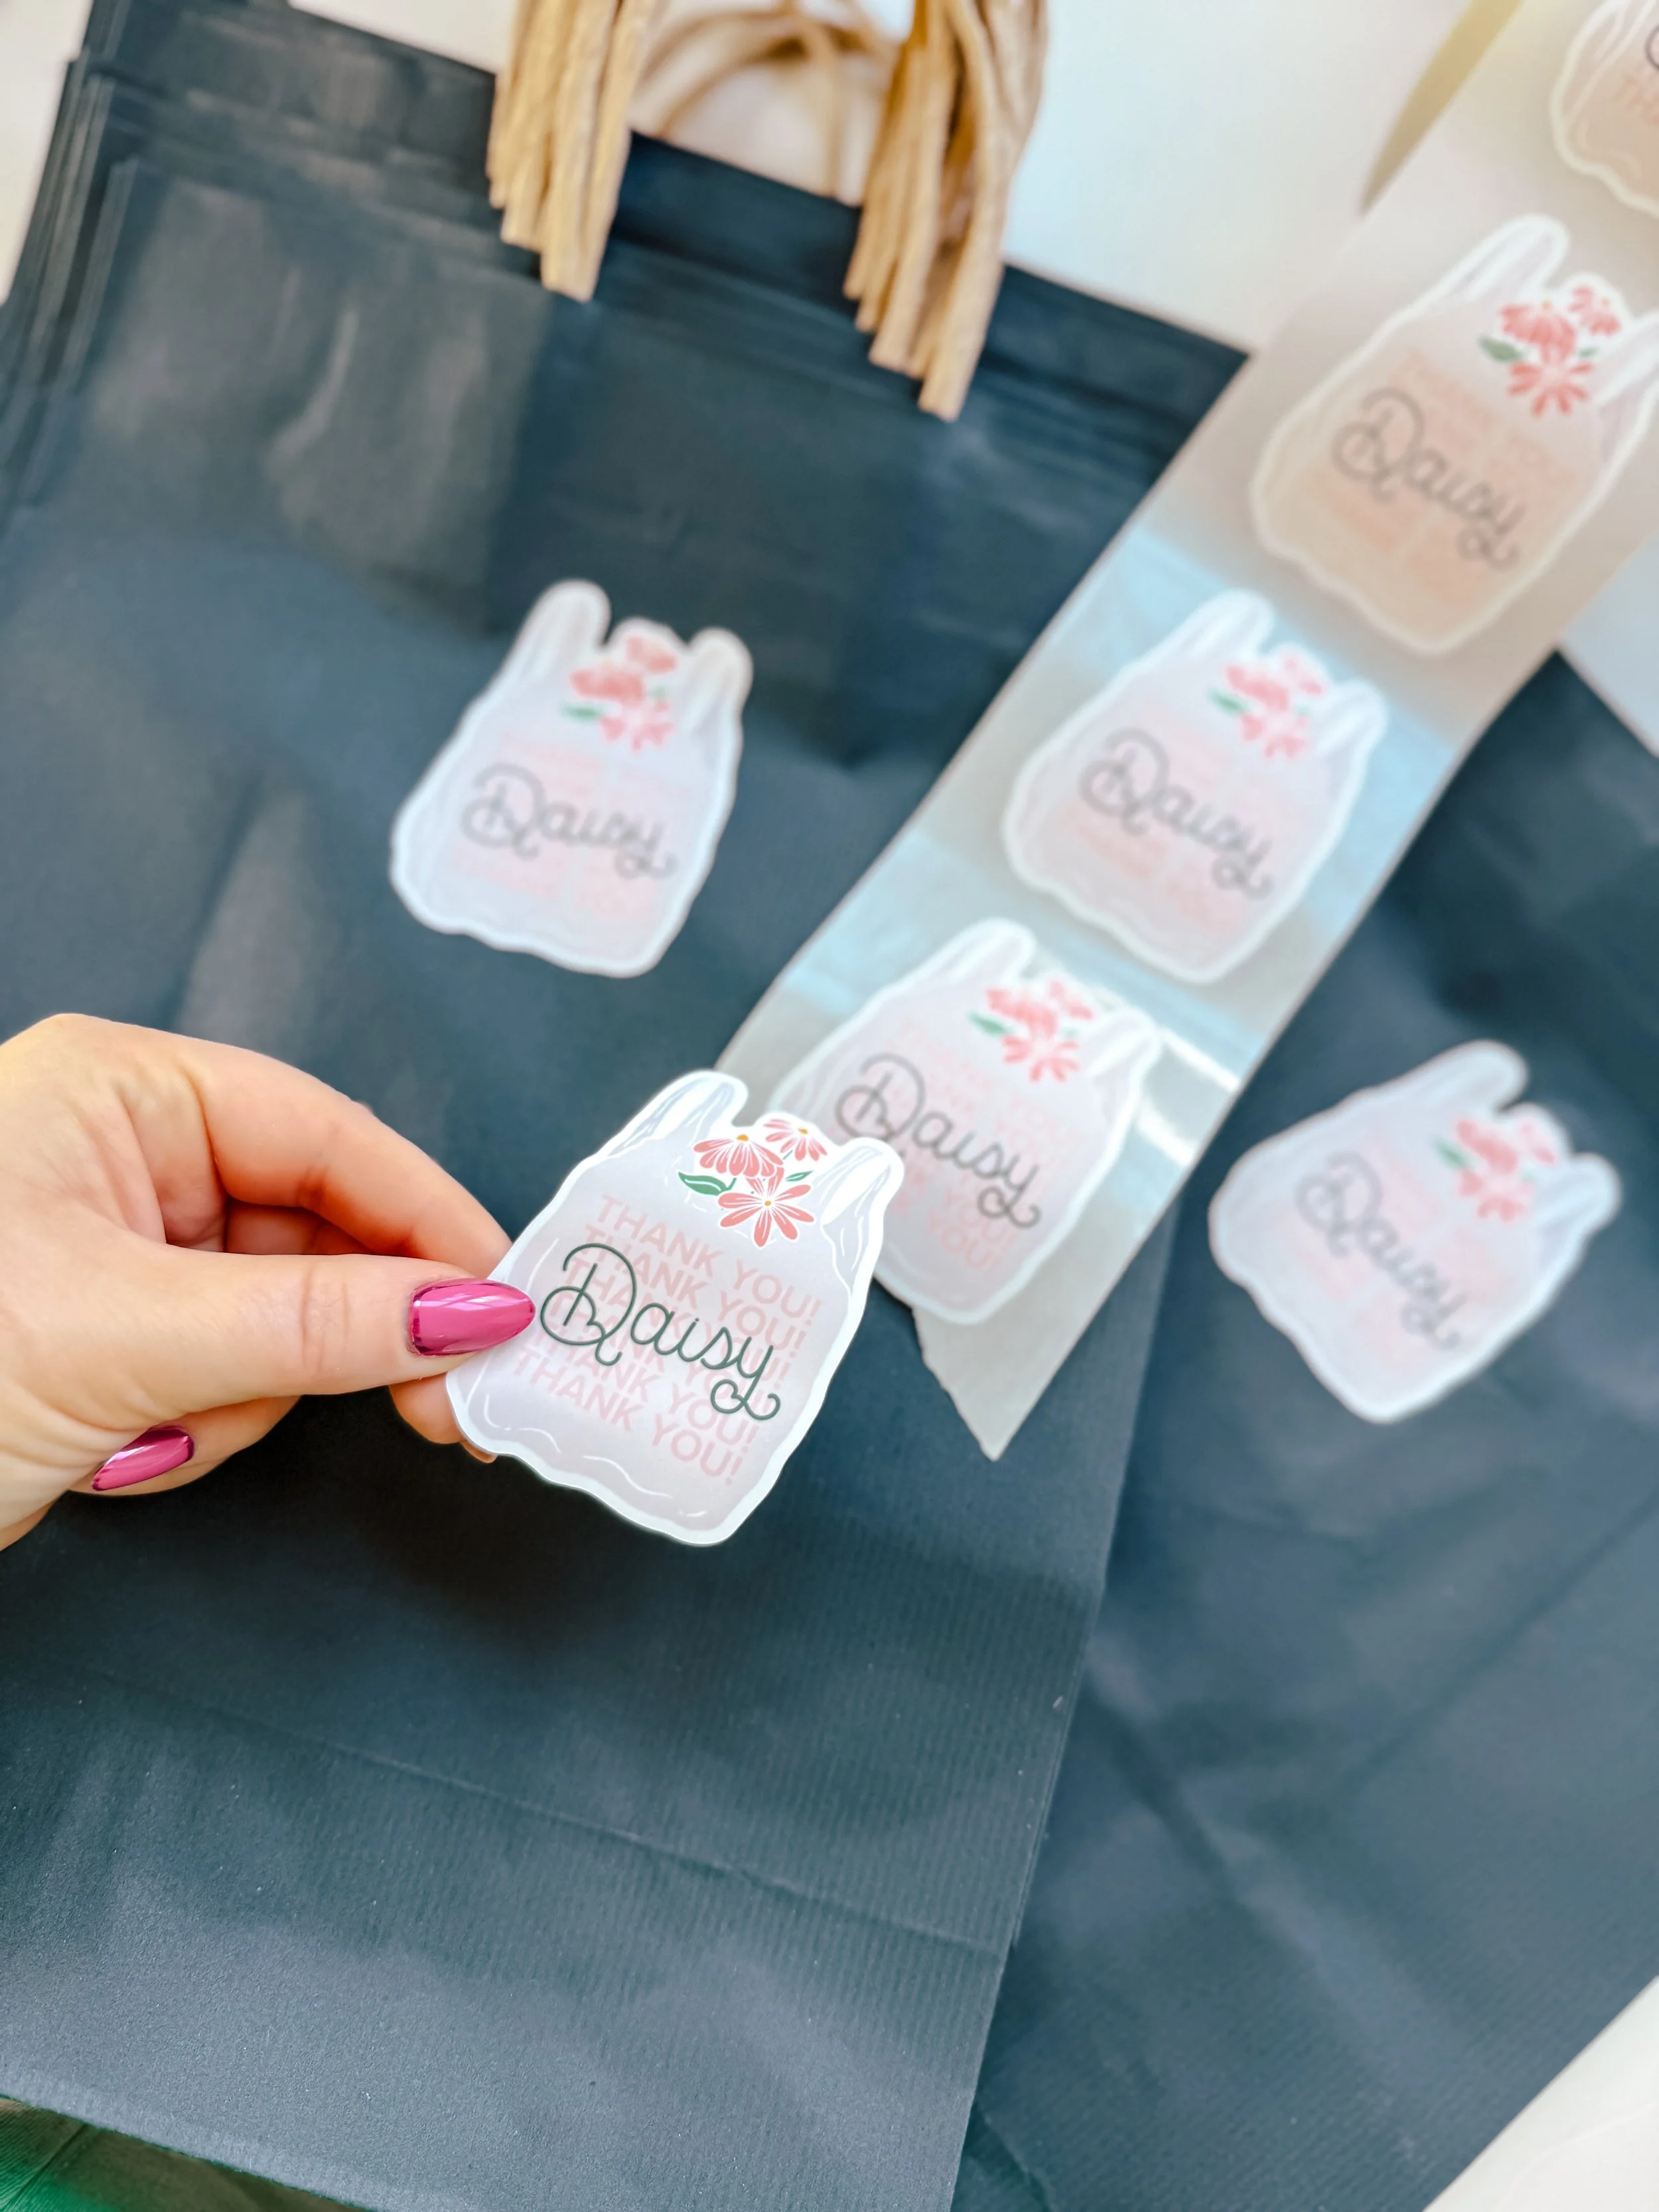
branded stickers for packaging
I love adding a branded touch to all aspects of my business and my bags and order shipments are no different! StickerMule offers packaging labels as well as custom packaging like bubble mailers, poly mailers and packaging tape. Check out StickerMule’s offerings here by clicking here.


branded custom gift bags
I mean…how CUTE! For big events where I want to stand out, I love getting these branded gift bags made! I’ve worked with PackM on a few campaigns including these gift bags which are my all-time favorite. This is also a fun way to change up your experience throughout the seasons - like the holiday gift bags I designed last year. Learn more about creating custom gift bags by clicking here.


gift with purchase
I’ve done a gift with purchase several times and it’s been a fun and exciting way to treat my customers! Last holiday season, I did a free set of gift tags with purchases over $100 and I’ve also given away a free print for purchases over $100. It’s a good way to increase sales to get to that $100 purchase amount.
local love products
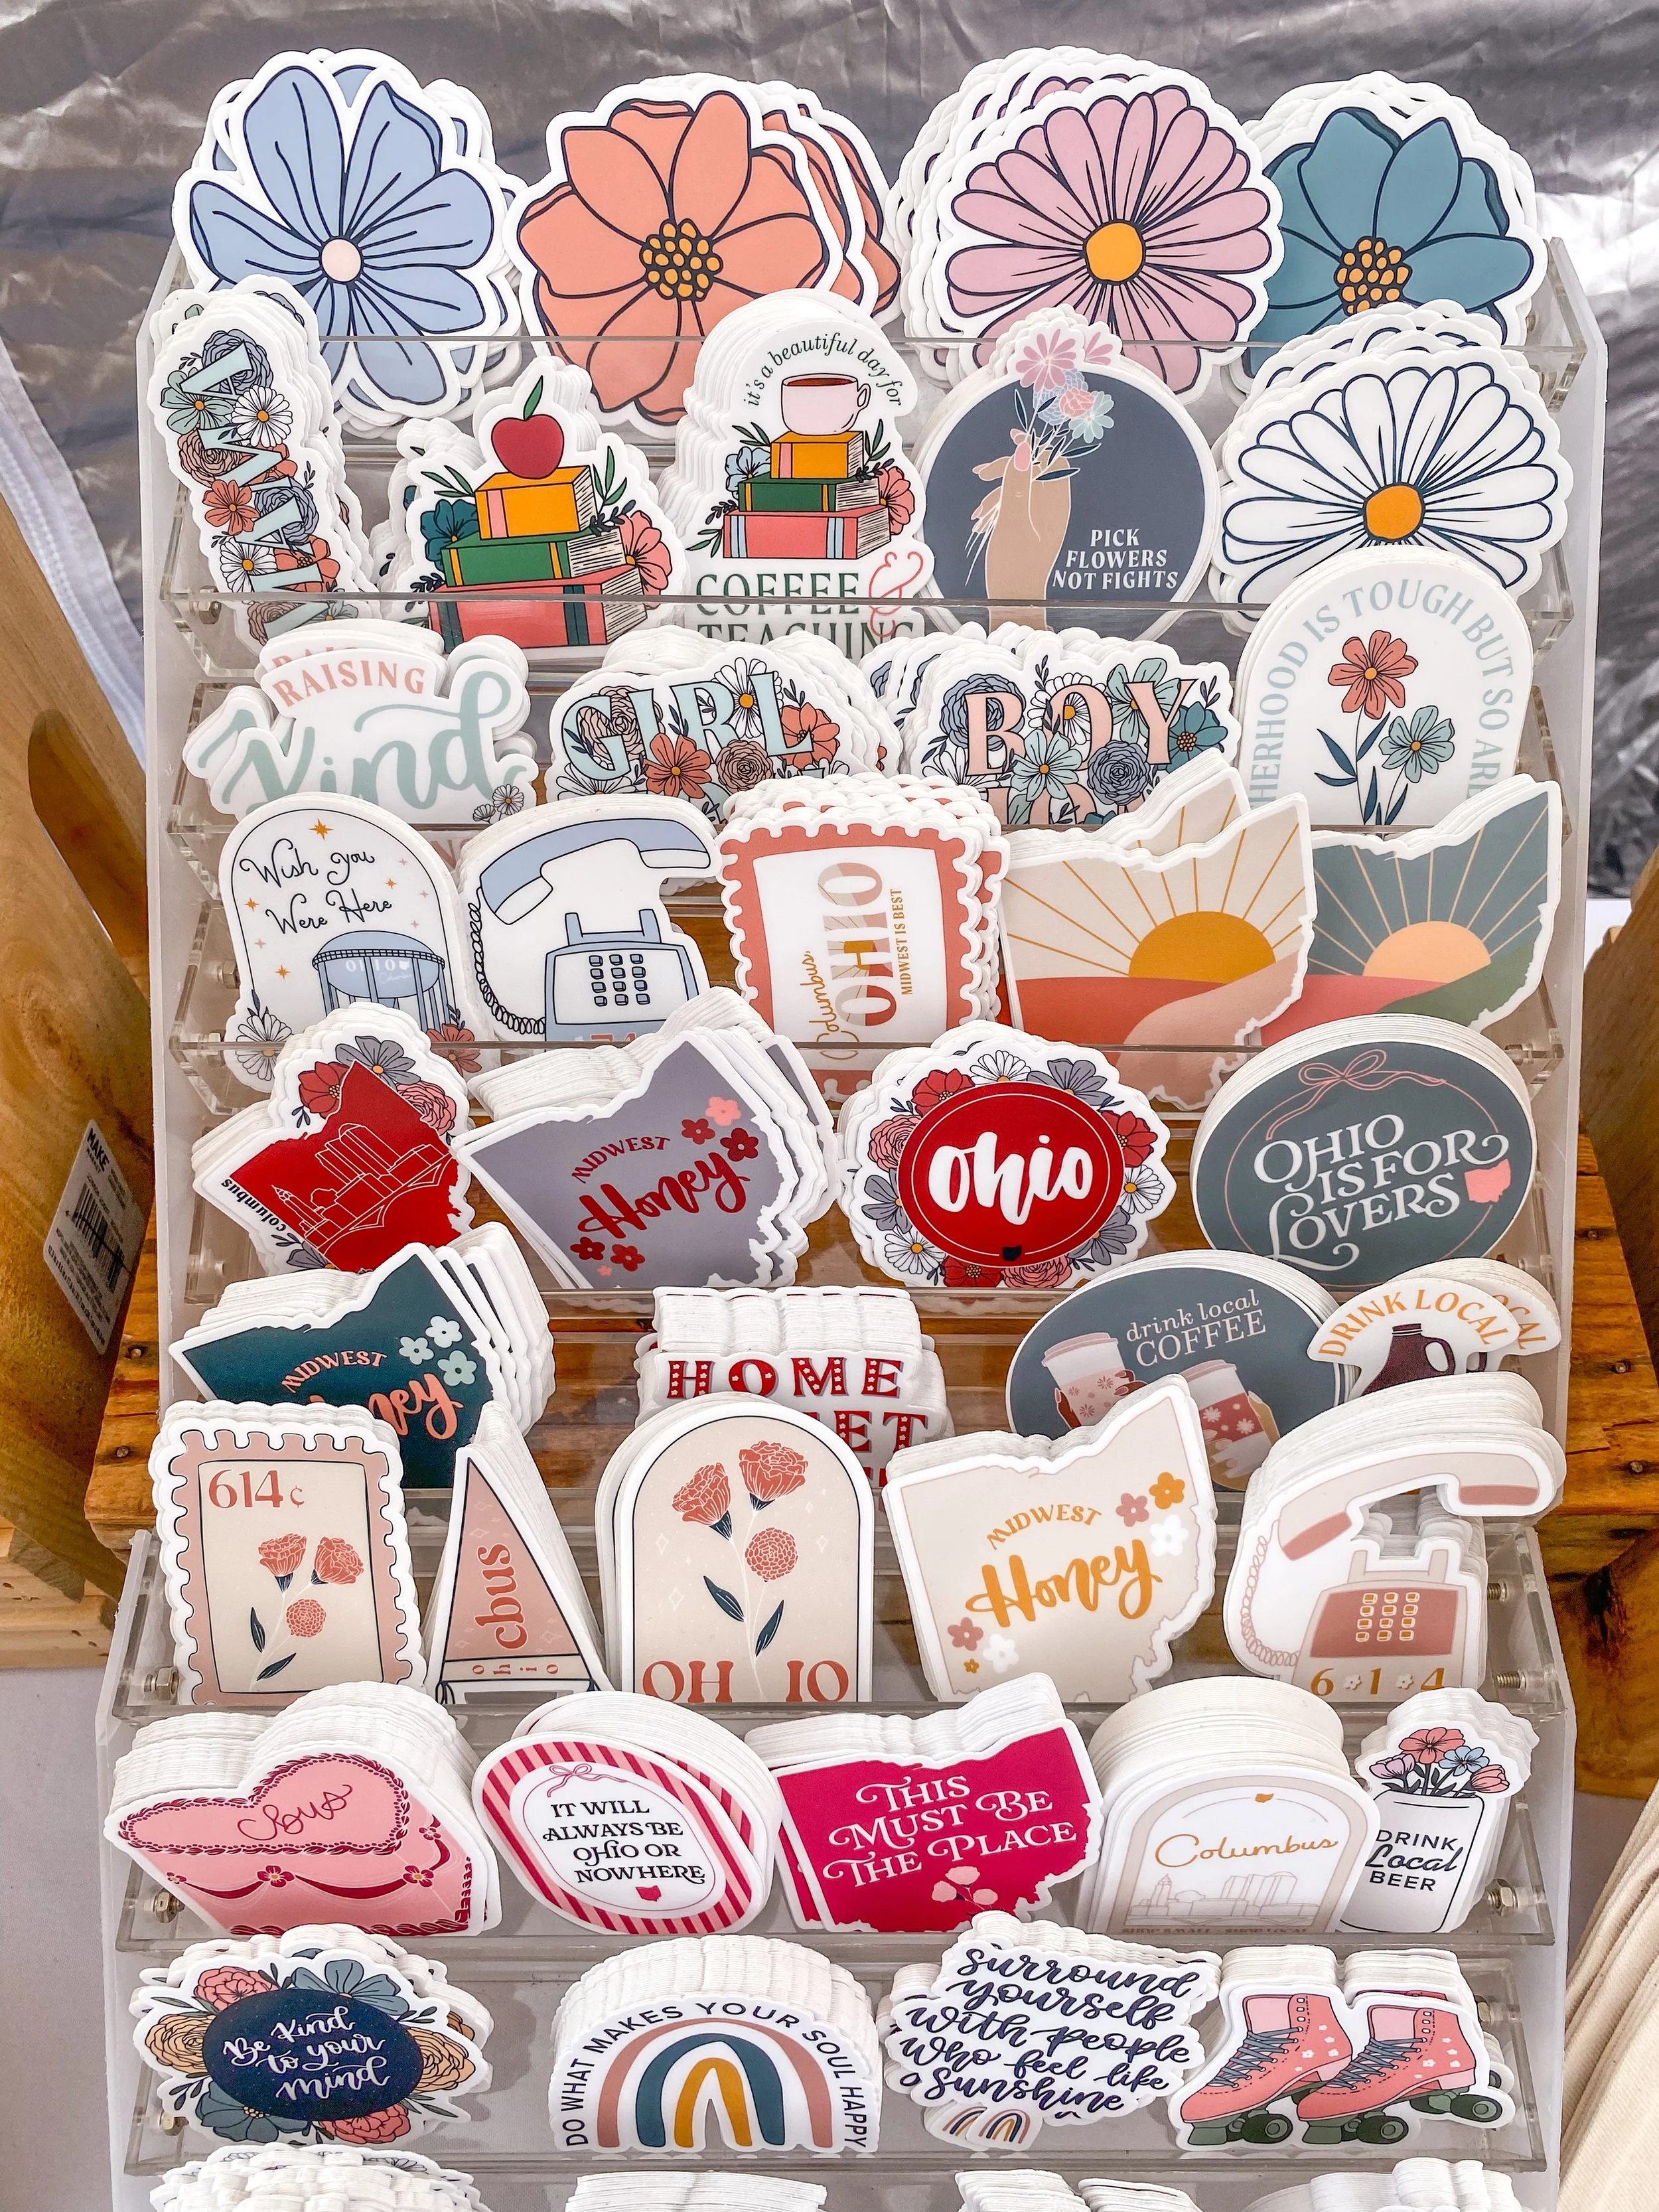
For big events, if I’m going to a new city or venue, I will create some location specific products! People love to rep their hometown so I love adding items and creating specifically for events. An example of this is when I added Cincinnati Bengals inspired stickers to my shop before I did a few events downtown Cincy during football season!
seasonal
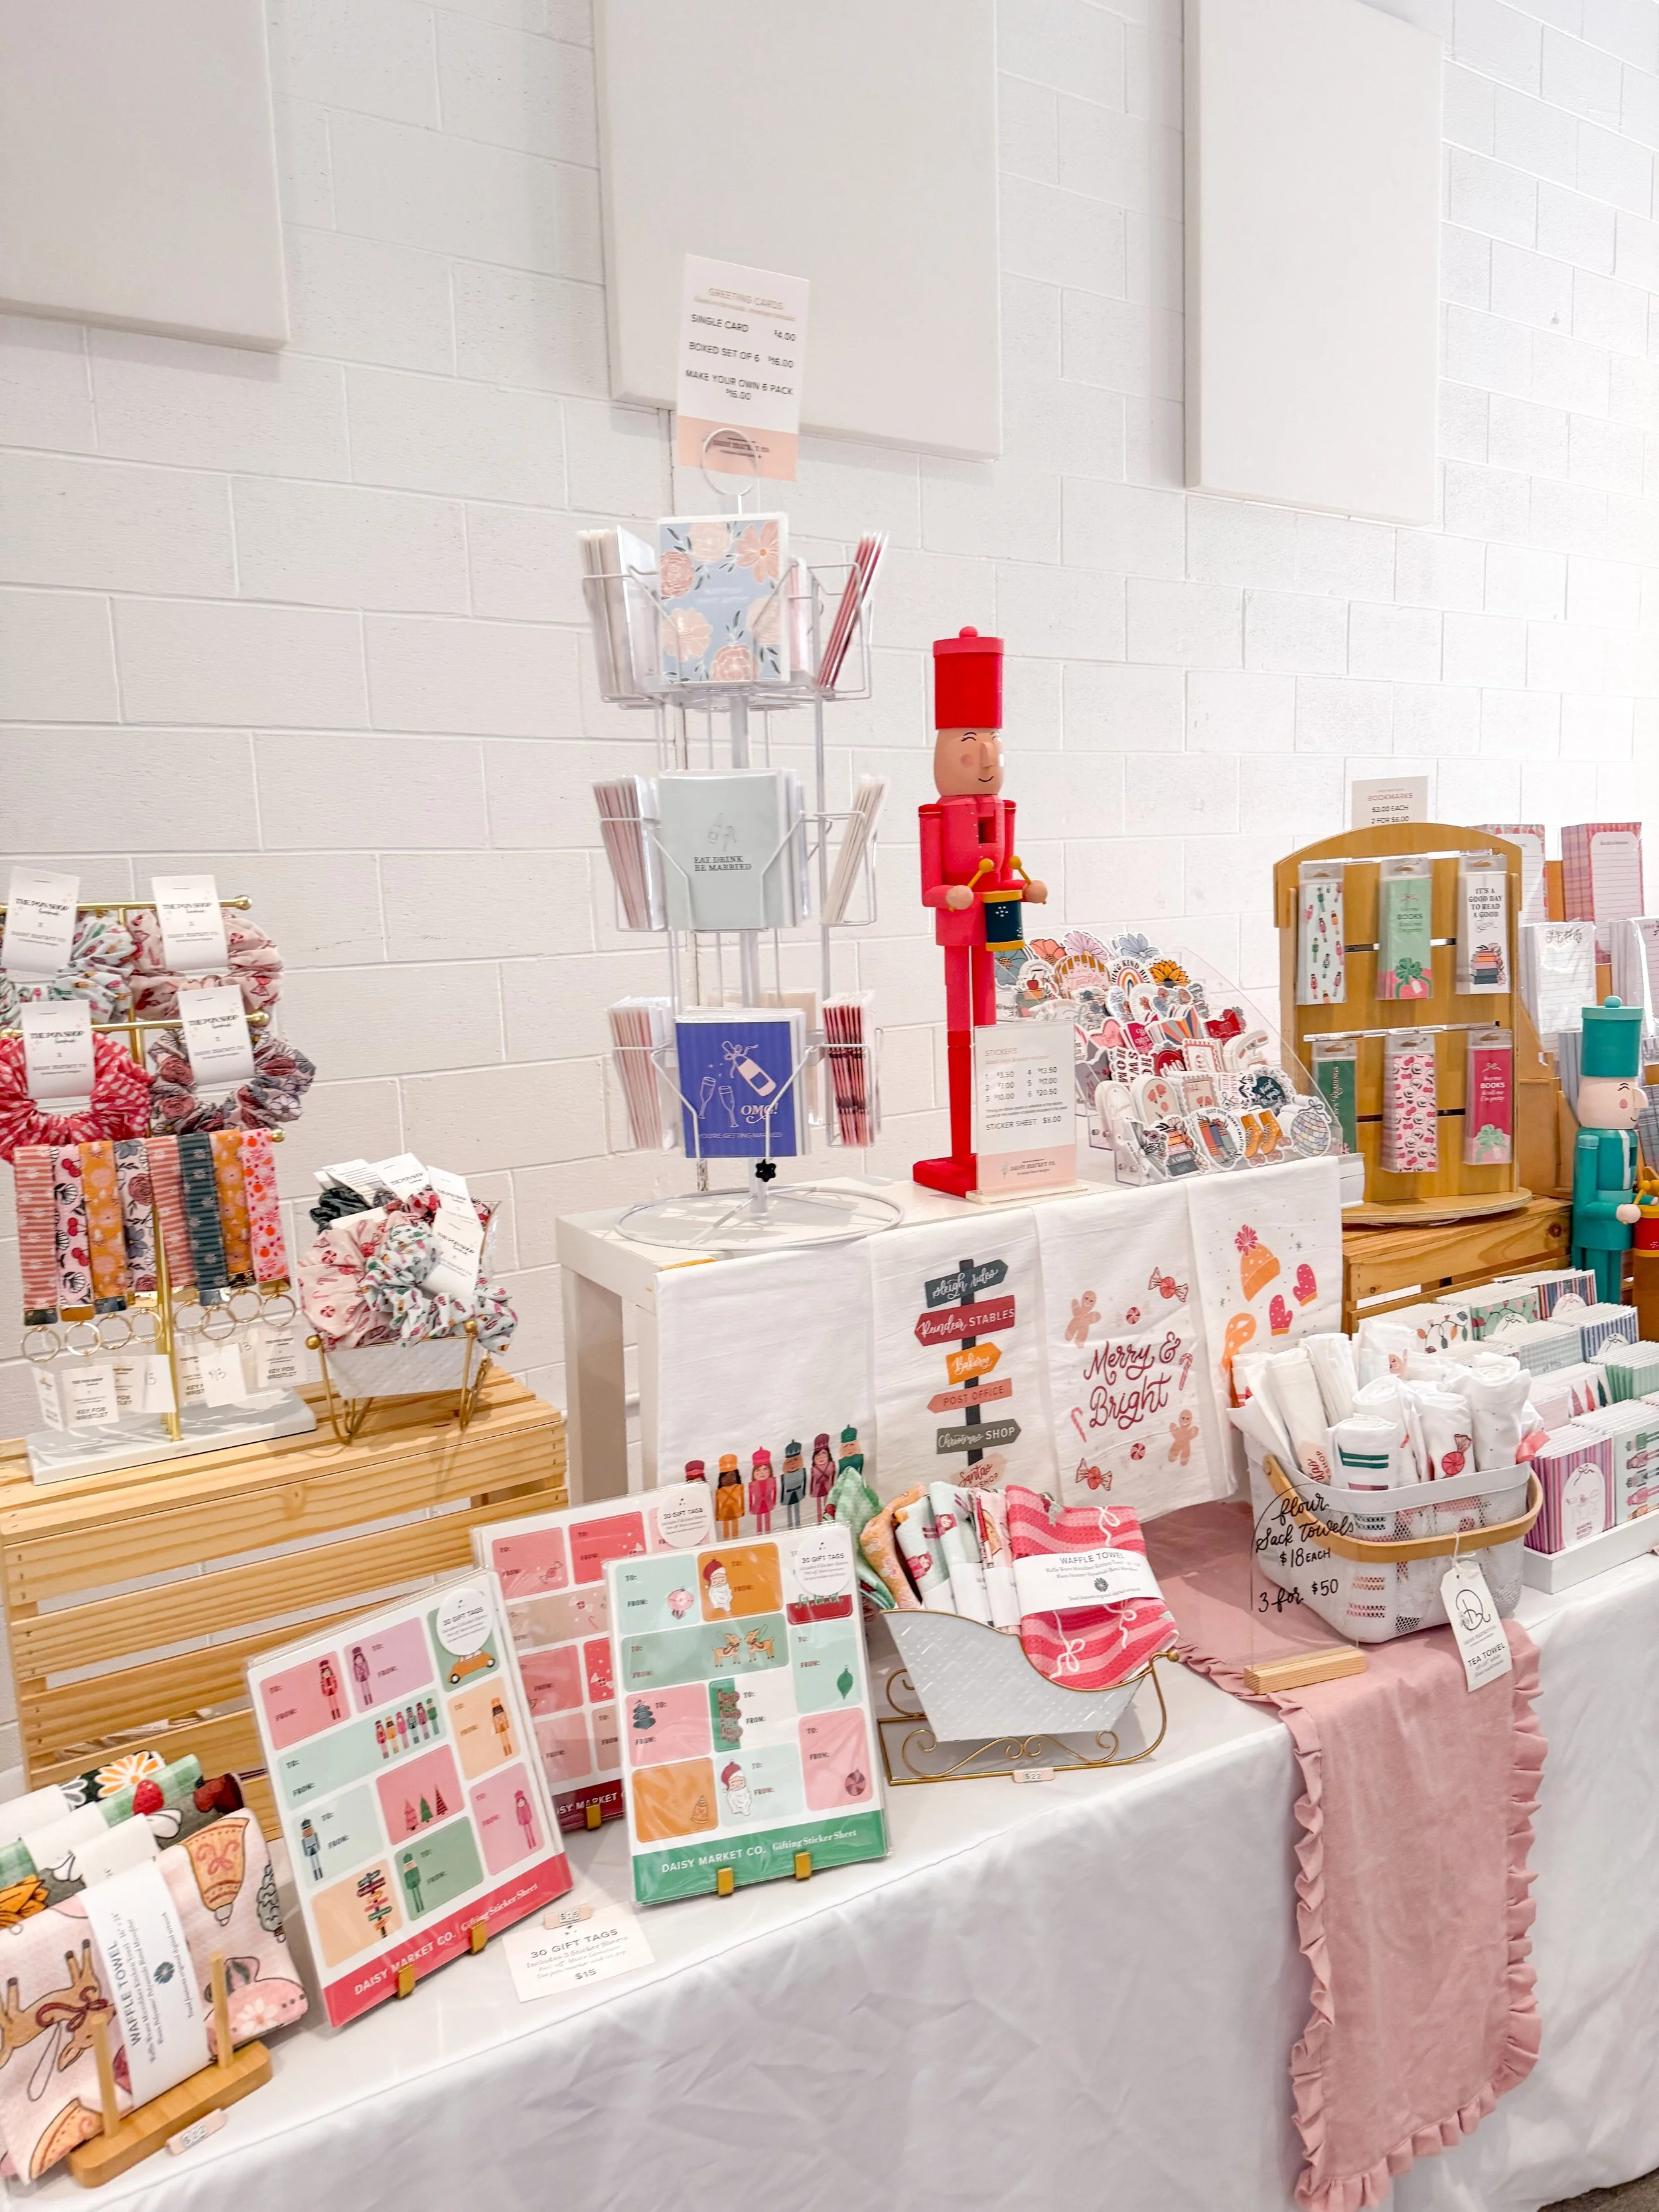
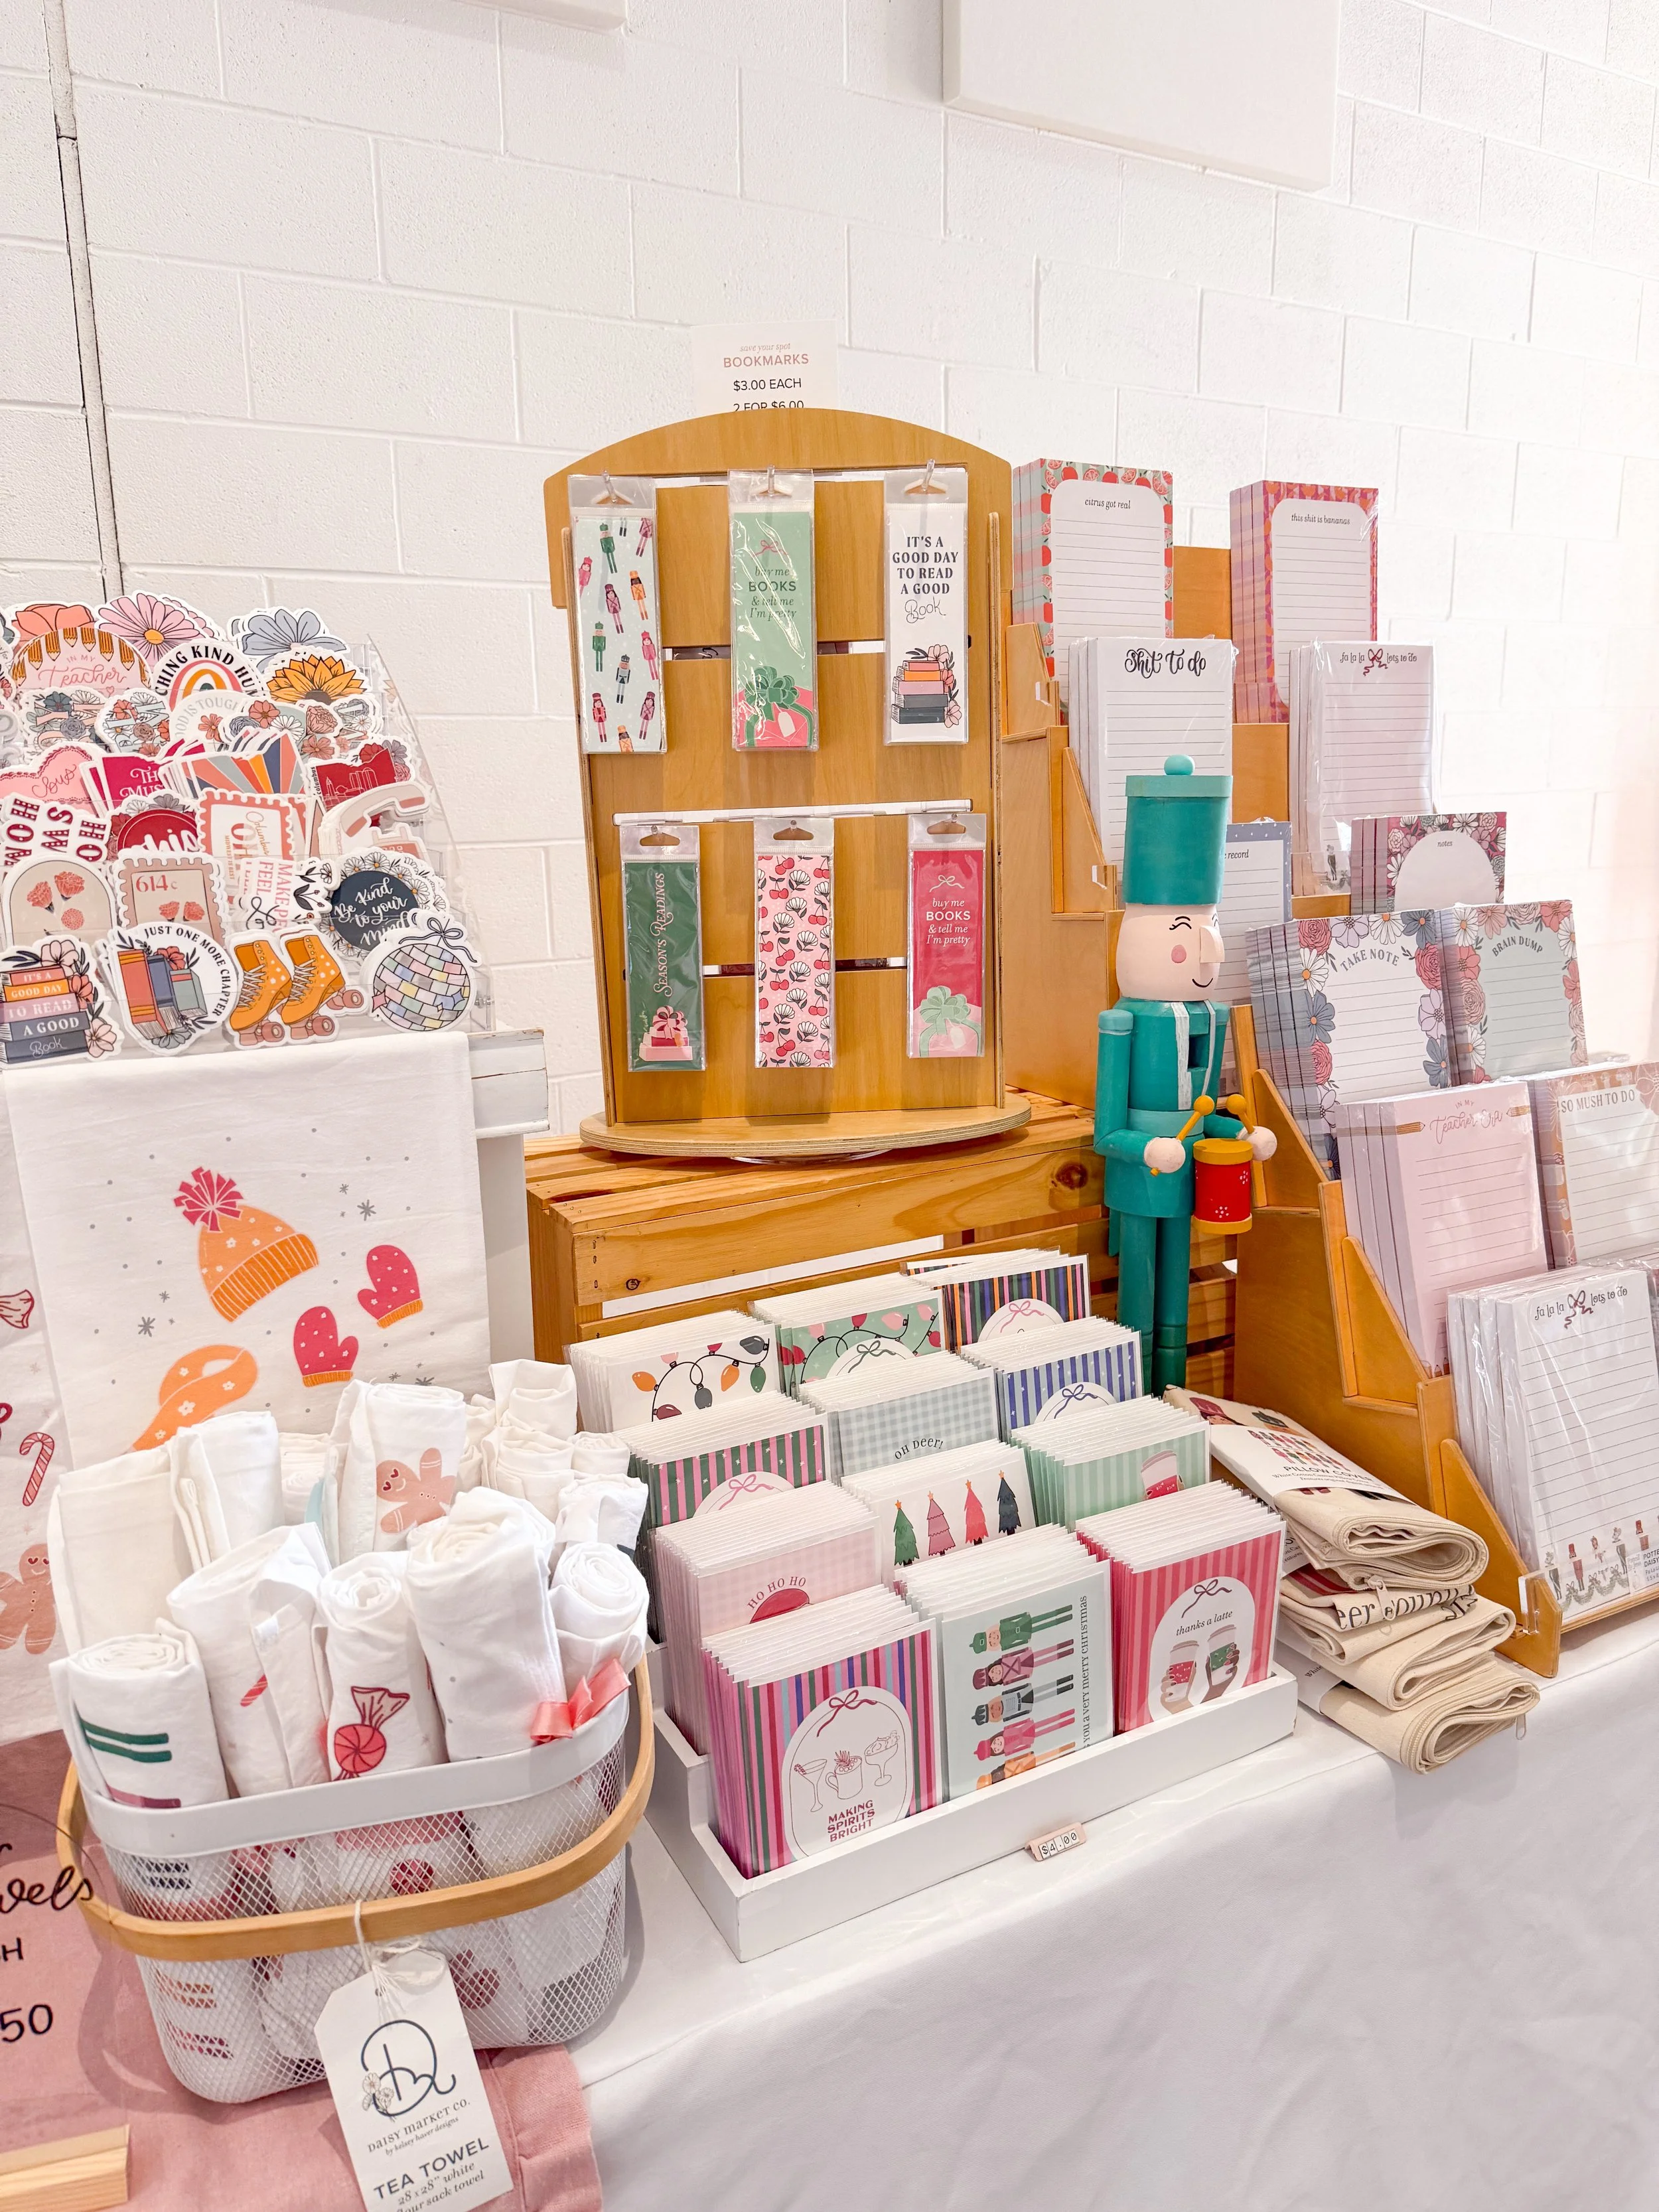
I love switching up my packaging for different seasons and my booth is no exception! I’ll switch out signage, my takeaways/business cards, packaging, etc. to make it more fun and unique. This also adds something to repeat customers - my hope is that they have an experience each time they enter my booth that is meaningful and different!
My favorite piece of seasonal decor to date were the nutcrackers that I painted to match one of my bestselling holiday designs. The nutcrackers were found at Michaels and I painted four of them to place throughout my booth. I had lots of people say that they looked for the nutcrackers as a way to find my booth amongst all the makers. So, for the holidays, I use the nutcrackers as an identifier! Now, I have a large vinyl banner as well as a sewn fabric banner that features the nutcracker design. Think about how you can DIY something fun like this for an extra special touch.


tips
Here’s some rapid fire tips, tricks and ideas for your events!
Takeaways - instead of business cards, I typically have a card that has information on one side and then a mini art print on the back! It’s more sustainable to have something that is multi-purpose and it makes customers happy!
Brand Everything - put your logo and business name as many places as you can! On signs, on packaging, on price sheets, etc. Create that brand recognition and exposure within your booth so everything is consistent! PS - if you need a logo design or a rebrand, fill out the form on the contact tab of my site to work with me!
Coupon Codes - if I sell out of something that someone is looking for (example, a particular size tshirt) I have a coupon code that I give out so they can order online! Another tip is to give out coupon codes when customers make a purchase, you can change this coupon code for different events or during different seasons to track which events are giving you repeat customers and which events are better for exposure!
Giveaways - offer giveaways at your booth! Before a big event, I’ll post a giveaway on my instagram and have a sign in my booth advertising it! Make sure the requirements include following you on instagram or subscribing to your email list and gain more followers and subscribers from the event. Sticker Mule launched Give, which is an easy way to do giveaways that could be utilized at events too! Learn more about Give by clicking here.
Say Hi - easier said than done but welcome people into your booth, offer to answer questions, tell them a little about your products, etc. People are more inclined to make a purchase when they feel a connection.
Price Lists - have several price lists and pricing signage throughout your booth if you aren’t planning to label everything individually! I keep mine in acrylic stands (a few sizes available) that are linked here.
Price Signs - if you are wanting to price things individually, these linked here are a good, flexible option that can be changed and re-used! I use these in combination with the acrylic price signs linked above.
Payment Methods - have multiple and backups (see THE BASICS section above)
Social - I post leading up to the event and after the event! People may see the event and come shop because they saw your post!! Plus, meeting instagram friends in person is so fun.
Post your Schedule - have a markets and events tab on your website so people can plan to shop!
Practice your Setup - do a test! My living room and front yard has frequently been home to a fake setup to make sure I’ll fit in a specific booth space size!
Load the car the night before - if you can, load your car the day before so you have a better start to your market morning! It makes for a less hectic start to the market day and makes me personally less rushed and less likely to forget something. Going along the same lines, lay out your outfit, pack your lunch, fill your water bottle, etc. Set yourself up for success by preparing the night before.
Inventory - my motto is overpack vs. underpack! I typically always have access inventory but I’d rather be prepared and have too many things than not enough. If/when things do sellout, I offer a 10% off coupon code to those who ask for/inquire about a specific item or size at markets so they can order online.
Protect your Inventory - I keep everything in bins in case of bad weather! They stack and are snap enclosed which has helped me during rainy markets.
Offer Market Pickup - if you have an online shop or post on socials, offer market pickup where people can order ahead and pick up at the market to ensure they get an item! This is good for people who have more one-of-a-kind / made to order products but also works for me with apparel.
Sell - I’m by no means a “pushy” vendor. However, if someone is looking at a product, I may tell them a feature about the item! For example, my notepads are 100 pages - when someone picks up a notepad I will tell them that it is 100 pages with cardboard backing and tear-off pages, so it should last you a while! Another example is when people are looking at stickers, I’ll let them know that they are water-resistant. These things speak to the quality and may encourage a sale but they are not pushy or aggressive.
People will be rude - unfortunately there will be Karens who openly tell you they hate something, that they think your prices are too high, etc. Way easier said than done but try not to let it get to you. In those instances, I usually say something along the lines of “that’s the reason I love events like this is because there’s so many different vendors with something for everyone!” Remember you aren’t alone and everyone gets these comments - follow @smallbizmemez on instagram for a laugh!
my essentials
what’s in my market bag
Portable Charger(s)
iPad for Accepting Payment
Square Card Readers
Cash and Change
Sunglasses
Rain Jacket
Notebook/Notepad as sometimes ideas come to me during events
Medicine and first aid including advil, excedrine, band aids, tissues, etc. You want to be prepared to feel your best!
Sunscreen and/or bug spray depending on the event
Liquid IV as you want to stay hydrated but don’t have a ton of time for bathroom breaks
Hair clips/scrunchies/hat and makeup - it can be super hot or rain so pack for some touch ups! Look good, feel good :)
Change of clothes - for longer events or big setups, I’ll bring a change of clothes to put on after setup before the event!
Food and drinks (see sections below)
what’s in my market box
This is the box that stays packed with my setup gear!
Business Cards / Takeaways - lots of them!
Price Signs
Blank Note Cards (to make backup price signs)
Scissors (you never know when you’ll need these!)
Pens/Pencils
Command Velcro Strips + Zip Ties + Rope for Signage
Granola Bars + Bags of Chips
Liquid IV
Hand Sanitizer / Wet Wipes
nice to haves
These are things that make my market days easier!
Belt Bag - I highly recommend keeping your cash on you and not in a cash box as those can be easily stolen. I have three of these belt bags and LOVE them. Linked the belt bags I have here.
PS - they come out with new colors for different seasons…I have a variety to accommodate different market outfits, haha!
Portable Rechargable Fan - if you’re doing summer markets, you’ll want one of these! It’s rechargable, has different speeds and has a hook so it can either attach to my tent or sit on my counter. Fan is linked here.
Foam Floor Mat - lots of events are on concrete floors or parking lots so I recommend getting one of these to stand on! I’ve linked the one I purchased here.
Comfortable Shoes - along the same lines, I would invest in some comfortable, high quality sneakers for events! I’ve had Hokas for about a year and they definitely make a difference for long market days! My Hokas inked here.
Water Bottle - staying hydrated is a must and the Brumates (Toddy XL and Eras) keeps drinks cold for hours. I’ve been at all day markets and left with ice. PLUS, they come in really cute colors and look great with my stickers on them!! Linked here
Liquid IV - again, you want to stay hydrated! I put these into my water for some extra hydration because you’ll never get as many bathroom breaks as you want if you’re solo at a market. Linking my favorite flavor here.
Caffeinated Greens - I drink these before markets and in the afternoon for a healthy caffeine boost! Coffee and soda can sometimes feel heavy whereas these are a healthier alternative and mixed with water for more hydration. Try BetterDaysCo caffeinated greens here. My go-to flavors are the Raspberry Limeade and Peach Limeade - I have a subscription setup!
Foot Massager - this is definitely NOT a necessity but I absolutely love mine! I received it as a gift last Christmas after constantly complaining that my feet hurt after market days and this is a total game changer for the nights in between back to back market days. This one is the one I have - a great gift or treat for yourself!


snacks & food at markets
While I LOVE when markets and events have local food trucks and vendors, not all markets do. Plus, you may not be able to get away from your booth long enough to wait for food. Typically I keep some granola bars and bags of chips/crackers in my market box but I’ve listed a few easy go-to snacks to pack.
Chomps Beef Sticks - lots of flavors but the original is my favorite and linked here
Oat Bites + Granola Bars - lots of protein!
“Adult Lunchable” - hardboiled eggs with everything but the bagel seasoning, apple with peanut butter and crackers
Fruit/Veggies - cut up into bite size pieces so you can grab bites when you have a moment
Hummus & Pita Chips - add some veggies for a healthy and filling combo.
Pasta Salad - I meal prep this as it’s super filling and doesn’t feel super heavy in my opinion!
Good old PB&J is also a go-to as well
Starbucks Snack Boxes are also an easy thing to pickup and take with you!
what to wear
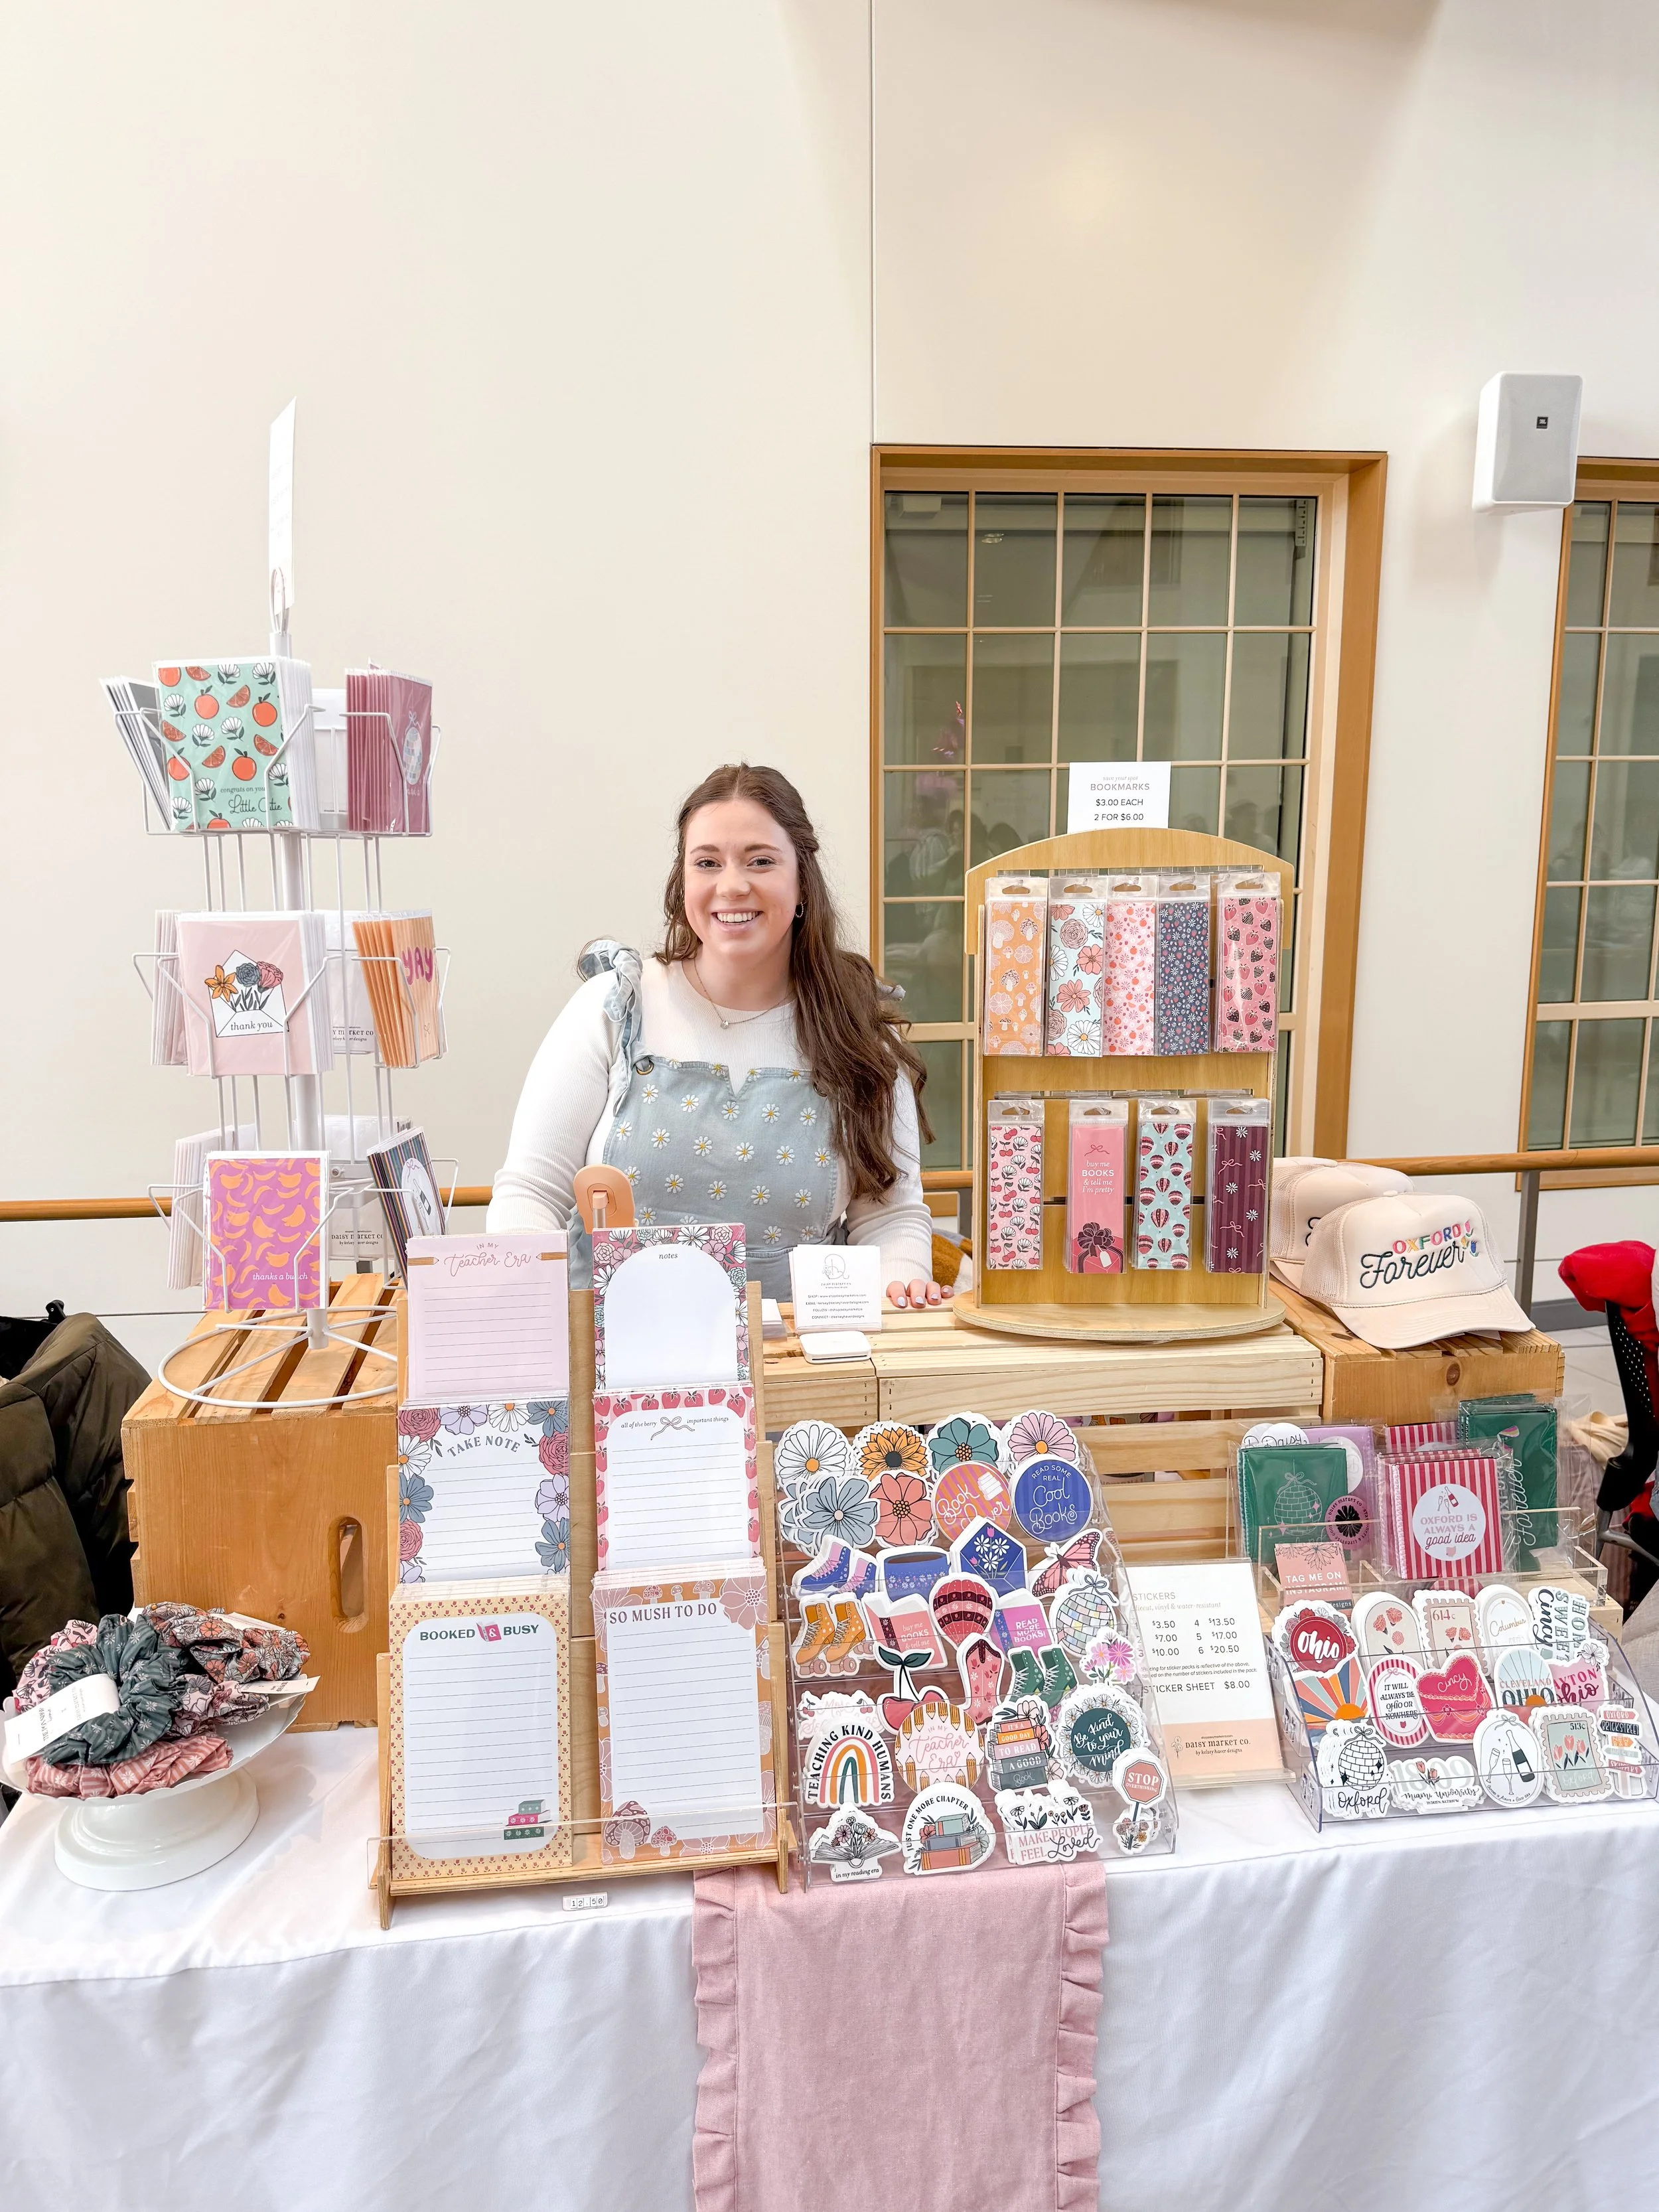
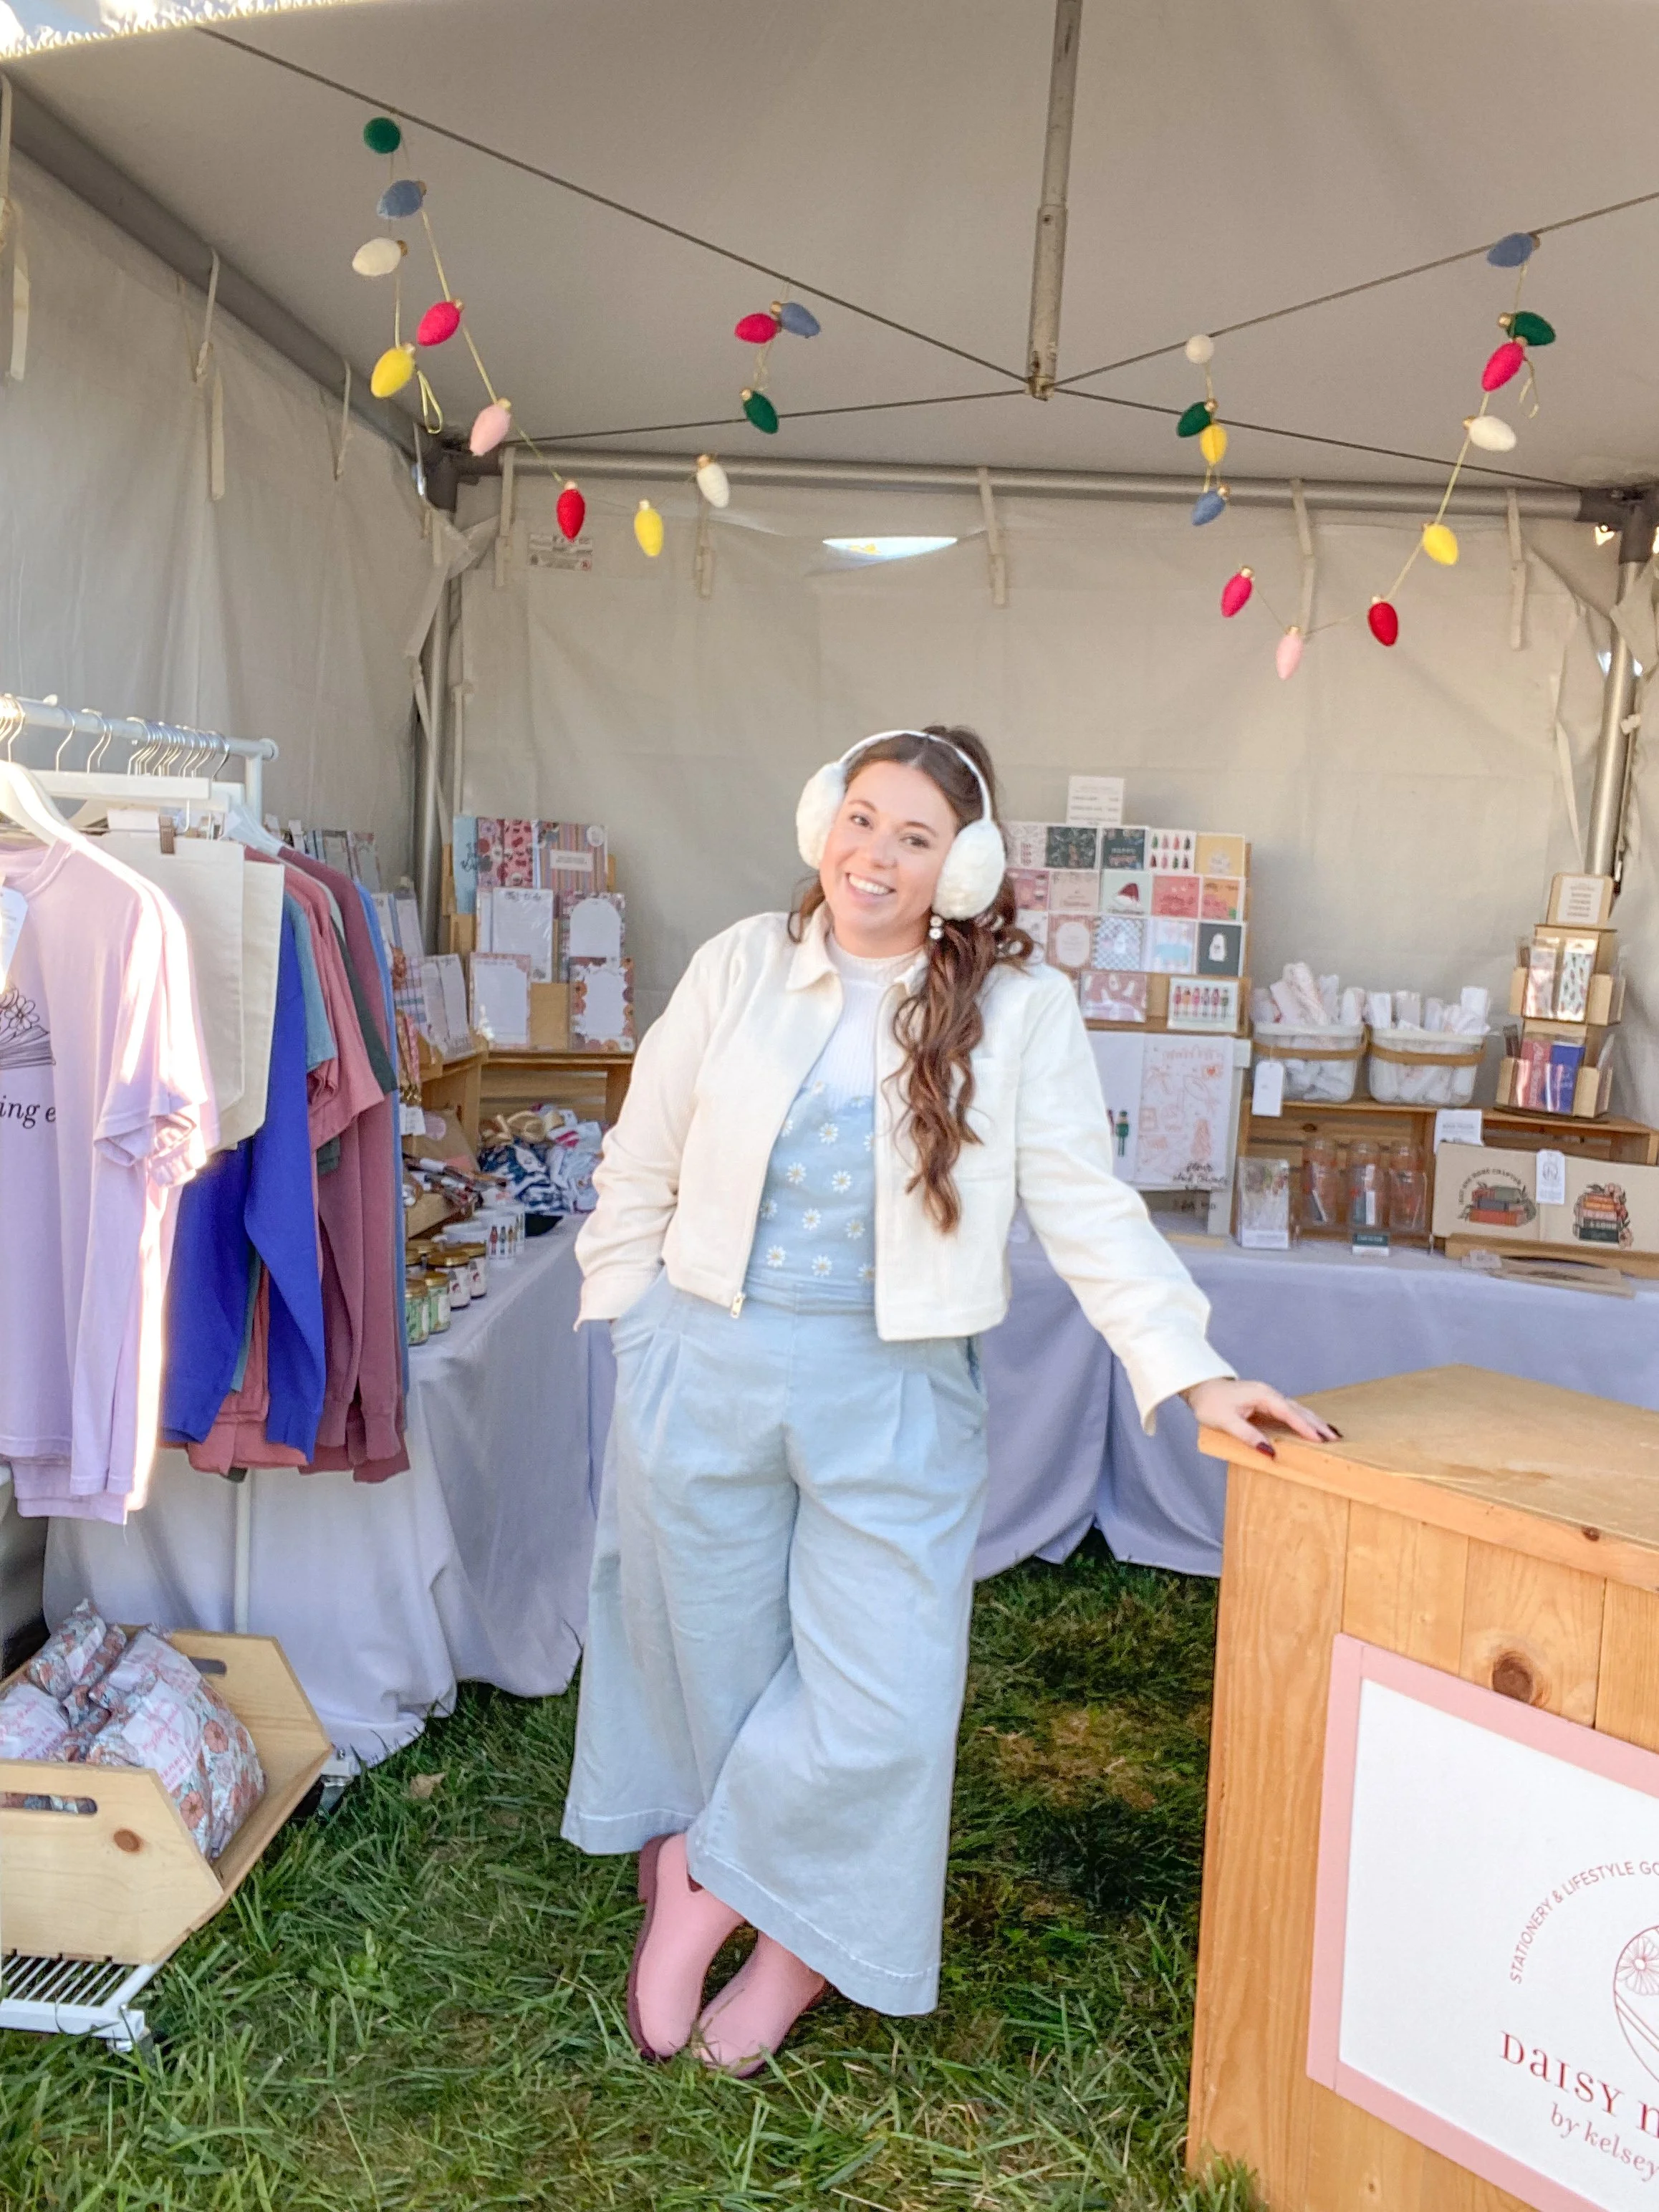
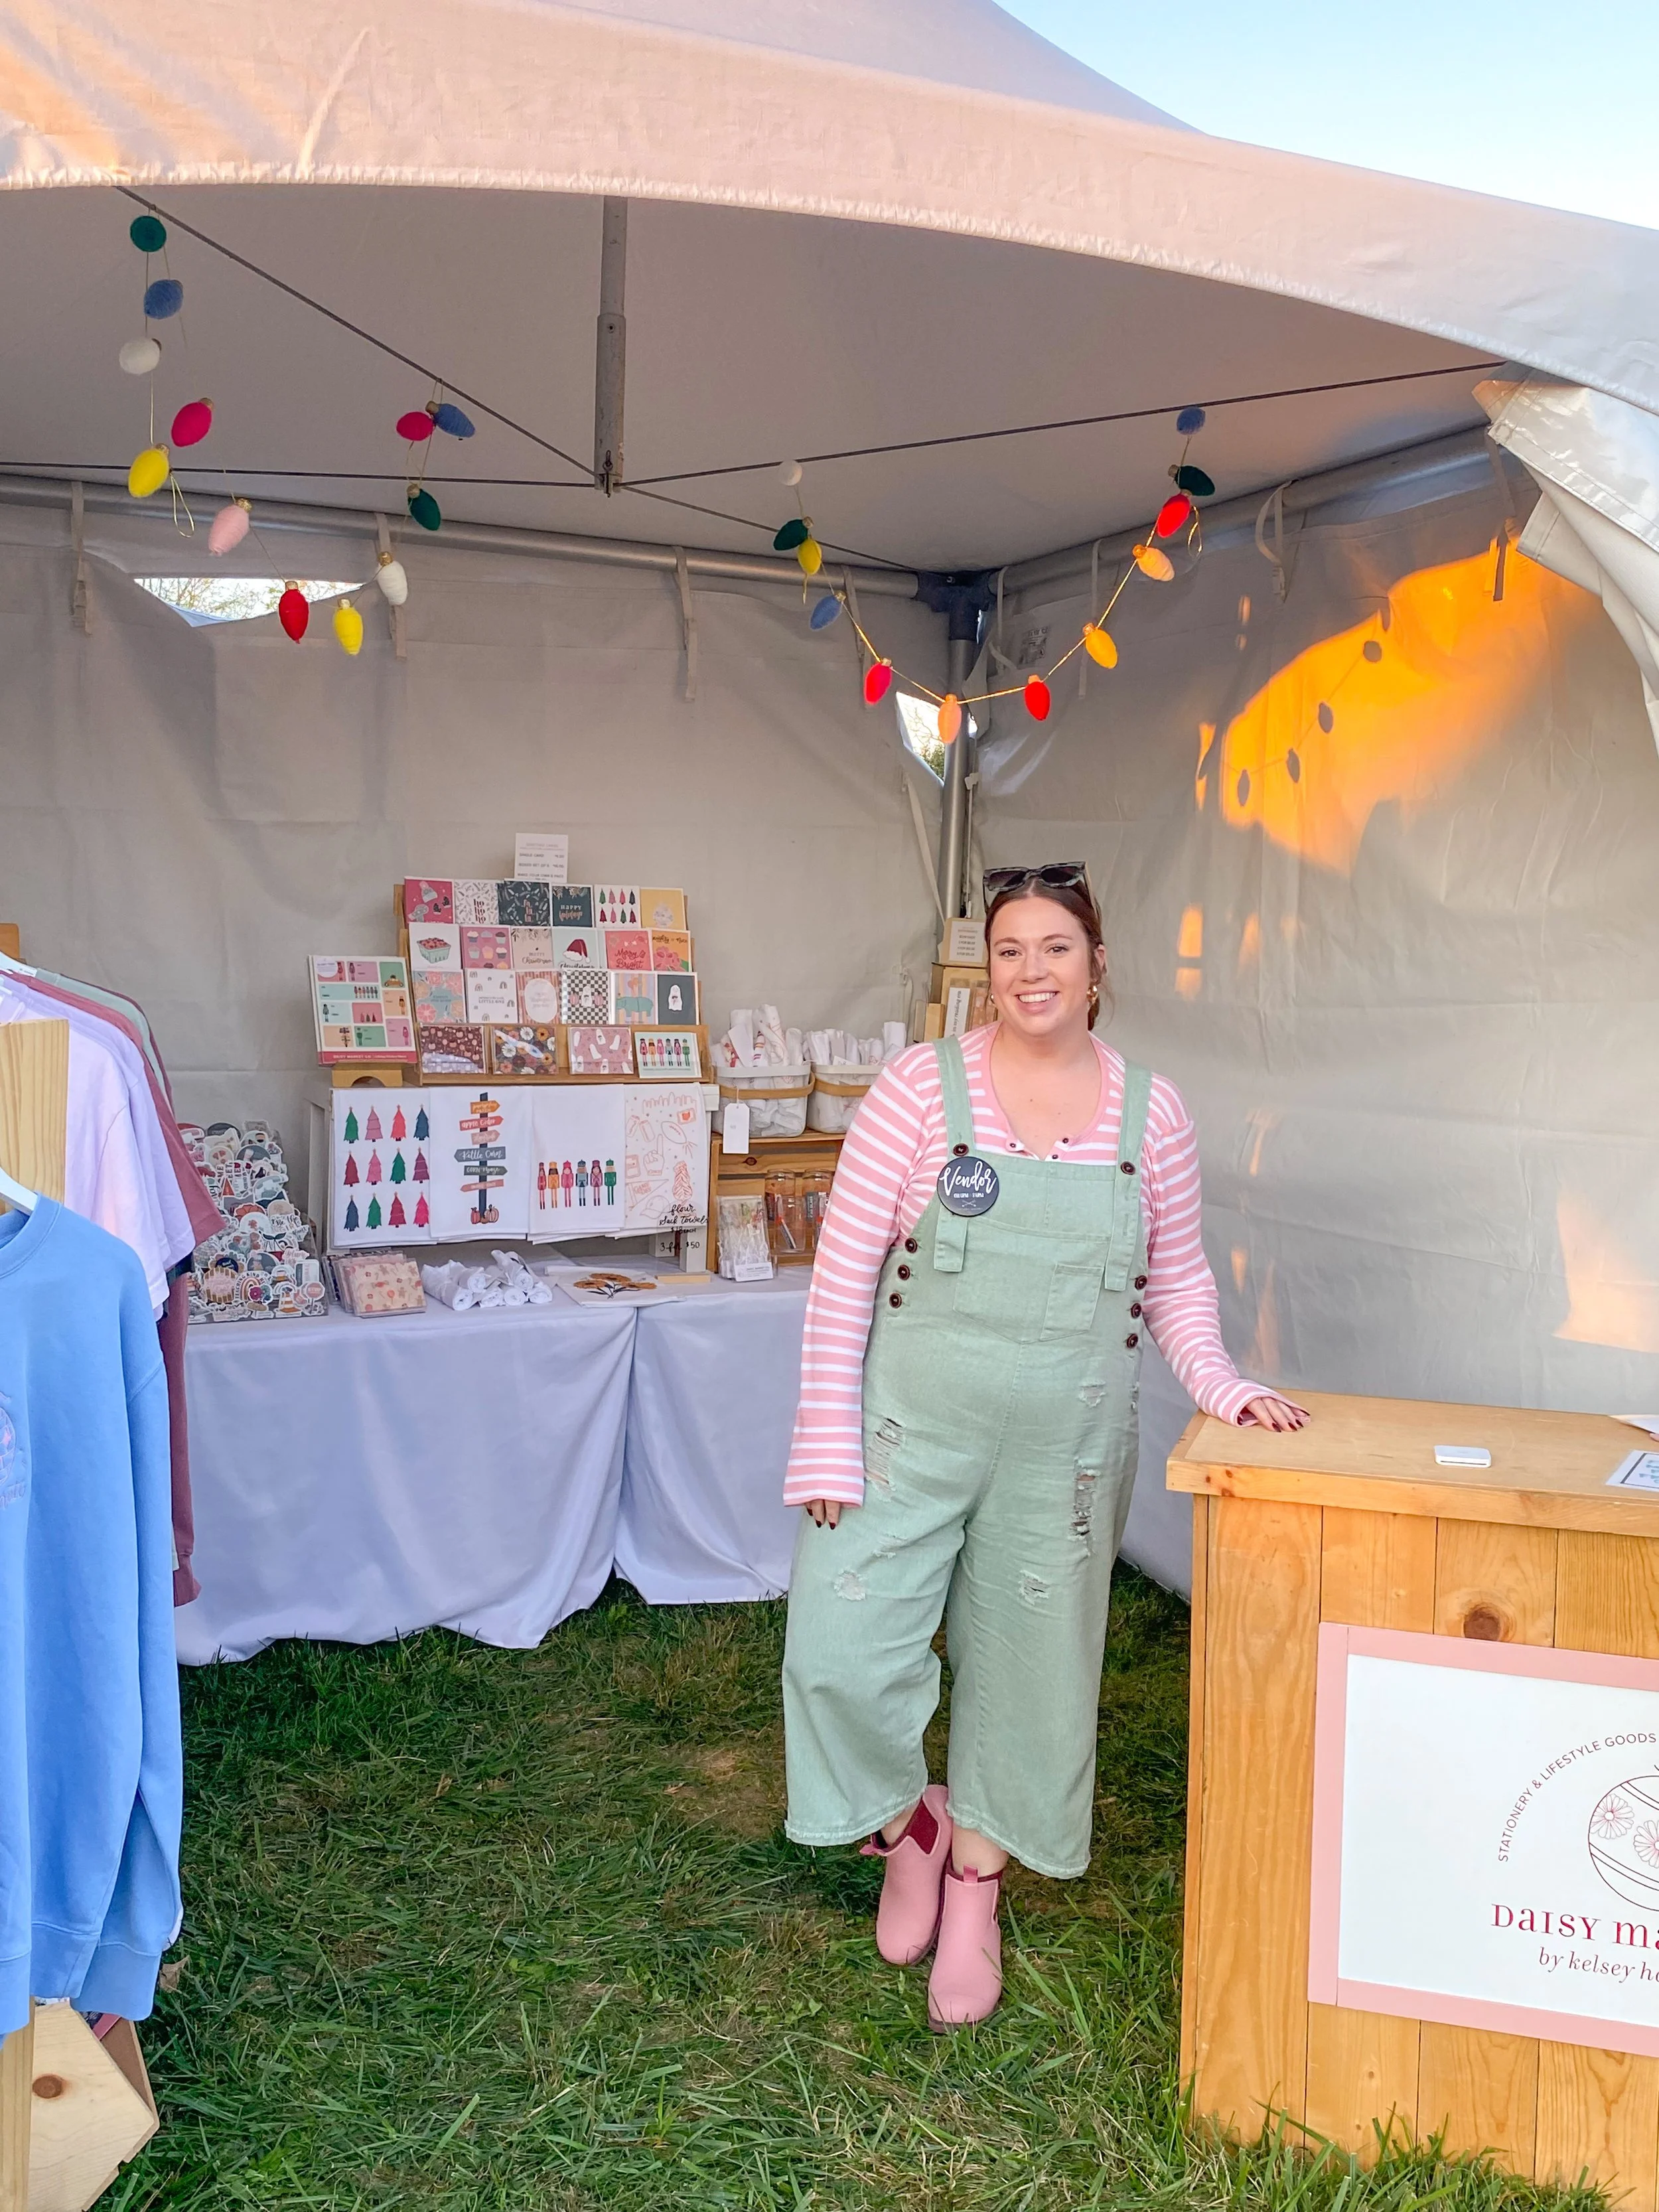
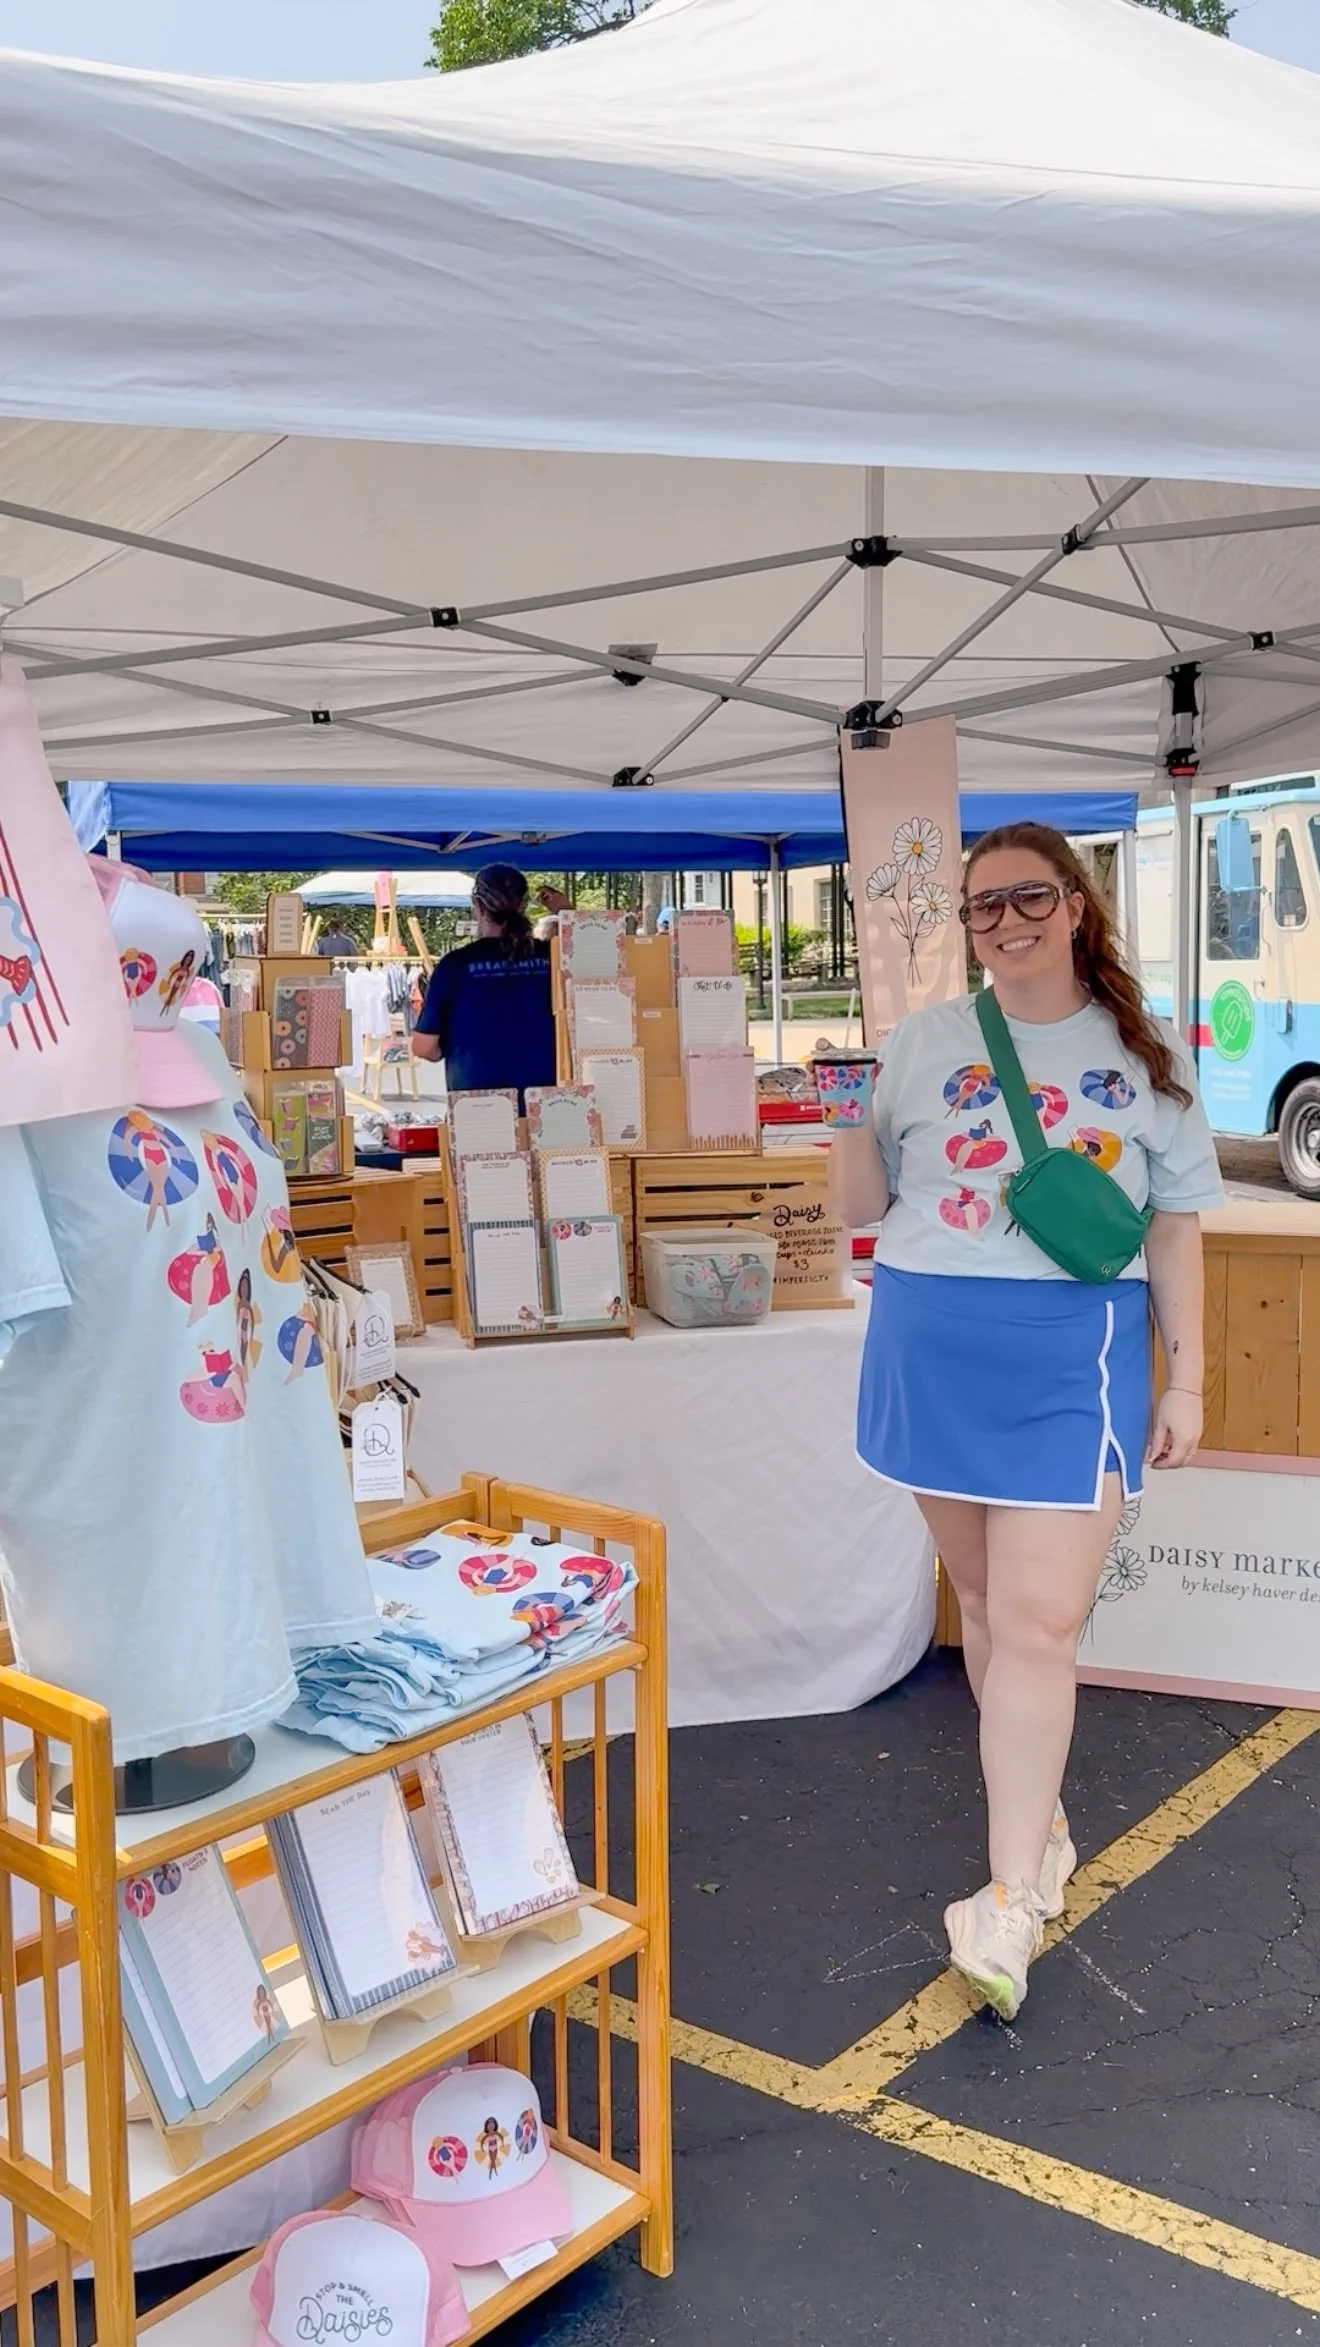
I’m a big believer in “look good, feel good” so I love putting together on brand outfits to match my brand and the aesthetic of my booth! You’re creating a full brand experience when people enter your booth so don’t forget yourself. Let your brand personality shine through all elements of your booth - plus, I think it’s fun to match! You’ll often find me wearing daisies :)
At the end of the day - do what makes you feel good and is comfortable. Outdoor markets can be HOT or rainy or windy and you can be on your feet for hours. I noted above that I will bring a clothes to change into after setup and before the market begins - definitely recommend this for certain markets!
Some events do have dress codes (for example, I’ve vended at a fashion show before where we had to dress according to theme) but the organizer should make that apparent if a dress code is needed. You can always go to the social media pages for the event and see what other vendors have worn for an idea! If there is a theme (think holiday events or Valentine’s events) then it is fun to dress on theme! I’ll often wear seasonal colors (think red/green during the holidays or something with hearts/pink for vday) and fun earrings to match the vibe.
When deciding what to wear, I factor in the venue, weather and length of the event. So, you’ll see that what I wear varies a lot! Here’s a few tips:
Wear your products - if you have apparel, hats or hair accessories, etc. in your shop, wear them at events! People like to see the items being worn.
Layers layers layers! Sometimes setup is early in the morning when it’s still chilly so layers are a go-to for me. If you’re wearing a belt bag (to keep your cash/change,etc), choose something that either buttons or zips up so you can take it on/off without putting it over your head. Girls - I often wear tank tops underneath tops so I can always take off a layer during setup if I need to, that’s when I sweat the most! One of my favorites is from Blush & Bubbly Boutique - they have so many color options and I’ll link it here.
Invest in good rain gear - my favorite pair of comfortable rain boots are from Merry People. I’ll link those here.
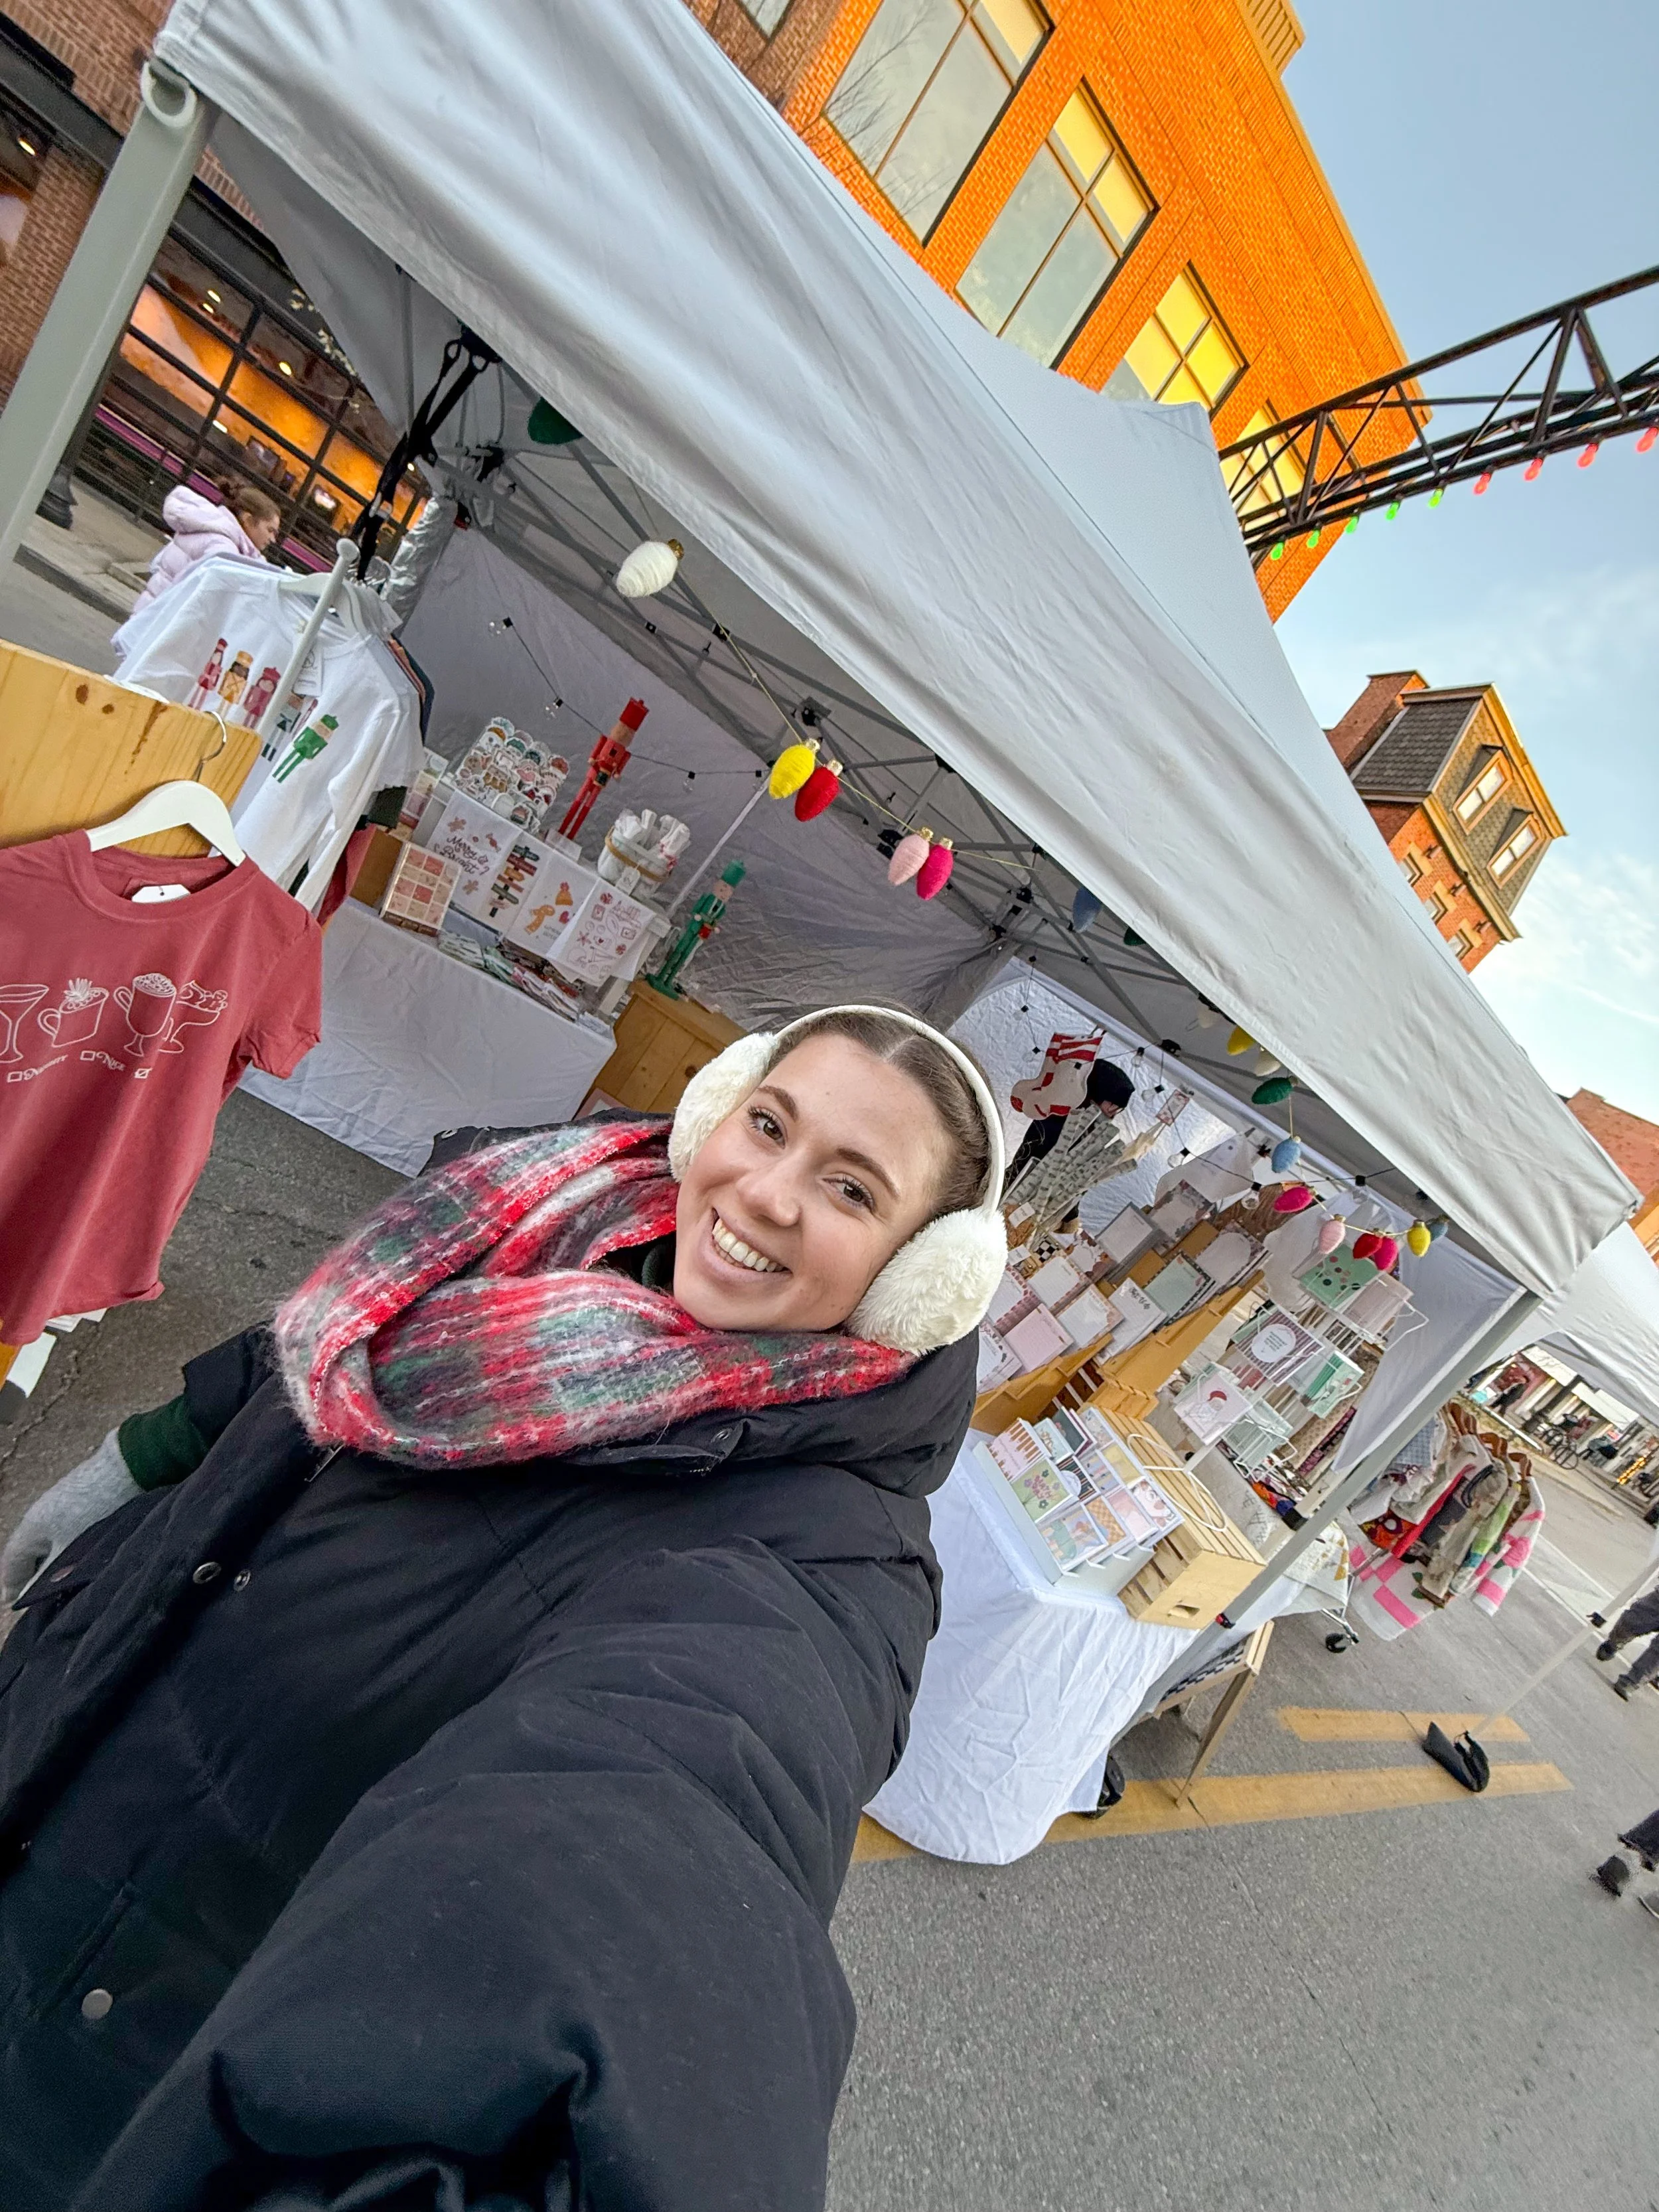
Have warm options too - If it’s cold during outdoor holiday markets, make sure you dress for it. Have a set of gloves that will keep your hands warm, hat/earmuffs and a scarf. I also have a pair of fleece lined overalls and long thermal lined leggings for outdoor events. And pack handwarmers!
Dress for Comfort - if you’re wearing dresses, throw a pair of biker shorts or spandex underneath for comfort. And don’t wear the item that is so cute but you end up adjusting it all day.
Branded Apparel - I have a few items that have my logo and branding on them and it’s a good go-to! One of my favorites is a rain jacket that has a daisy on it - people compliment it all the time!
Some of my clothing go-tos:
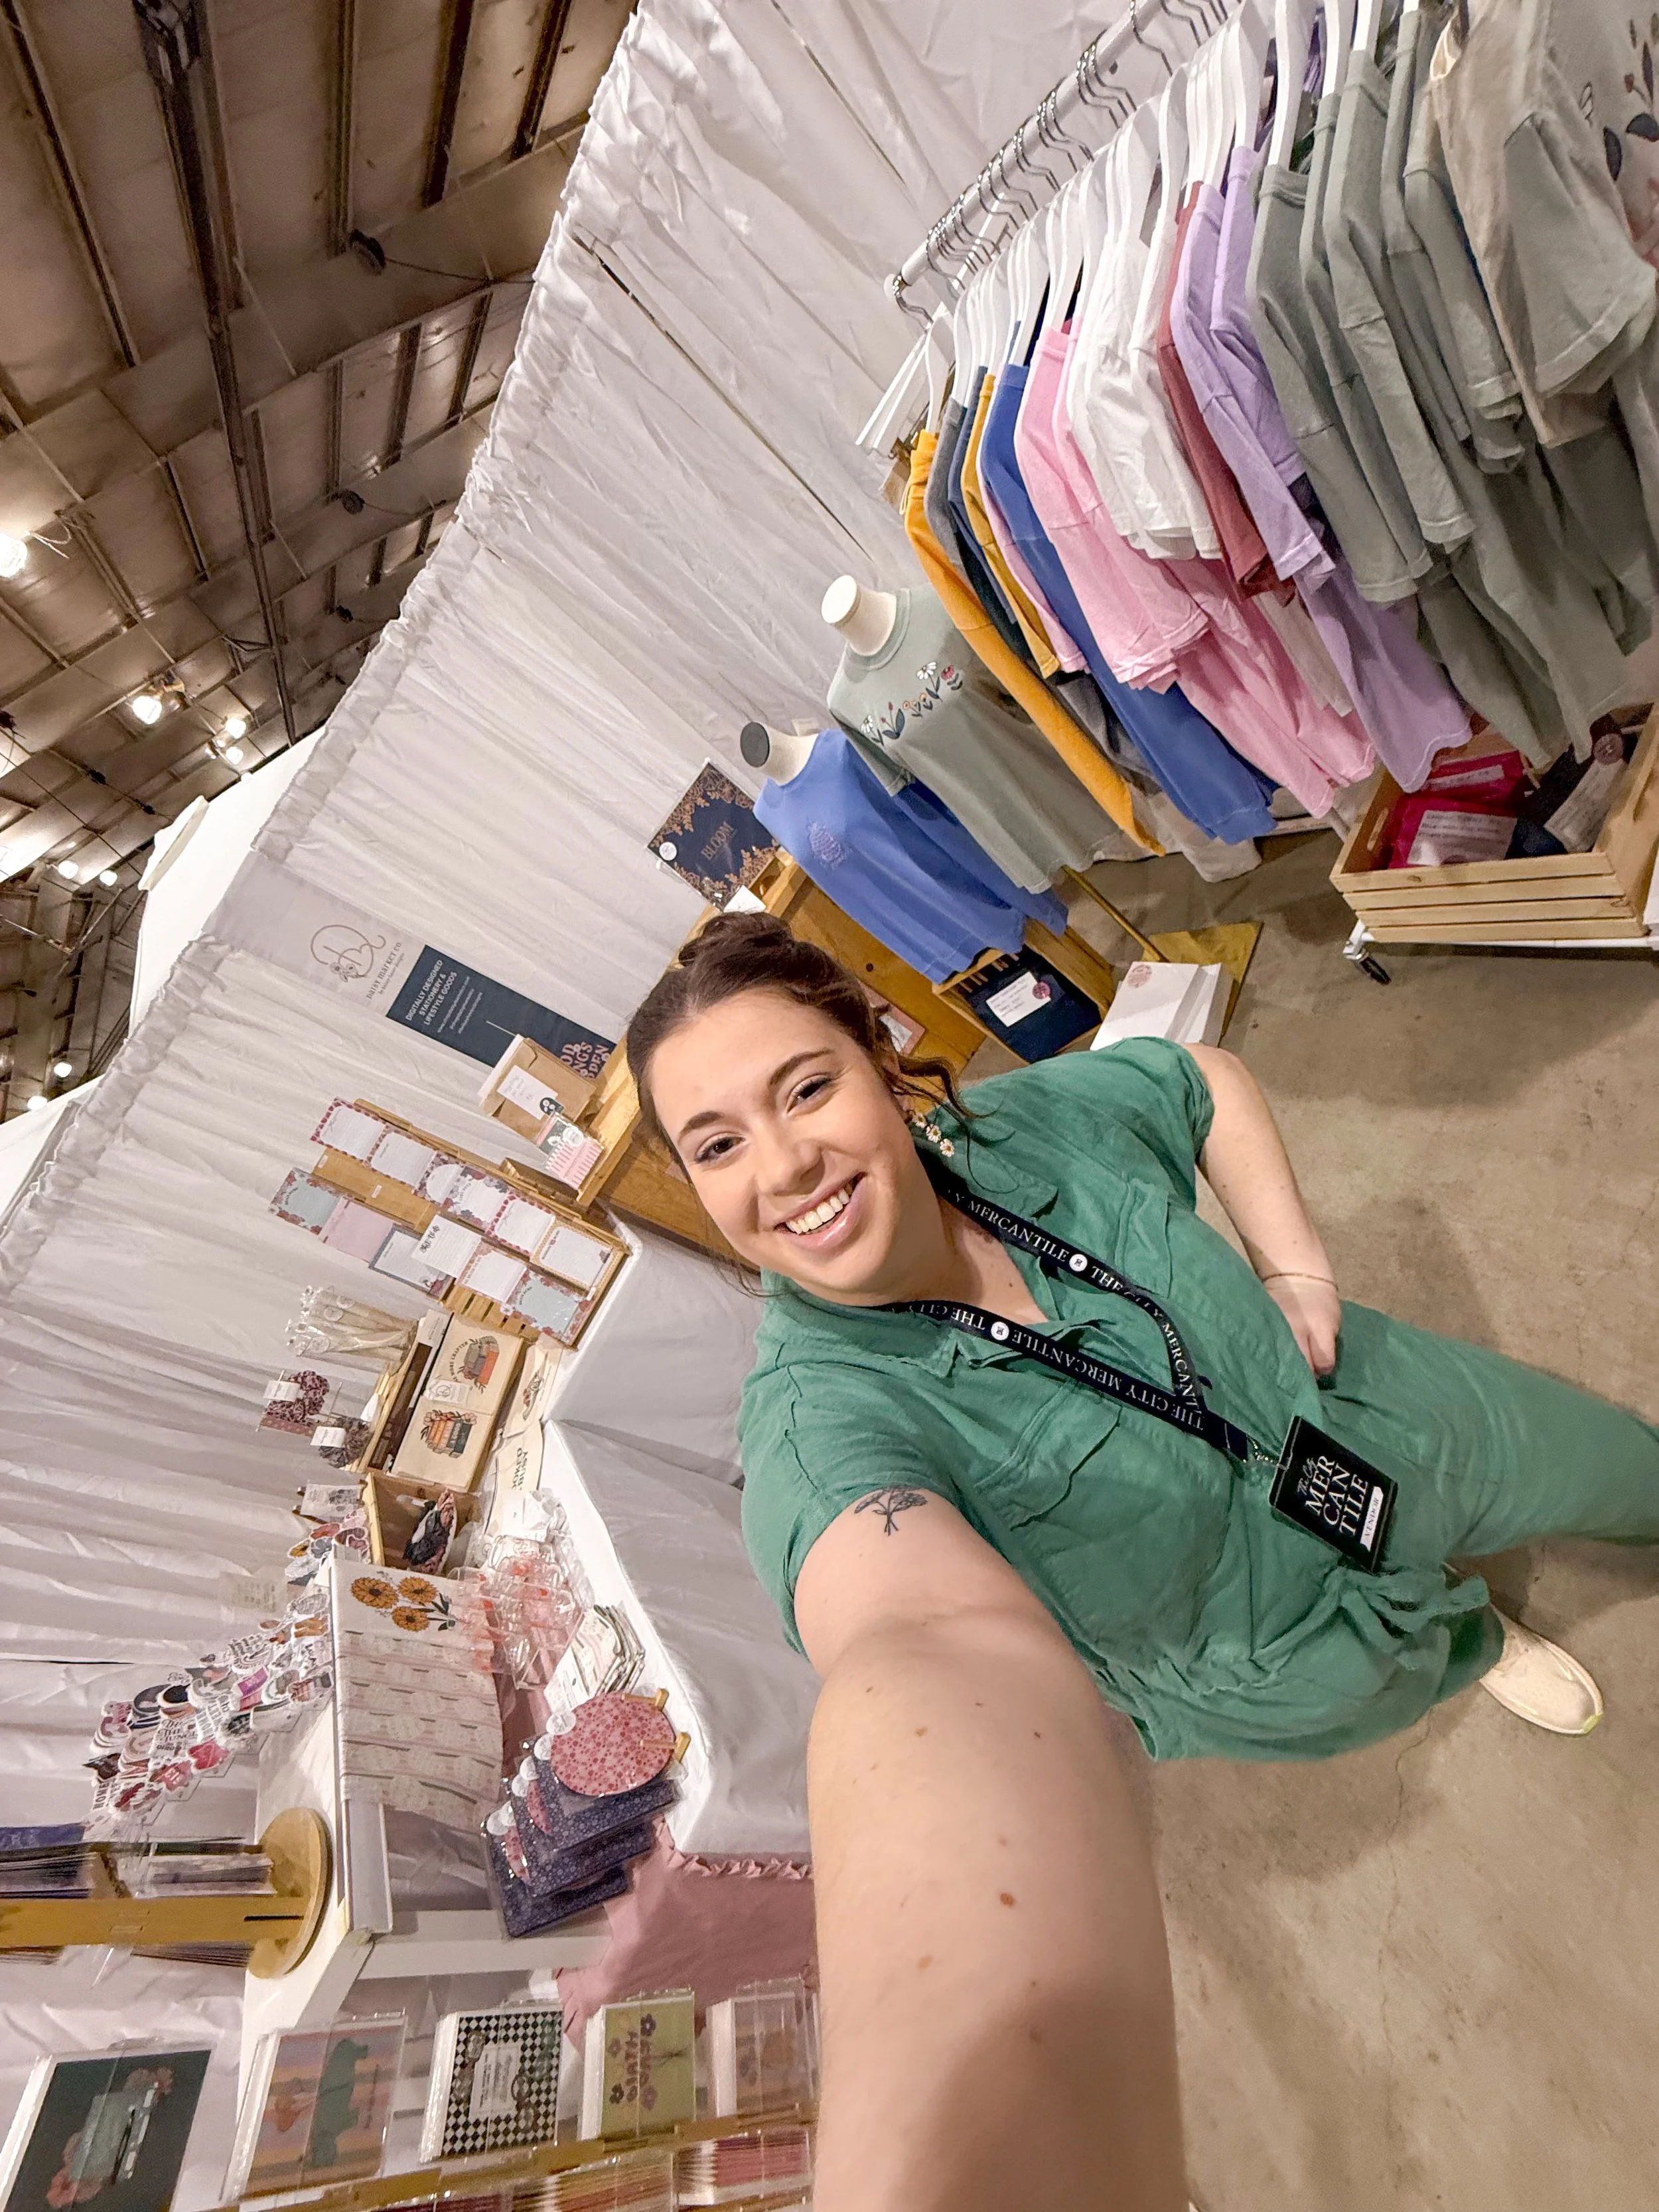
Overalls are a big go-to for me - When setting up, I’m moving around and constantly bending down, picking things up, etc. Having overalls (or any one piece jumpsuit) on makes it easy to do all the things and not worry! They’re also items that can be worn all year long by swapping out what you wear underneath - from tank tops to sweaters. My favorite pairs are from Three Bird Nest Boutique linked here.
Free People Hot Shot Onesie - one of my favorites! This piece is so versatile as I can layer with a tank top for summer to a mock neck long sleeve in the winter. It’s not the most flattering thing by any means but it’s oversized, comfy and trendy! It comes in lots of colors (mine is pink, of course!) linked here. See counter photo above.
Athletic Dress or Skirt - Any athletic dress or athletic skirt is great for hot market days! Grab one that has built in shorts underneath for an easy one piece.
Biker Shorts - these are my favorites…pair with an oversized tee (bonus points if it’s from your shop and/or branded) and you’re set for warm summer markets! Click here for my go-to biker shorts.
Allbird Sneakers - I listed my Hokas above but I also love my Allbirds! Another good pair of sneakers although these have less support than the Hokas. Linked them here!
I often share my outfit of the market on my Instagram stories! You can follow along here.


FAQs
Q: How do you find markets?
A: Mostly on Instagram and Facebook! I search hashtags in my area and pay attention to markets that other makers are doing. I keep a list of all markets in the back of my planner and put dates in my calendar of when to check for applications for each event. A lot of event applications come out in January/February for bigger events so block off some time there for applications.
Q: What if I get rejected from a market?
A: It happens - it’s all a part of the game! It can definitely sting a little because artists and makers are very passionate about their work but it’s going to happen. Know that rejection can be for many reasons - sometimes your market category is full, the jury might think you wouldn’t do well due to their customers, etc.
Q: How do I make my maker application the best it can be?
A: Tips for applying to markets:
Read the fine print and follow all the requirements
Make sure all of your links work
Include quality photos of your product
Take photos at every event so you have lots of setup photos for applications
Have a document with all of your links and bio ready to copy and paste to be efficient
Create a folder with your images all labeled and sorted for quick upload
Be posting on social media consistently and share about events you’re participating in
Q: How much do booth spaces cost?
A: Each market is different in booth size and price. I’ve vended at events that were free and I’ve also paid up to $600 for events before. Several things go into booth pricing including the space size, venue, credibility of the market itself, event times and more.
Q: How do I know if a market was “good”?
A: This answer will vary between every maker but I can tell you how I think of it! The common “rule” in the industry is that you should sell 10 times your booth fee. So, if you’re booth fee is $100, you’d ideally have $1,000 in sales. This is an overall guideline that I factor in!
I look at the total number of sales minus the vendor fee minus the cost of goods and then divide that number by the number of hours at the market. If that “hourly rate” is worth it to me then I’ll do the market again! I also look at what sold - was my number of sales high but my profit low? Is this because I sold a ton of stickers ($3.50) and no tshirts ($30+)? All things to think about.
I think you also need to look at the reasons WHY the market might not have been successful. Was the weather crappy? Is it the first year for this market and you see potential? Was there another big event going on that day (like an OSU football game for my Columbus people)? You could do that market again and have it be your best one - if it was borderline successful then I’d do it again and go from there!
Lastly, once you have a season of a variety of markets under your belt, I encourage you to look at the pros and cons of each event. If you have two potential events that are on the same day and the sales in the past have been about even, think about the other factors. Is the load-in super convenient for one but a lot of walking for another? Is the commute to the event longer to one event? Do you prefer the hours of one market over the other? These are all things that I think about when choosing between events that happen to be scheduled on the same day.
Q: What are some of your favorite markets?
A: SO many to choose from but here are a few of my favorite events in Ohio (in no particular order):
Not Your Mama’s Craft Market (Columbus)
Charm at the Farm (Lebanon)
German Village Maker’s Market
Holly Days at the Dayton Arcade


Q: What piece of advice would you give to someone doing their first market?
A: Practice your setup beforehand, go in with no expectations and make friends with other makers/vendors!
Q: What kind of car do you drive? And how do you transport everything to markets?
A: HONDA CRV! I have a video showing how I load my car linked here.
YAY! You made it through this blog post - feel free to DM me on Instagram with any questions!